Perché gli anelli in schiuma degli altoparlanti per auto si danneggiano e come risolverli?
Non molto tempo fa, subito dopo aver installato i nuovi altoparlanti delle portiere nella mia auto, ho dovuto smontarne uno e riparare l'anello di gommapiuma.
Fortunatamente, non è passato molto tempo prima che l'altoparlante fosse riparato e di nuovo in macchina, e ho pensato che potesse essere una buona idea scrivere un articolo su come riparare l'ambiente dell'altoparlante.
In generale, per riparare piccoli danni sull'anello circostante, riempire un punto danneggiato con colla siliconica elastica. I danni e le crepe più grandi dovrebbero essere coperti con una toppa sottile per dare loro una forza extra. In caso di danni maggiori o anelli circostanti strappati, potrebbe essere necessario sostituire l'intero anello con quello nuovo.
Nell'articolo qui sotto ti mostrerò come riparare l'anello di gommapiuma di un altoparlante per auto rotto in modo che tu possa goderti l'ascolto della tua musica preferita molto più a lungo.
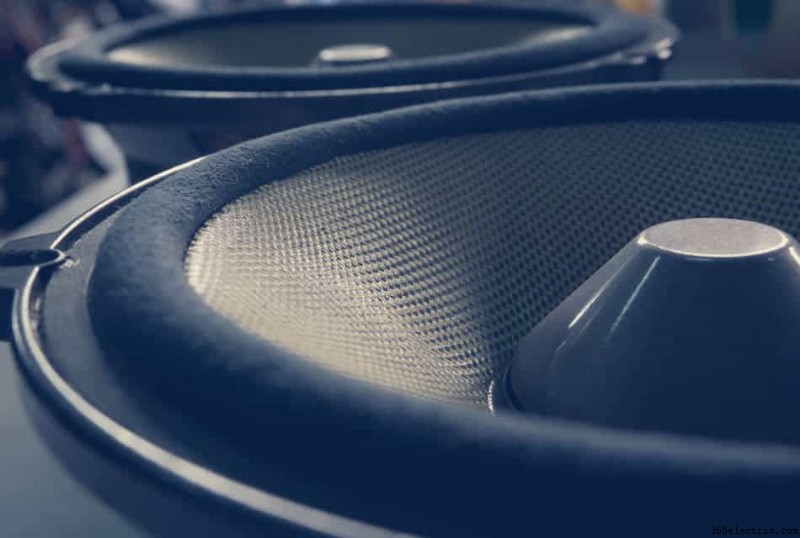
Che cos'è un anello circostante in schiuma per altoparlanti e a cosa serve?
L'anello in schiuma fa parte della sospensione dell'altoparlante che funziona come un pacchetto completo con un cono e un ragno. Entrambi surround e un ragno nella parte inferiore dell'altoparlante mantiene un cono in una posizione centrata che garantisce un libero movimento della bobina mobile all'interno dello spazio magnetico.
Una bobina mobile deve muoversi solo in una direzione su e giù senza alcun movimento laterale, ecco perché è fondamentale mantenere un cono dritto.
Il danno all'ambiente circostante su un lato, specialmente quando è più grande di una semplice puntura, fa sì che un cono si sposti leggermente verso il lato più forte. Di conseguenza, poiché la bobina dell'altoparlante non è più parallela all'interno del magnete, inizia a muoversi con un lato troppo vicino al magnete e puoi sentire un ronzio.
Questa posizione può causare ancora più danni alla bobina mobile. Al limite, può sfregare sul magnete e può essere completamente distrutto. Ricorda inoltre di non riprodurre altoparlanti con surround marce.
Gli ambienti in schiuma si consumano in tempi relativamente brevi, potrebbero essere necessari diversi anni a seconda dell'ambiente della tua auto prima che sia necessario ripararli.
Gli altoparlanti di qualità superiore utilizzano rivestimenti in gomma o fibra che possono durare molto più a lungo della schiuma o della carta, ma possono anche essere danneggiati meccanicamente.
Come riparare un surround altoparlante strappato?
Non solo i coni degli altoparlanti sono danneggiati, spesso accade che l'altoparlante inizi a strapparsi o qualcosa sia stato perforato attraverso una sottile gomma sul bordo.
Se si verifica uno di questi problemi, non devi spendere soldi per i nuovi altoparlanti e, analogamente ai coni danneggiati, ci sono modi semplici per riparare l'ambiente circostante.
Non importa quale materiale dell'anello hanno i tuoi altoparlanti quando è danneggiato. Puoi sentire il suono di sbattimento, specialmente sugli altoparlanti dei bassi che hanno forti vibrazioni. Anche un piccolo taglio o una foratura può causare ulteriori danni all'altoparlante, quindi cerca di ripararlo non appena lo vedi.
La cornice dell'altoparlante può essere riparata in pochi minuti se il danno è piccolo, ad esempio se si vede un bordo strappato o se si fora la schiuma o la gomma. Per pause più grandi, potrebbe essere necessario sostituire l'intero surround.
Di seguito troverai una guida passo passo per entrambi gli scenari, andiamo avanti e iniziamo con semplici riparazioni.
Come riparare il surround degli altoparlanti?
Per riparare la schiuma degli altoparlanti o gli anelli di gomma danneggiati, non sono necessari strumenti speciali. Usa un coltello a lama, un bisturi o un paio di forbici. Come colla, di recente ho usato la colla per la riparazione degli altoparlanti Parts Express e la sigillatura è stata ottima.
Ma se c'è una foratura o una crepa più grande, hai fatto qualche altro passaggio per riparare l'altoparlante.
Il primo passo per riparare una gommapiuma o un anello di gomma è pulire quest'area. Uso un normale solvente per unghie e pulisce perfettamente gomme e schiume.
Quando la schiuma è pulita su entrambi i lati, capovolgi l'altoparlante e lascialo riposare sull'ambiente circostante. Questa posizione è ottima perché il peso dell'altoparlante aiuta a tenere insieme entrambe le parti che vuoi incollare.
Se stai lavorando su un woofer più grande che ha grandi movimenti del cono, è bene coprire quest'area con una toppa in più. Per realizzarlo basta usare una schiuma sottile e tagliare un pezzettino che copra il danno.
Prendi un po' di silicone e copri l'intera area danneggiata, ma non metterne troppo. Copri anche il cerotto con la colla e attaccalo all'anello.
Non lasciare spazi vuoti sui bordi e, se ne noti, aggiungi altra colla per riempire completamente lo spazio vuoto. Ora hai finito sul lato inferiore, quindi capovolgi un altoparlante e appoggialo sul magnete.
Ripetere la procedura sul lato superiore dell'altoparlante. Riempi il buco o la fessura con un sottile strato di colla, quindi attacca il cerotto all'anello.
Applica una piccola pressione sull'area riparata, puoi strofinare un dito sul cerotto.
Al termine, lasciare l'altoparlante in un luogo ventilato per tutta la notte per farlo asciugare completamente. A volte può volerci più tempo per asciugarsi, dipende dalla colla utilizzata. In rari casi, potrebbe essere necessario attendere 48 ore.
Come sostituire l'altoparlante surround?
Più complicato è sostituire l'intero disco circostante, ma non preoccuparti, anche questo è semplice se stai seguendo i passaggi nell'ordine giusto.
#1. Tagliare l'anello dal bordo del cono. Assicurati di farlo delicatamente per non danneggiare il cono.
#2. Rimuovere la schiuma dal bordo e pulire tutti i detriti dove verrà incollata l'area circostante.
#3. Prendi un nuovo anello circostante e ricopri la parte interna con uno strato di colla. Non mettere troppo poca colla perché il collegamento tra il cono e l'ambiente circostante deve essere solido e completamente sigillato. Inoltre, non incollare contemporaneamente all'interno e all'esterno dell'anello. In questo modo, rischi che la bobina mobile sia fuori centro e ciò può uccidere il tuo altoparlante.
#4. Flip over a surrounding and stick glued area to the edge of the cone. Make sure the surrounding is centred over the cone. For better sticking to the cone, apply some pressure on the glued edges, you can gently tap it all around with a finger.
#5 . This step is the most important in the whole replacement. You will have to glue the ring to the speaker surrounding making sure that the cone is centred against the magnet.
The video below shows the great and fast way how to centre the voice coil and test a speaker at the same time.
Another way to centre the voice coil is to remove a dust cap and use shims. This method, however, may not work in all car speakers due to their size.
#6. When the voice coil is centred, you can connect the foam ring to the speaker basket. Apply glue over the whole area and gently push a speaker ring down until it touches the basket. Rub fingers over the all surround, making sure it will stick to the basket with no gaps in between.
#7. After gluing, it is good to keep both parts together. You can use plastic clips and leave the speaker overnight. The next day when the glue is dry, push a cone a few times down, and if you do not feel any rubbing, the speaker is ready to be installed in the car.
How to Protect Speaker Foam Ring From Damages?
For mechanical damages, try to cover speakers with grills, and if not possible, try not to place any heavy sharp object in front of the speakers.
To prevent tears on the foam or rubber rings, do not keep speakers in a high humid condensation. It may be difficult during rainy days, but when you often use AC in a car, the air should dry the speakers’ surface quickly.
Also, sunlight is a killer for soft foam. Especially, when you have speakers in the dashboard or in the rear deck, they are exposed to the sunlight for the whole day, and that does not increase their lifetime at all. Tinted windows may help but not on the dashboard.
To protect your surroundings from tearing too fast, you can cover them with lubricate, like INTERIOR RESTORER CREAM from ArmorAll.
The extra coating will prevent foam from drying too quickly and can add a few more years to your speakers’ lifetime. For the best effect, try to cover both sides of the surrounding.
It may not always be possible to access this area in the smallest speakers, but you can use thin ear sticks with a little cream at the end and rub it gently.
It is essential to check the speakers from time to time. If you notice any signs of damage to the surroundings, try to repair them as soon as you can. This way, you can prevent more complicated repairs in the future.
I am checking my speakers twice per year before and after winter, and so far, they are in good condition. I am going to keep it that way also for the new speakers.
Domande frequenti
How to Fix a Torn Speaker Surround?
The most common type of damage to speaker surrounds is tearing. This can be caused by the speaker’s age, sun exposure, or simply when using the speaker too much.
There are two ways to fix this problem:you can either replace the surround or repair it.
If the tear is small, you may be able to repair it with glue. The best type of glue to use is a cyanoacrylate adhesive, also known as super glue.
This will bond the surround material with the speaker basket and the cone and make it strong enough to last for a long time.
If the tear is large, you will need to replace the surround. This is not a difficult task, but it does require some patience.
You will need to remove the old surround and install the new one. Make sure that you use the same type of glue that you used to repair the small tear.
How to Replace Speaker Surround?
Replacing the speaker surround is more complicated than repairing it because the cone will be free after removal.
Hence, keeping the cone in the speaker’s centre while installing a new surround is critical. Otherwise, the speaker will not work correctly.
#1. Remove the old surround:Use a razor blade or sharp knife to cut around the edge of the old surround. Be careful not to damage the cone.
#2. Install the new surround:Apply a thin layer of glue around the edge of the cone. Then, align the new surround with the edge of the cone and press it into place.
#3. Let the glue dry:Once the glue has dried, your speaker will be as good as new!
#4. Test the speaker:Make sure the speaker is working correctly before using it.
What Kind of Glue Is Used for Speaker Surrounds?
The best type of glue to use is a cyanoacrylate adhesive, also known as super glue.
This will bond the surrounding material together and make it strong enough to last for a long time. Super glue is also great because it dries quickly, so you won’t have to wait long for your speaker to be ready to use.
What Does It Mean Refoam a Speaker?
Refoaming speakers involve replacing the foam surround attached to the speaker cone.
The foam surround helps keep the cone in place and absorbs any vibrations. However, over time, the foam surround can degrade and cause the speaker to sound distorted, especially in the car speakers used in harsh conditions.
To keep the speaker in good condition, the surrounding should be replaced.
How Much Does It Cost to Have a Speaker Refoamed?
The cost of having a speaker refoamed will depend on the speaker itself and the surrounding type you use.
Generally speaking, it will cost between $40 and $100 per speaker, it is therefore not recommended for cheaper speakers.
How to Repair Torn Speaker Foam?
If your speaker foam is torn in a large area, then it needs to be replaced.
You can replace the foam yourself, but it is best to leave it to a professional, especially when you do not have experience with repairing speakers.
How to Repair Subwoofer Foam Surround?
Repairing foam surround on a subwoofer is not much different from fixing a speaker’s surround, but the materials used have to be much stronger.
To repair the subwoofer’s foam surround, follow the steps below:
#1. Remove the subwoofer from the enclosure. This will give you better access to the foam surround.
#2. Use a sharp knife to trim away any loose or damaged bits of foam surround.
#3. Apply a generous amount of glue to the new foam surround.
#4. Place the new foam surround onto the subwoofer cone.
#5. Use a clamp or heavy object to hold the new foam surround in place while the glue dries.
#6. Once the glue has dried, reassemble the subwoofer and place it back into the enclosure.
The above steps work in case of minor damages, but when the subwoofer’s surrounding is bad over a larger than two inches area, the subwoofer’s surrounding has to be replaced.
Can I Replace the Foam Surrounding With a Rubber?
Many people prefer to replace the foam surround with a rubber surround. This is because rubber surrounds last longer than foam, producing a better bass response.