Sostituzione attuatore porta Honda Accord 2008-2012
In questo articolo: Ti guideremo attraverso i passaggi necessari per sostituire un attuatore della porta difettoso su una Honda Accord 2008-2012.
- Strumenti necessari
- Parti richieste
- Passaggio 1:rimozione del pannello della porta
- Fase 2:rimozione dell'attuatore della porta rotta
- Fase 3:Preparare il tuo nuovo attuatore per porte
- Fase 4:reinstallare l'attuatore e il pannello della porta
Difficoltà del progetto:facile
Tempo stimato:1,5 ore (o meno)
L'attuatore della portiera lato guida della mia Honda Accord del 2009 ha iniziato a fare rumore circa 6 mesi fa durante il bloccaggio e lo sbloccaggio. È stato particolarmente evidente quando le porte sono state chiuse e l'auto ha iniziato a girare in marcia:il bloccaggio automatico. Suonava un po' come un lamento (per mancanza di un termine migliore).
Infine, circa due settimane fa ha smesso di rispondere al blocco e allo sblocco in modo intermittente. Ho notato che ogni volta che mi allontanavo da un semaforo cercava di bloccarsi, semaforo dopo semaforo. Mi sono reso conto che la portiera lato guida non si chiudeva e che la funzione di blocco automatico continuava a cercare di bloccarla ogni volta che l'auto iniziava a girare. Quella era la mia coda per sostituirlo.
In questo articolo, ti guiderò attraverso i passaggi per rimuovere il pannello della portiera e sostituire l'attuatore della portiera della tua Honda. In realtà è abbastanza semplice. Ricorda:per una buona pratica e una conservazione sicura, ricorda di scollegare il lato negativo della batteria del tuo veicolo prima di qualsiasi intervento elettrico per evitare fusibili saltati o danni elettrici alla tua auto!
Parti richieste
C'è davvero solo una parte (o due se stai facendo due porte):
- Attuatore lato guida per Honda Accord 2008-2012 – $ 37
- Attuatore lato passeggero per Honda Accord 2008-2012 – $ 32
Strumenti necessari
Questo progetto è stato piuttosto semplice e diretto e richiedeva solo pochi strumenti:
- Cacciavite Phillips
- Cacciavite a testa piatta
- Chiave da 10 mm o bussola e cricchetto
- Strumento di leva in plastica
- Super colla
- Nastro adesivo
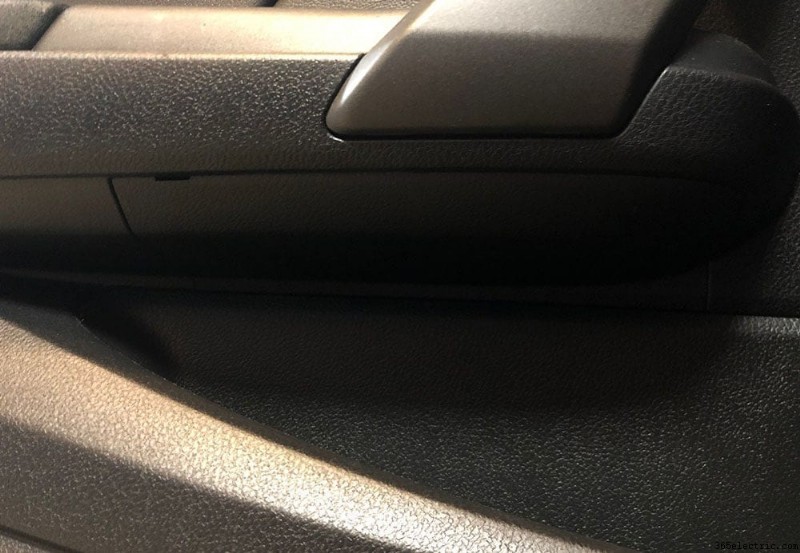
Passaggio 1:rimozione del pannello della porta
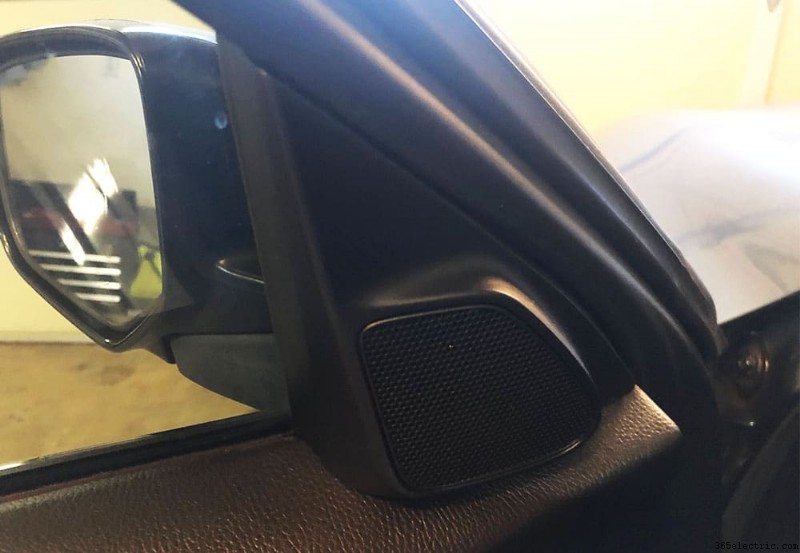
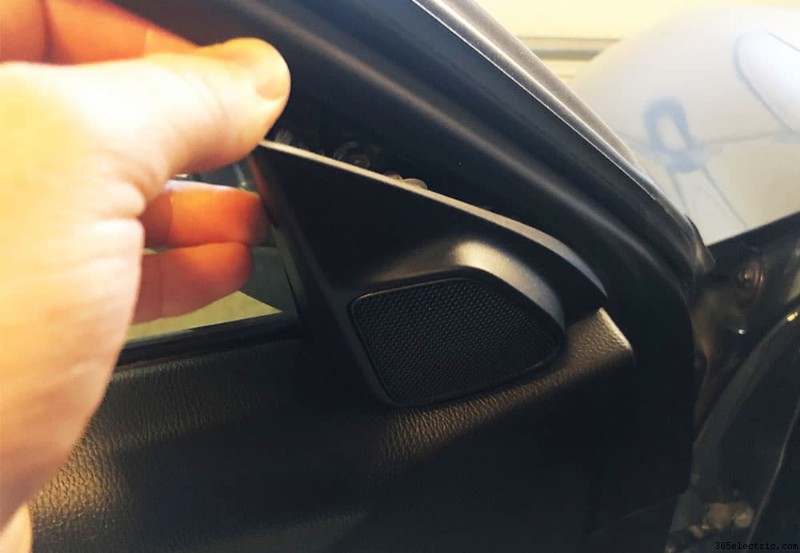
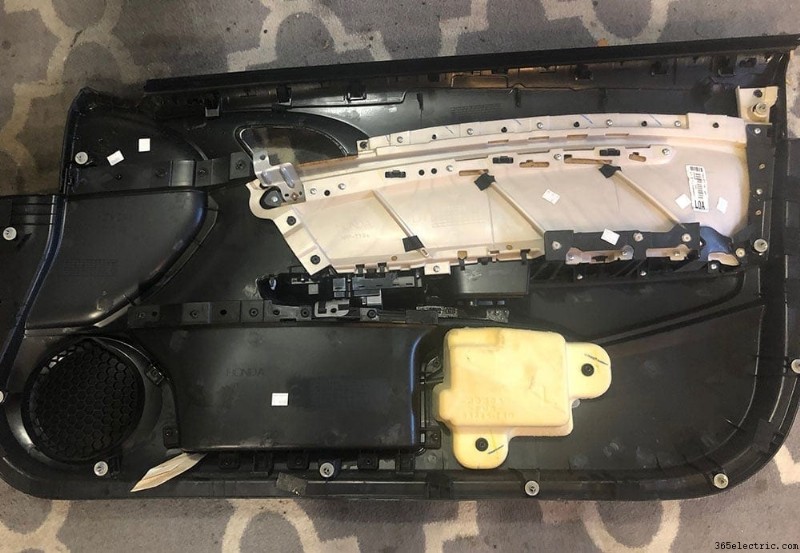
La prima cosa che devi fare è rimuovere le viti del pannello della porta e sganciare e rimuovere i pannelli della porta del tuo Accord. Per fare ciò, inizia con il tweeter sul lato superiore della porta. Metti le dita tra la finestra e il pannello del tweeter e tira delicatamente. C'è una singola clip dietro di essa, quindi si sgancierà con relativa facilità. Una volta sganciato, rimuovere la spina del tweeter singolo e mettere da parte il tweeter.
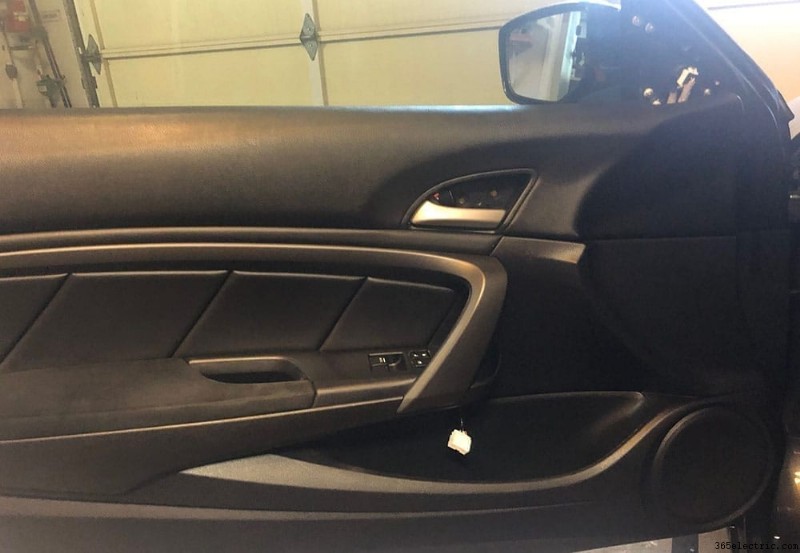
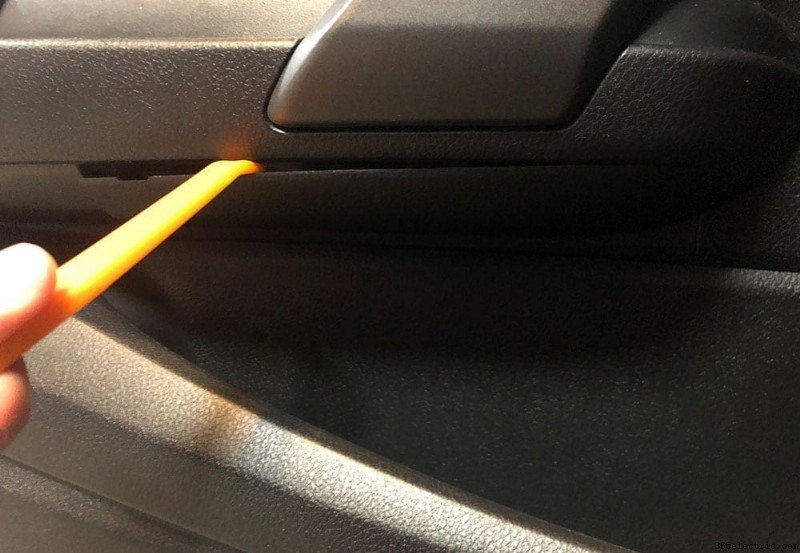
Con il tweeter rimosso, spostati verso il basso fino alla maniglia della porta. Dietro la maniglia della porta c'è una copertura del rivestimento che copre tre viti. Sulla parte superiore del coperchio di plastica noterai una piccola clip. Utilizzare un piccolo cacciavite a testa piatta per inserire la clip ed estrarre il pannello per esporre le tre viti dello sportello. Svita tutte e tre le viti e mettile da parte per quando reinstalli la porta.
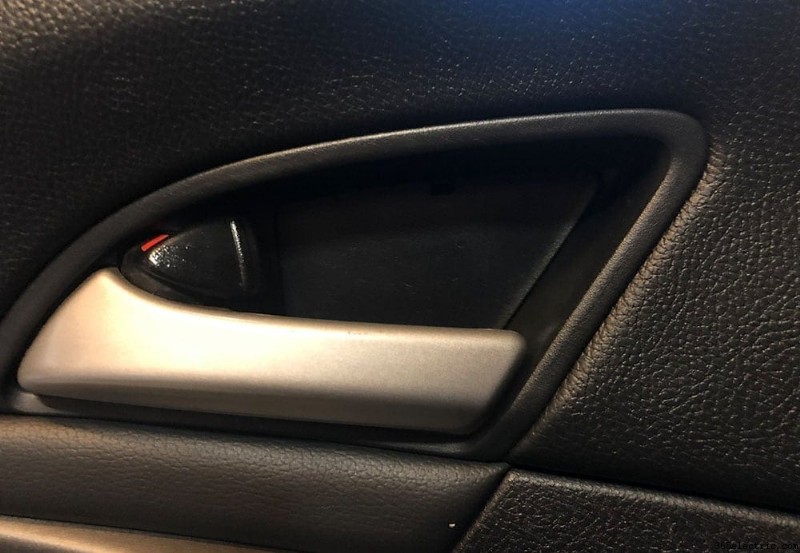
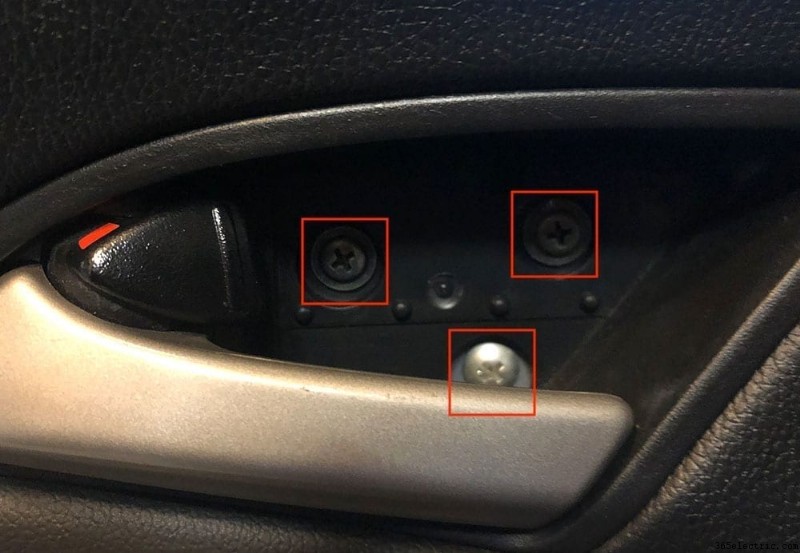
Sul bracciolo e sulla maniglia della porta è presente un'altra vite da rimuovere. La vite si trova sotto una copertura simile alla gomma posizionata nella parte inferiore dell'area della maniglia della porta. Usa una testa piatta per incastrare tra l'angolo e solleva il coperchio per accedere alla vite sottostante. Quindi, svita questa singola vite del pannello della porta.
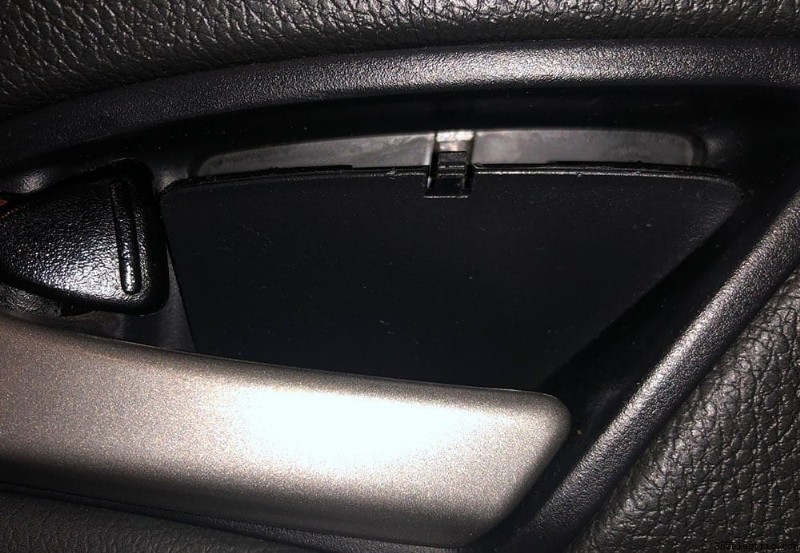
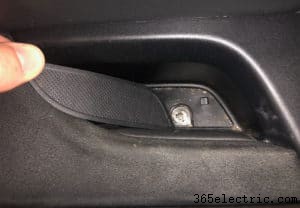
L'ultima vite che dovrai rimuovere è dietro un pannello sul lato inferiore della maniglia della porta. Utilizzando uno strumento a cuneo, fare leva verso il basso per rimuovere il pannello e accedere alla vite dietro di esso. Svitare l'ultima vite e mettere da parte. Quindi, sganciare i tappi bianchi e grigi dal pannello della porta e spingerli dietro il pannello nella porta. Ciò consentirà alla tua porta di muoversi liberamente quando estrai il pannello dalla porta.
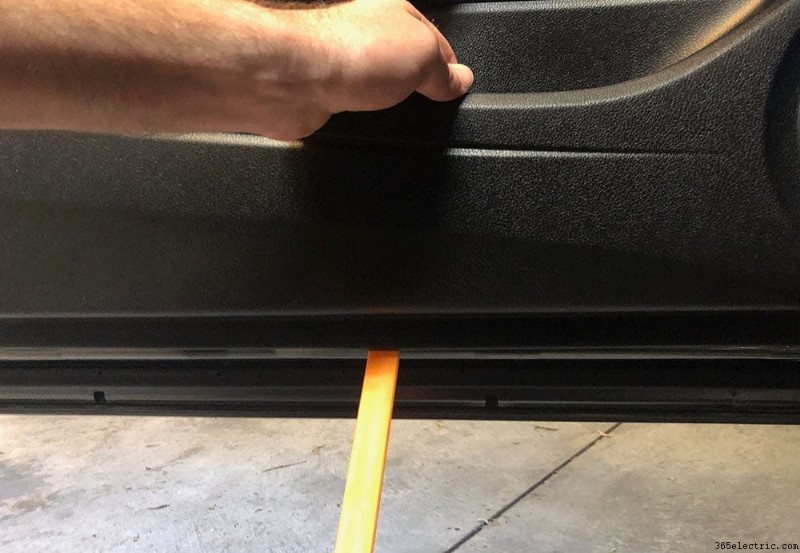
Con tutte le viti, il tweeter e le spine degli interruttori rimossi, sei pronto per sollevare il pannello e rimuoverlo dalla tua porta. Per fare ciò, incunea un grande strumento di leva sul lato inferiore del pannello. If you don't have a pry tool large enough there's actually a space that your fingers will fit in along the bottom side of the panel.
Pulling from the very bottom side of the panel and from the cubby area, pull the door panel outwards away from the door to unclip all of the bottom door clips. Typically this will be a loud and abrupt ‘POP' and the bottom side of the panel will break free. There are clips along side the entire bottom of the panel and one or two on the side.
Once all of the clips are free, lift upwards on your door panel to remove it. Once it's lifted away from the door the last piece you'll need to pull free from the panel is the handle. There's a few plastic clips on the back side of the handle that you'll just need to lift upwards to break the handle free and detach it from the door panel.
Place it on a rug or towel to prevent any scratching of the surface.
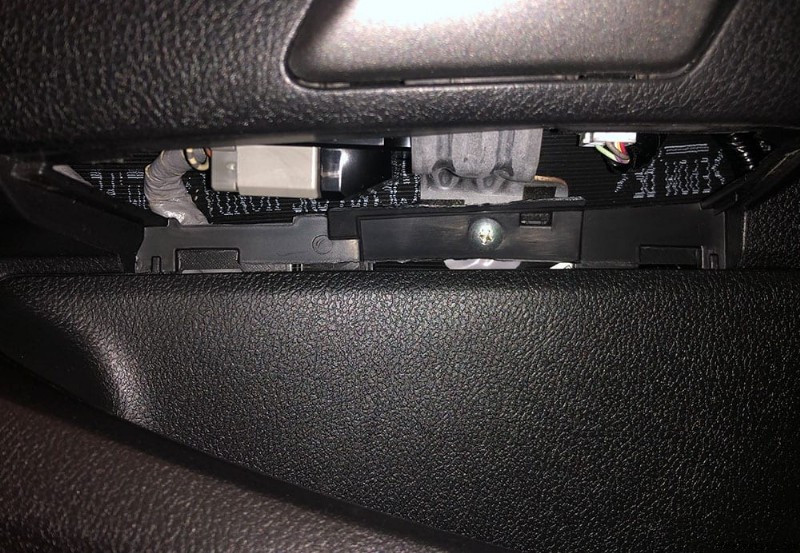
Step 2:Removing Your Broken Door Actuator
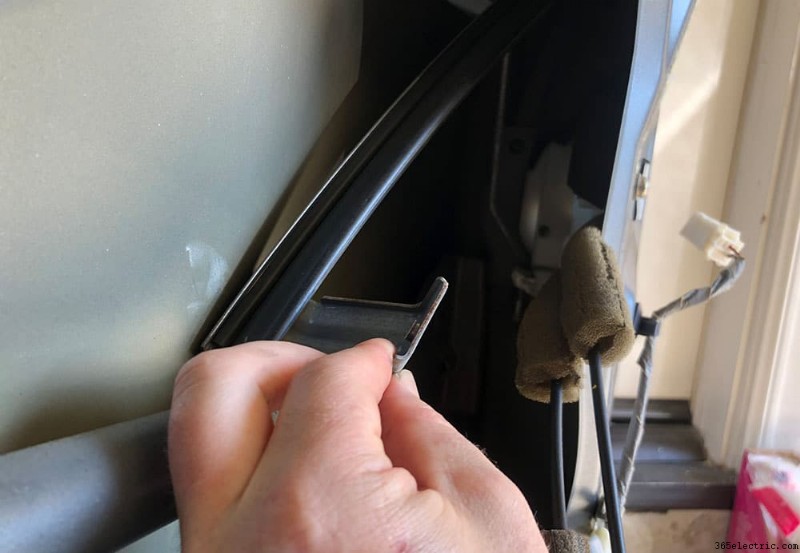
With your door panel removed, you now will be able to gain access to the back side of the door and ultimately the actuator. To begin, you'll need to get behind the damping material that covers the opening of the door panel so that you can reach and access the cable and actuator rod. You can do this by running a razor blade along the adhesive that holds the damping material to the door and peel the material back a foot or two – enough to reach the actuator. In my case I cut a sizable slit in the center to try to limit the damage to the damping.
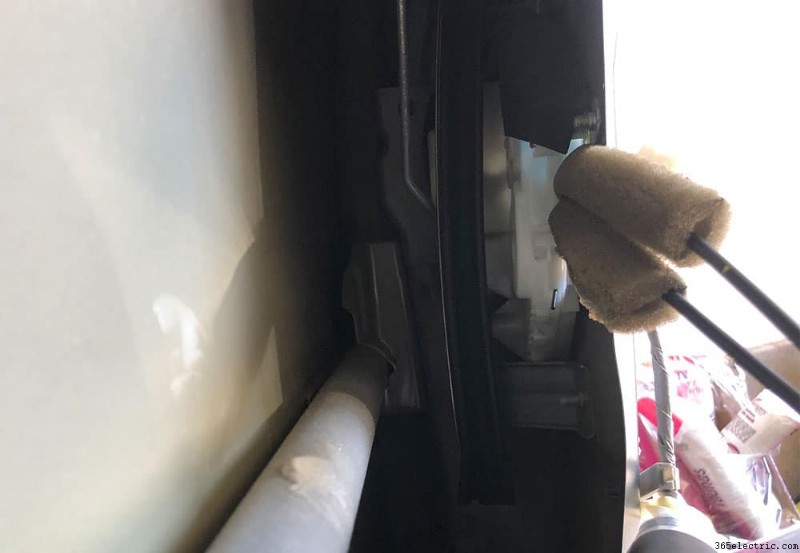
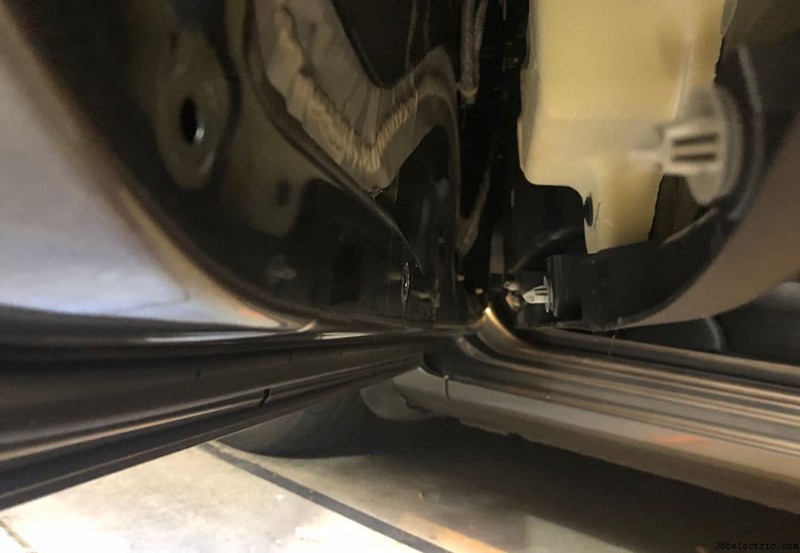
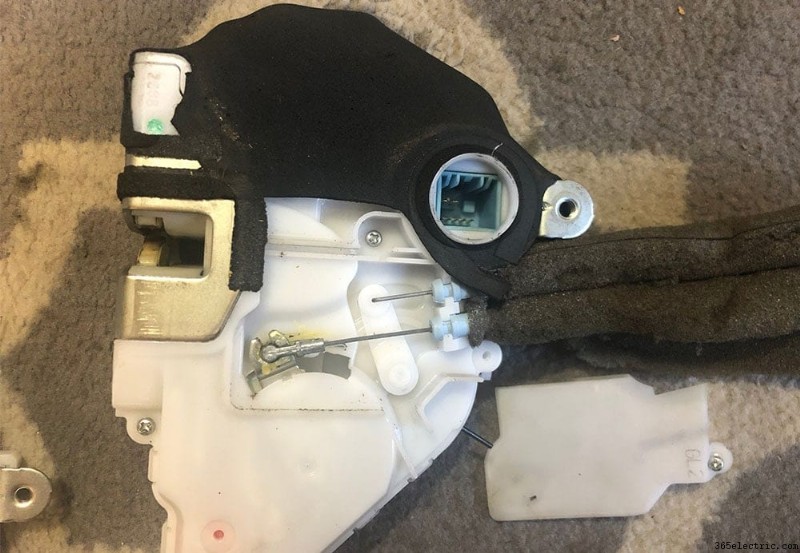
Next, you'll need to unclip the door latch cable that runs along the door and into the back side of the actuator. Once unclipped you can either feed the cables and latch through the damping material or you can leave it hanging for now until you remove the actuator.
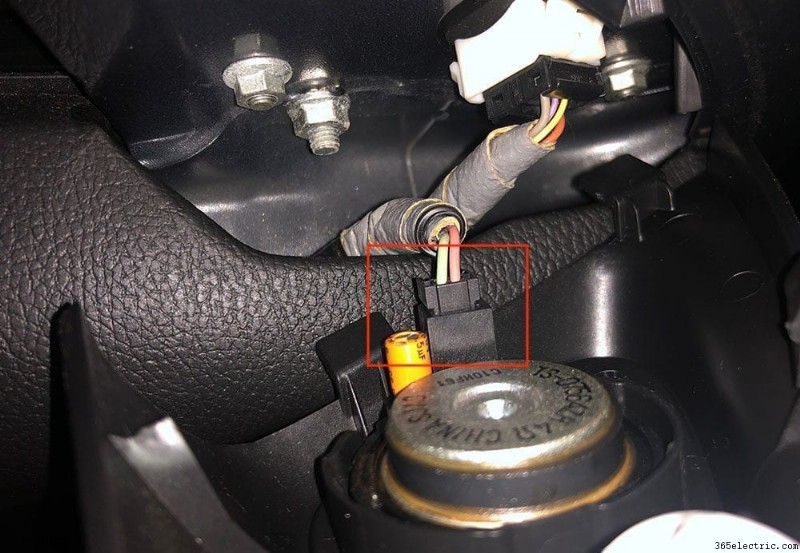
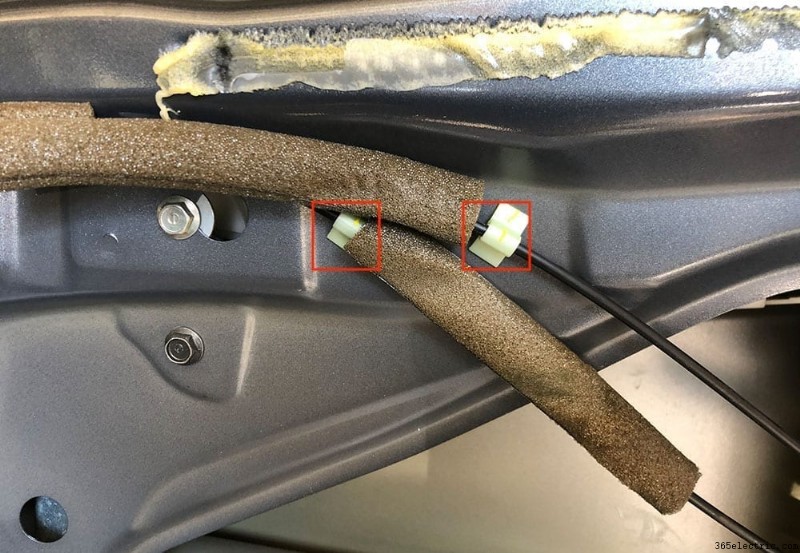
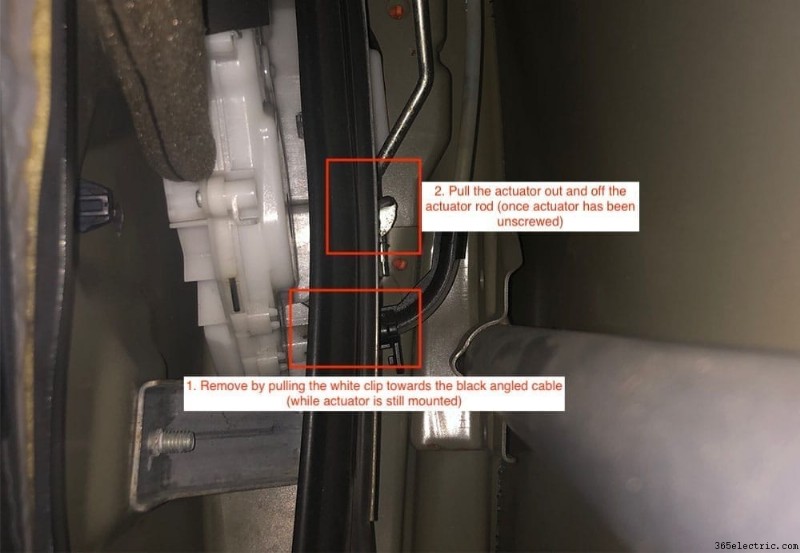
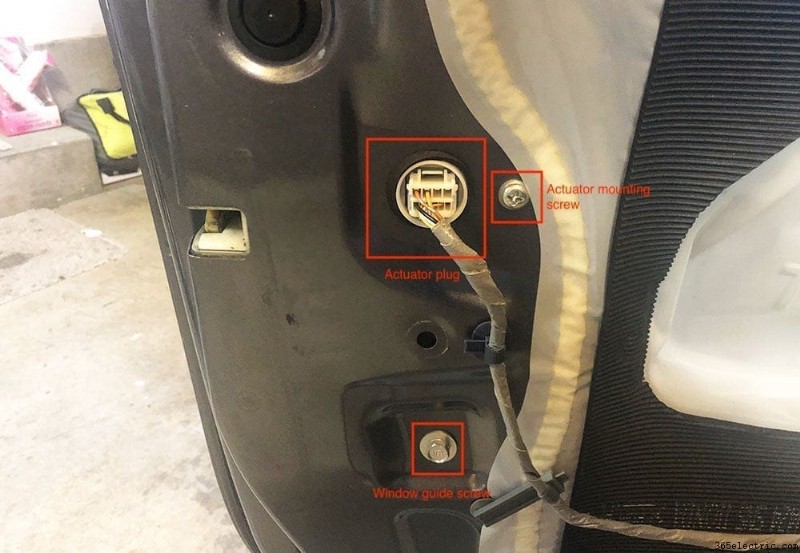
Using the slit in the damping to access the actuator, for those who are replacing the driver side actuator you'll need to remove a single cable that feeds directly into the back side of the actuator (*note this single cable that goes to the back-side of the actuator is only located on the driver side door actuator) . To do this, you need to grasp the white clip that surrounds the black cable housing and pull it away from the actuator to get it to unclip. Once it's unclipped you can remove the cable from the actuator itself (see images). Finally, pull out the plug that powers the actuator.
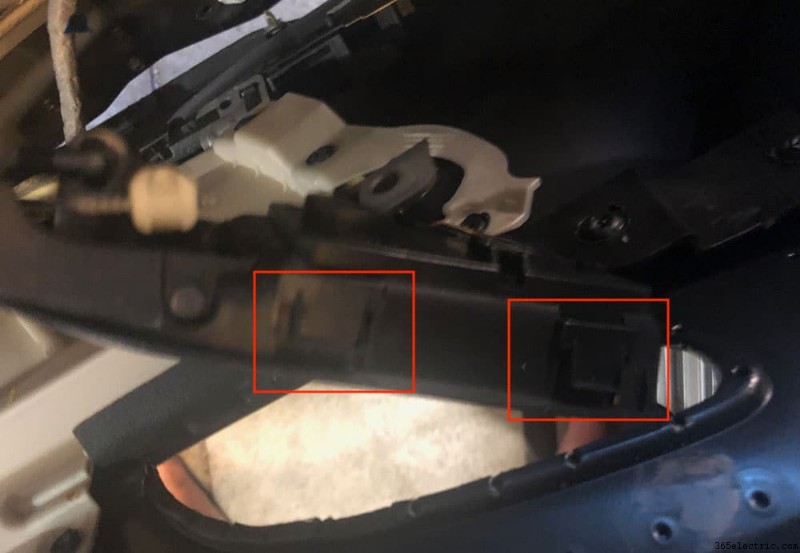
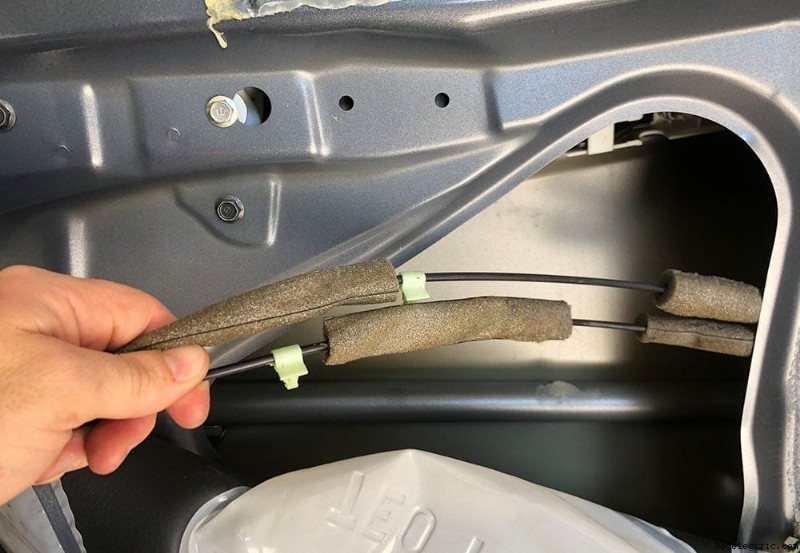
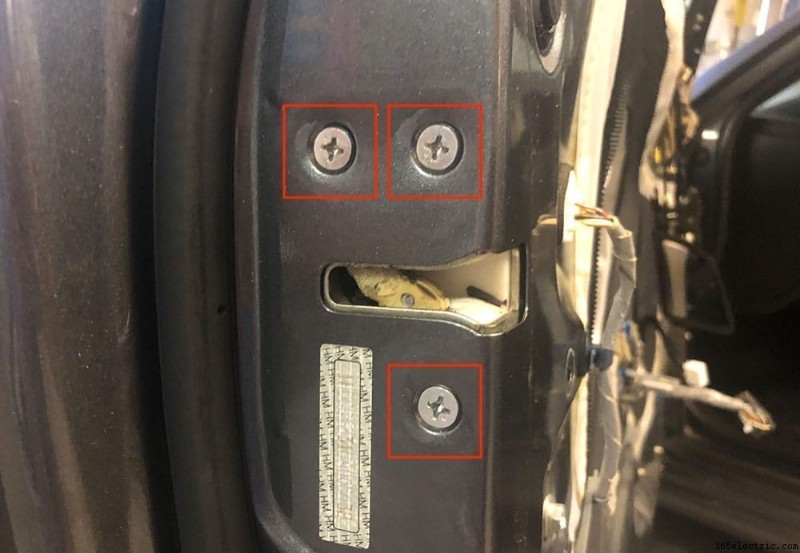
With the cables unhooked from the door and the single cable removed from the back side of the actuator you're ready to unmount the actuator from the door. There are a total of 4 phillips screws that hold the actuator to the door. Remove all 4 screws along with the 10mm bolt that holds the window guide behind the door. This will allow you to pull the actuator from behind the door a little easier with the window guide pushed aside.
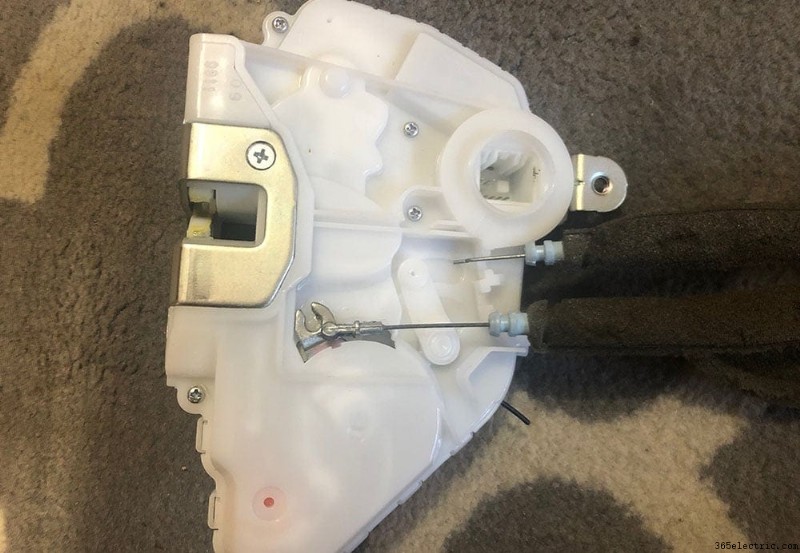
Start to pull the actuator from the door, working the remaining rod out. Once the rod is removed you can pull actuator out completely and begin the process of preparing your new actuator.


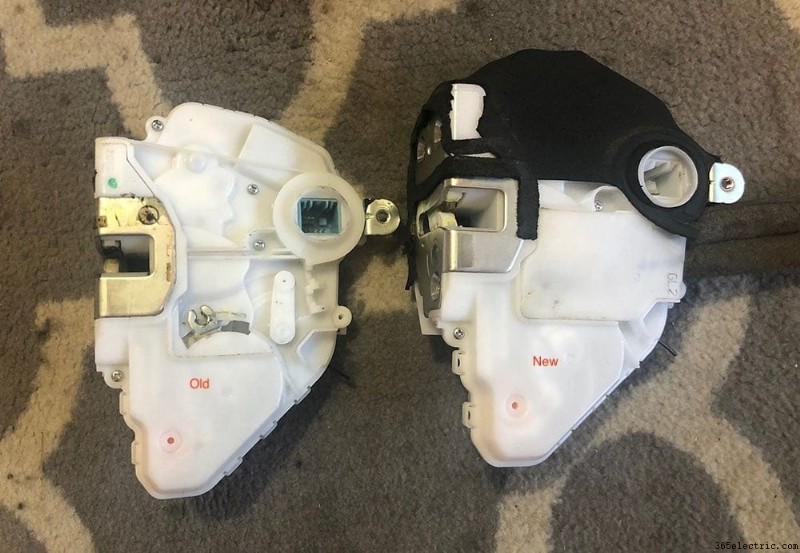
Step 3:Prepping Your New Door Actuator
There's a couple things you'll need to do to prepare your new door actuator for installation. First, the door handle cables that run to the interior door handle will need to be pulled from the old actuator and installed on the new one. There's a panel that covers the cables with a single phillips screw holding the cover in place. Unscrew the panel to gain access to the two cables.
Remove the two cables from the old actuator and then place it onto the new one along with the cable cover, screwing it back into place.
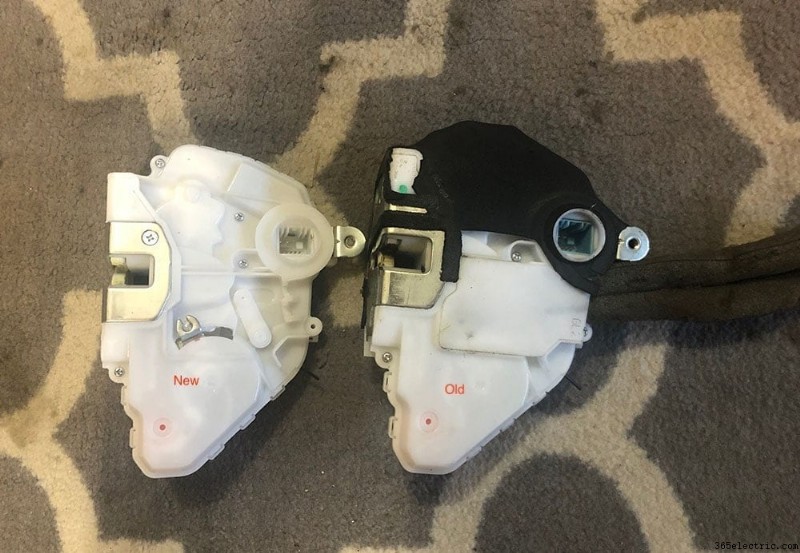
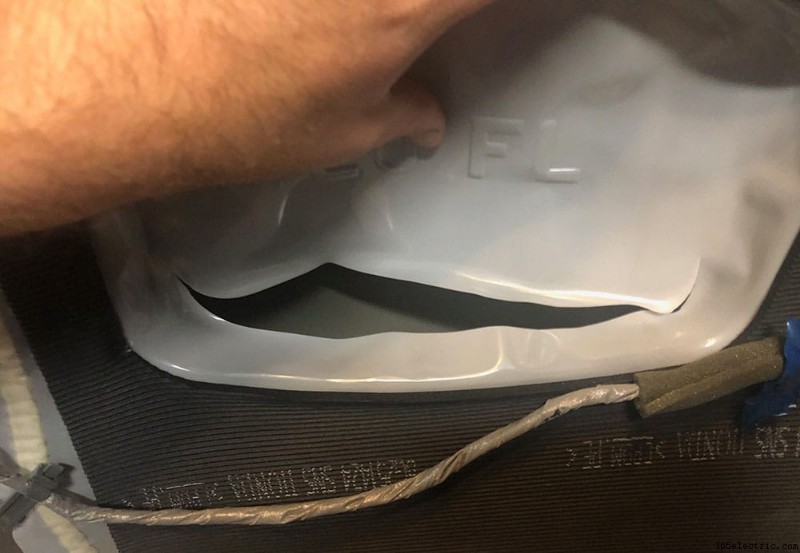
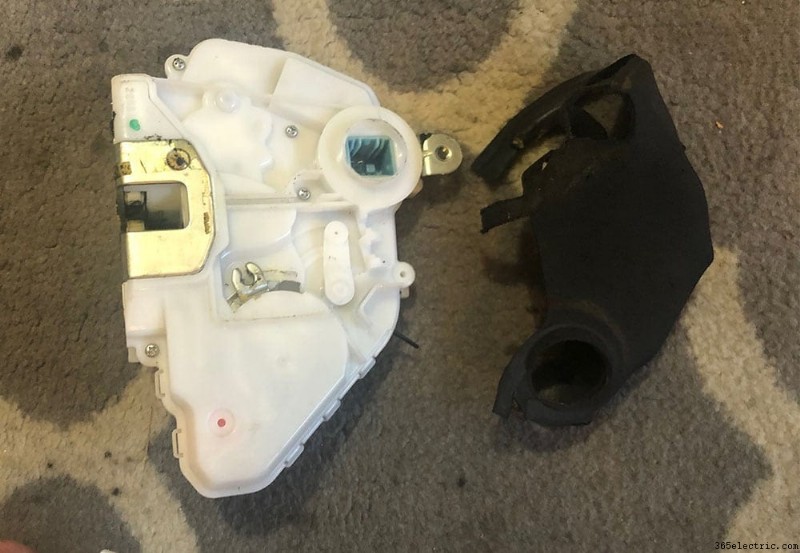
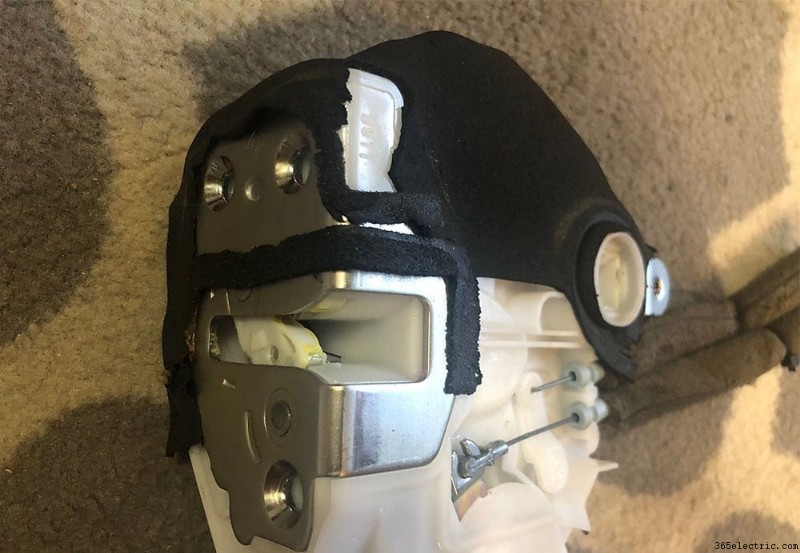
Once the cables are in place on the new actuator, the only thing left to do is to remove the old padding that's on the old actuator and place it onto the new one. Unfortunately, the new actuator doesn't come with the padding so it'll need to be reused from the old, broken unit.
I used a razor blade to separate the padding from the actuator with minimal damage and then used a few dabs of super glue to fuse it to the new one. For the most part, the padding is placed between the door and the actuator so naturally when it's mounted it'll stay in place.
Step 4:Re-installing Your Actuator and Door Panel
The rest of the process is pretty simple. Re-install your actuator, feeding the actuator rod back into the actuator and then mounting it to the door. Plug the actuator plug back in, then insert and re-clip the single cable back into the backside of the actuator.
After the actuator is mounted and the cables are in place, be sure to re-install your window guide and screw it in, along with clipping back the door handle cables to the door.
At this point, you're ready to test your new actuator. Close your door (note that you should ensure the door is unlocked before you close it), and then use your remove to lock and unlock to ensure your new actuator is working properly.
As for the slit that you cut (if you cut one) into the damping, I used some heavy duty duct tape to seal it back up. With the damping fixed you can re-install the door panel, ensuring that the window and door lock buttons are plugged back in. Re-install your tweeter, and you're done!
Hope you enjoyed the how-to, please feel free to leave us a note or ask questions in the comments below!