Come collegare un preamplificatore a un ricevitore AV (9 semplici passaggi)
Sebbene i ricevitori AV abbiano amplificatori integrati, questi tendono ad essere di bassa qualità. Quindi, per migliorare il segnale audio e la qualità del suono del tuo home theater, devi utilizzare un ottimo preamplificatore insieme al ricevitore o al processore audio surround.
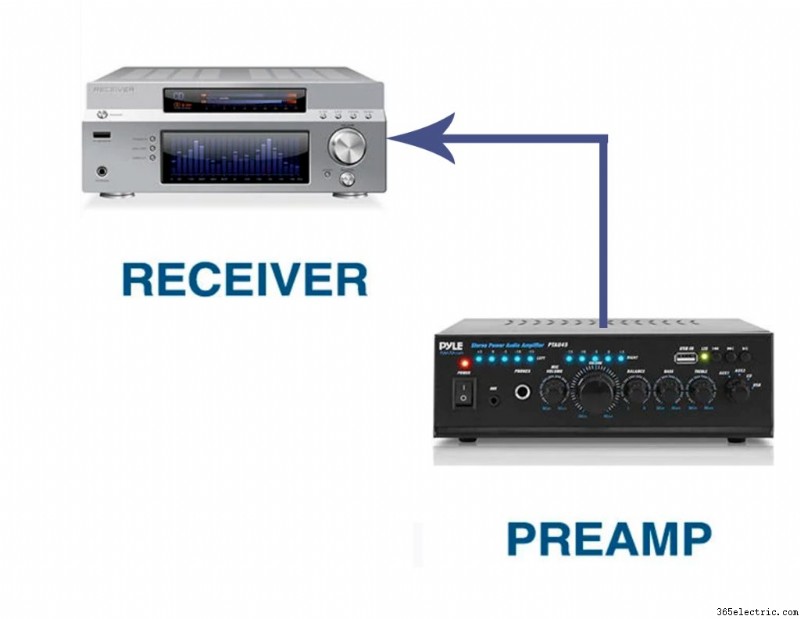
Come collegare un preamplificatore a un ricevitore AV
Ecco come collegare un preamplificatore a un sintoamplificatore AV in 9 semplici passaggi:
- Spegni tutti i dispositivi di configurazione.
- Collega i tuoi dispositivi di sorgente sonora al ricevitore AV.
- Collega il preamplificatore al ricevitore AV.
- Collega il ricevitore AV all'amplificatore di potenza
- Collega i tuoi altoparlanti al preamplificatore.
- Accendi il preamplificatore, il ricevitore AV e l'amplificatore di potenza.
- Imposta il guadagno dell'amplificatore di potenza e il volume del preamplificatore.
- Calibra i tuoi altoparlanti.
- Riproduci il dispositivo sorgente che preferisci.
Continua a leggere per una spiegazione dettagliata di come impostare il preamplificatore per funzionare con il tuo ricevitore AV per prestazioni audio perfette.
1. Spegni tutti i dispositivi di configurazione
Prima di collegare il preamplificatore al ricevitore AV, assicurati che entrambi i componenti elettronici siano spenti e scollegati dall'alimentazione punti vendita. Ciò ti impedirà di incorrere in incidenti durante la connessione dei dispositivi.
Può anche consentire di collegare comodamente i due dispositivi senza timore di subire lesioni elettriche o di bruciarli.
2. Collega i tuoi dispositivi sorgente audio al ricevitore AV
Il dispositivo di origine potrebbe essere il lettore CD o il lettore di dischi Blu-ray. Aggancia i connettori di uscita della sorgente ai connettori di ingresso sul ricevitore AV.
Assicurati di collegare ogni elettronica al connettore corretto sul ricevitore AV affinché funzioni bene. Il cavo destinato a entrare nell'ingresso corretto dovrebbe essere collegato lì e l'altro nell'ingresso sinistro.
3. Collega il tuo preamplificatore al tuo ricevitore AV
Utilizzare cavi RCA per collegare le uscite pre che si trovano sul retro del ricevitore. Sarebbe meglio collegare un paio di cavi alle uscite destra e sinistra del ricevitore prima di collegare l'altra estremità del cavo RCA agli ingressi line-in del tuo preamplificatore.
Queste pre-uscite aumentano il numero di canali che il tuo ricevitore ha e, a sua volta, crea più opzioni per l'utilizzo di altoparlanti extra.
Inoltre, può consentire di collegare diverse sorgenti di ingresso come il lettore DVD, il lettore CD o il Blu-ray. La possibilità di farlo ti consente di passare facilmente dall'utilizzo di questi dispositivi elettronici da un'area centralizzata.
Inoltre, il collegamento di un preamplificatore a un ricevitore può fornire una qualità audio più ricca con effetti sonori realistici come quelli che si trovano nei cinema. Ciò significa che puoi trasformare la tua stanza in una sala cinematografica improvvisata o in un club a piacimento.
Scegli connessioni bilanciate che trasportano il segnale audio attraverso tre conduttori per goderti le massime prestazioni. Un conduttore verrà utilizzato per la messa a terra mentre gli altri due trasmettono segnali negativi e positivi.
Una connessione bilanciata ti consente di goderti un suono eccezionale dal tuo home theater senza molto rumore dai cavi e dall'ambiente.
Ricordati di selezionare il preamplificatore appropriato entro il tuo budget in grado di connettersi con tutta l'elettronica su cui vuoi suonare.
Per saperne di più su come collegare un preamplificatore a un ricevitore AV, guarda questo video di Techno Daddy:
Come aggiungere un amplificatore esterno al ricevitore AV | Nozioni di base sull'home theaterGuarda questo video su YouTube.4. Collega il ricevitore AV all'amplificatore di potenza
Aggancia i connettori di uscita centrale, destro e sinistro del ricevitore ai connettori di ingresso corrispondenti sull'amplificatore di potenza utilizzando cavi RCA.
Linking the two together can increase the power load of the receiver and enable it to enhance the sound in addition to supplying an active music range.
5. Plug Your Speakers Into the Preamp
Get the speaker wire and connect its left and right inputs from the speakers to the appropriate output terminals on the preamplifier. The center speaker should be plugged into the center terminal, the right one to the right output and the left speaker to the left terminal. Make sure the inputs you attach to are linked to the speaker you want to hook up.
Also, ensure to get the polarity of the connections right as the red cable should be plugged into the red output and the black cable into the black one. Reversing the cables can create poor sound quality.
6. Power on the Preamp, AV Receiver and Power Amp
Always check the AC power outlet to guarantee that it has the correct voltage for your preamp before using it. You can find the right voltage that your device should be operated at its rear end.
Connecting the preamp with the wrong AC voltage may cause the device to catch fire and end up harming yourself and others if the fire spreads. To further protect your equipment from damage and yourself from injuries, use properly grounded components to connect your sound system.
Besides that, you could opt to use a trigger wire to quicken the process of connecting all three devices so that they can power on at the same time. But if you would rather not and prefer turning on the devices one at a time, start with the AV receiver first before powering on the preamp and the amp because it doesn’t need any fine-tuning.
7. Set the Power Amp Gain and Preamp Volume
Tune the amp’s gain to full and the preamplifier’s volume at about 2 o’clock to achieve full volume. Doing this will ensure that your preamp runs in an ideal range, which will give you the perfect sound.
However, if you want to listen at a lower volume, set the amplifier gain at a near minimum and the preamp volume still at 2 O’clock. Then, increase the gain until you reach the loudest level you enjoy listening to music.
Keep in mind that your power amp should always be tuned high enough, like at 2 O’clock or above. Otherwise, it won’t be able to send a high enough sound signal from the preamp and end up causing distortion. The voltage gain needs to be 2 volts and above to avoid performance problems.
8. Calibrate Your Speakers
You will have to use the automatic speaker setup on your receiver and a calibration microphone to ensure that your home theater works as intended with fewer audio problems.
For this to happen, you have to ensure that the sound levels of the speakers and the subwoofer are tuned right and that the audio will sound fine from wherever you will be sitting as you listen.
You can also use it to determine whether all the speakers are hooked up correctly and equalize the frequency levels of your speakers.
So here are the steps you should follow to fine-tune your speakers:
- Put a tripod or mic stand in the center of the room and place the microphone on it while facing up.
- Adjust the stand’s height to the level of a seated listener’s ears.
- Plug the microphone into the MIC jack of the surround sound processor.
- Turn on the automatic speaker setup on your receiver.
- Measure the sound of the speakers while in the center of the room and if it’s unsuitable, modify the volume levels. Move the mic to different areas around the room, like about 2 feet to the right and the same feet to the left. This position will get the best sound for the entire room.
- Unplug the mic from the receiver when you have finished and verify your measurements before turning off the calibration system.
Endeavor to leave the volume settings of your speakers as calibrated to avoid messing up the sound. But if you can’t prevent altering the volume levels to get more bass or a high pitch, you will have to re-calibrate your speakers to get the best sound in your listening room.
9. Play the Source Device of Your Choice
Now you can play whichever electronics you want and enjoy watching a movie or listening to music with fantastic sound quality. For instance, if you wish to listen to a specific genre of music, you can choose your Blu-ray disc player on your remote and run it.
Supplies Needed to Connect a Preamp to an AV Receiver
Hooking up a preamplifier to your AV receiver can offer you a personalized experience of using your home theater system. It allows you to configure your speakers to play different music in multiple rooms.
To recap the steps above, here are all of the things you’ll need to connect your preamp to the AV receiver and calibrate the speakers.
- Power amplifier
- Audio and video equipment
- RCA cables
- Speaker wire
- Trigger wire
- Microfono
- Tripod or mic stand
Make sure to double-check all of your connections throughout to ensure the final sound quality is optimal.
Pensieri finali
When you decide to buy a preamp for connecting to your AC receiver, ensure it’s compatible and has all the necessary features like the pre-outs. Much as you can hook up these devices without pre-outs, it’s much easier to do so with them.