Come installare un sistema di telecamere di sicurezza da soli? La guida definitiva (2022)
L'installazione di una telecamera di sicurezza non è così complicata come sembra, specialmente con i nuovi (e avanzati) sistemi di sorveglianza che sono fondamentalmente "plug and play" e che non richiedono competenze di rete avanzate.
Molte persone continuano a chiedere online:“Come installare le telecamere di sicurezza in casa” o “Cosa mi serve per installare le telecamere in interni o esterni” o “È facile installare le telecamere di sicurezza”… Ebbene, in questa guida andremo passo dopo passo su come installare telecamere di sicurezza CCTV di sorveglianza nella tua casa o azienda.
Ci sono due componenti principali quando si installa un sistema di telecamere di sicurezza. Il primo e il più difficile è praticare fori, far passare i cavi all'interno o all'esterno della casa, terminare i cavi e installare le telecamere nel punto giusto.
Il secondo include l'angolazione corretta delle telecamere, facendole vedere sul registratore e sul resto delle impostazioni come registrarle e vederle sul telefono o sul monitor locale. Sebbene all'inizio possa sembrare complicato, la parte di configurazione è piuttosto semplice e la maggior parte dei sistemi funziona automaticamente senza la necessità di eseguire alcuna configurazione di rete.
Installando la tua fotocamera da solo (fai da te), risparmierai un sacco di soldi. A seconda del paese, solo l'installazione può essere costituita dal 70% del prezzo totale che l'impresa di installazione quota ai propri clienti.
Di seguito mostreremo le istruzioni su come installare le telecamere di sicurezza domestica cablate e wireless all'interno e all'esterno della tua casa, i preparativi da fare e come configurare il sistema una volta terminato.
PARTE 1:Preparativi per l'installazione di telecamere di sicurezza domestica fai-da-te
PARTE 2:Installazione autonoma di telecamere di sicurezza cablate e wireless
Parte 1:Preparativi per l'installazione di telecamere di sicurezza domestica fai-da-te
Esistono diversi tipi di sistemi di telecamere di sicurezza e possono essere classificati in due gruppi:sistemi cablati e wireless. Mentre i sistemi TVCC wireless sono sempre sistemi IP, quelli cablati possono essere IP o coassiali.
Le telecamere IP utilizzano cavi di rete (cavi Ethernet) e possono trasmettere l'alimentazione e i dati tramite lo stesso cavo (PoE). I sistemi coassiali utilizzano cavi coassiali e ciascuna telecamera deve essere alimentata singolarmente utilizzando un secondo cavo (quindi ogni telecamera necessita di due cavi, mentre una telecamera IP ne necessita solo uno).
In entrambi i casi, telecamera coassiale o IP, la logica di installazione è la stessa. Tuttavia, consigliamo di utilizzare un sistema di telecamere IP poiché i prezzi sono convenienti e la qualità dell'immagine è molto migliore rispetto ai sistemi TVCC coassiali (tradizionali). Inoltre, i sistemi IP sono a prova di futuro, il che significa che puoi aggiornare il sistema in pochi anni senza dover rifare i cavi.
1. Decidi quale tipo di sistema di sicurezza CCTV installerai
Come abbiamo detto, il processo di installazione varia in base ai diversi sistemi di telecamere di sicurezza. Scenderai a decidere se vuoi optare per sistemi di telecamere di sicurezza cablate o wireless. Questa decisione dipende dalle tue specifiche esigenze di sicurezza e ovviamente dal tuo budget.
Le telecamere di sicurezza Wi-Fi, in particolare quelle alimentate a batteria, sono migliori se stai cercando flessibilità e un'installazione più semplice. I sistemi di telecamere IP PoE offrono maggiore stabilità ma richiedono un po' più di lavoro durante l'installazione.
Se vuoi sbarazzarti di cavi disordinati e perforazioni, puoi utilizzare telecamere di sicurezza alimentate a batteria. Non necessitano di cavi, basta montarli nella loro posizione, inserire la batteria e poi collegarli via WiFi.
Per questo tipo di sistema, è necessario disporre di una buona copertura Wi-Fi e bisogna scendere a compromessi sulle batterie che necessitano di continue ricariche o sostituzioni (una volta ogni poche settimane o mesi).
Un'altra opzione è quella di scegliere sistemi di telecamere di sicurezza cablate che consigliamo personalmente. This type is way more stable, doesn’t need batteries, is always powered, it’s not affected by the WiFi internet, but you need to run one cable for each camera.
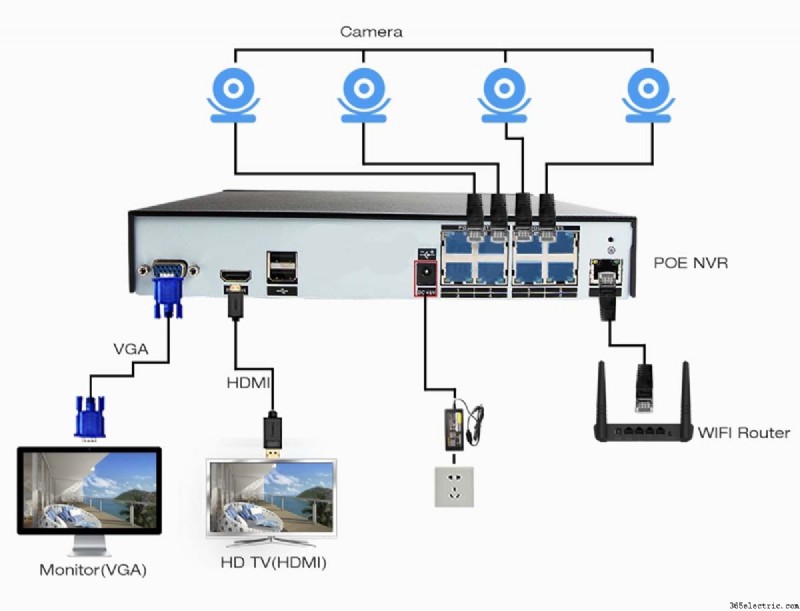
In this demonstration, we will use an NVR camera system with a built-in PoE switch (the so-called PoE NVRs). All the cameras need one cable run each and they get plugged into the NVR which serves as the central brain for storage and other camera management features. Or you can use a DVR (for coaxial cameras). Here are the differences between NVR and DVR camera systems .
2. Decide on the type of cameras (shape, color, outdoor, indoor)
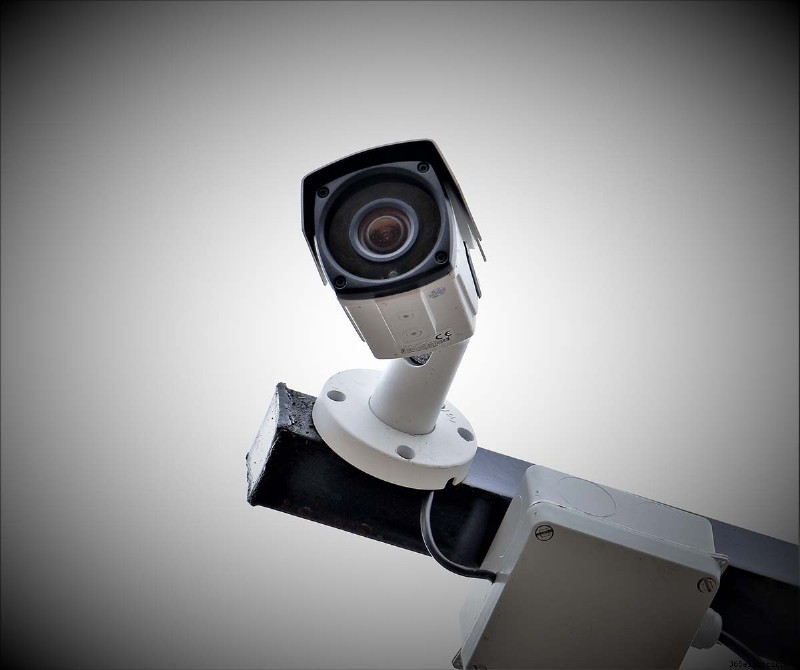
There are different types of cameras and you can choose between dome or bullet style, eyeball shape, small or big, also different colors. The general rule is not to install bullet cameras indoors since they take a lot of space and don’t blend well with the environment.
If you’re looking for indoor cameras, always go for the dome-shaped one, possibly small in size. These cameras blend well inside, don’t stand out, and aesthetically look better.
For outdoor, you can either go for bullet or turret style and purchase cameras with a higher count of LED lights. The more LED lights, the better the image during the nighttime.
About the color, there are two choices. You can either go for a color similar to the wall or ceiling which will make the camera difficult to notice. Or if you want to scare people off, choose a color that stands out such as black cameras on a white wall.
NOTE. Check this article for more details regarding the camera’s shapes and types:Types of CCTV security cameras — Complete Guide .
3. Prepare for installation
You need to prepare your material, tools and plan out how you will do the installation. The material includes:
- The cameras
- The recorder (DVR, NVR)
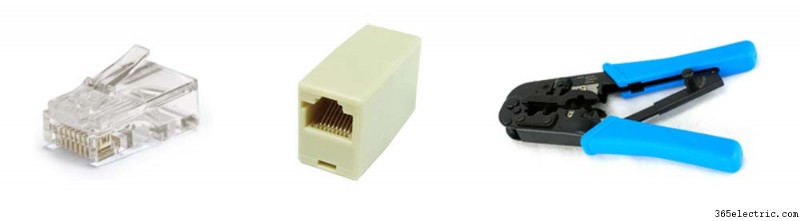
- The cable (this one can be premade or you can buy a roll which lowers the cost. If using a roll, you need to terminate the cable using the RJ45 plugs and the crimper tool).
Tools include:
- Screws, anchors, junction boxes (these come with the cameras)
- Drill
- Power adapter for the recorders or coaxial cameras.
- Templates for drilling that come with the cameras
Part 2:How to install wired and wireless security cameras by yourself?
Setting up a DIY security camera system is not as difficult as it may sound. Surely, you need to do some labor and configuration but nowadays the systems are almost completely plug and play.
Technically, you just have to install the cameras and they’ll automatically connect to the recorder or the central station. Even viewing them on the phone involves scanning a QR code.
While for the PoE NVR systems there’s no need to do any pre-configuration, for the wireless cameras it’s better to connect them to the central station prior to physically installing the camera in its place (you may need to check the user guide of wireless cameras on how to link them to the main unit).
We’ve summarized the installation process into 5 easy steps that are valid for any security camera system regardless of being wired or wireless. Go through them and you’ll have a properly installed system.
1. Inspect the spots where you want to install the camera
It’s crucial to check the spot where the camera will be placed. Keep in mind the following suggestions when deciding where to install the camera:
- To get a clear and wide view, the camera needs to be mounted up high.
- Try to cover as many areas as possible using fewer cameras. This will keep the costs low.
- By placing the camera high you prevent possible intruders by physically messing up with the camera such as changing the angle or obstructing it.
- Avoid angling the camera straight to a light source. If so, the picture will be washed up and you won’t be able to see anything.
- If using powered cameras such as wireless powered cameras or coaxial cameras, ensure it’s easy to get the power line. This doesn’t matter if you’re using battery-powered cameras or PoE cameras (they’ll use the same cable for the power and data).
- If using a bracket, place it under the eave. This installation will protect the camera from the elements (such as heavy rain or snow)
- Don’t place and point the cameras close to a solid surface such as a wall, fence, window glass. The IR light may reflect and wash out the image.
- Don’t point your security cameras to your neighbors’ properties, bathrooms, or other private places. Check with your neighbor before doing so, or you may also use the privacy mask feature to hide those sections of the image.
2. Mount the camera on the wall or ceiling
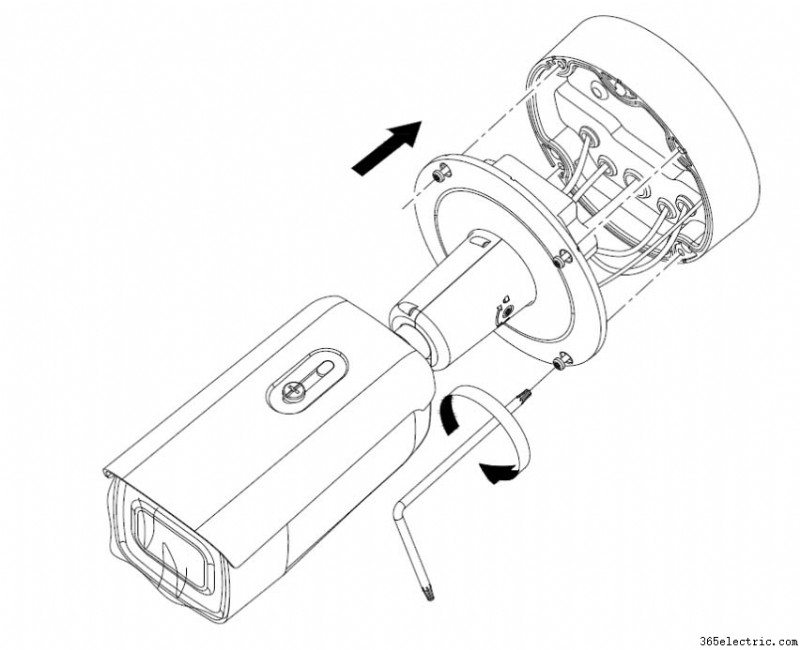
Most of the time, each camera is shipped with a template that can help you drill the holes correctly. Place the template on the wall, ceiling, or on any surface and drill the holes through it.
Then place the camera over the holes and screw it in. If it’s a dome camera, you may need to take out the cover. Point and position the camera at the correct angle. Ensure that the angle provides the best motion detection position.
Security cameras come with various brackets or junction boxes that depend on the camera shape and model. Sometimes they are included in the package, sometimes you need to buy them separately.
Moreover, certain cameras and installations may require special brackets such as installing a dome camera on a wall (they are designed to be mounted on the ceiling), or placing a camera on the mounting pole to achieve more height or distance from the wall/ceiling.
For basic DIY installation, you’ll most likely use a dome or bullet camera which can be installed easily without overthinking.
3. Run the cables
Welcome to the most difficult part of installing a security camera system:running the wires. Well, it’s not that difficult, let’s just say it’s the annoying part.
If you’re installing battery-powered cameras, you don’t need to run any wires (obviously). For other systems such as NVR IP systems, you need to run one cable per camera.
Before you get started, map out the camera’s wire route. If you plan to install the cameras on hallways, basement, garage, entrances, etc, plan out where the wires will go (from the attic, ceiling soffit, under the eave, etc).
Then you should decide the place where the NVR or DVR will be located because that’s where all the cables will end up. Most people place their NVRs in the utility room in the basement. It’s recommended to place the NVR in a strategic spot, somewhere in the middle of a three-story house so the cable runs can be shorter and easier.

Now let’s start by running the cable for the first camera. Drill a hole on the wall, insert the network cable, snake it down and push it on the other side. Depending on the installation, you may attach the cable to a snake rod and it will make things easier.
You should do the same thing for all the cameras until all the cable runs are close to the NVR or DVR. If you don’t want to hide the cable, then you can run them on the surface and clip the run along the walls or ceiling.
pic
For clarification:
- If you’re installing a PoE NVR system, you only need to run one cable per camera. This cable connects the camera to the back of the NVR and will transmit the data and the power at the same time.
- If you’re using a DVR camera system with coaxial cameras, then each camera needs two cables (called Siamese cable), one for the data (the coaxial one), and or for the power line. The power lines can be powered individually using a DC power adapter, or you can bring all of them to a power box. This type of installation is more complicated, and you may need to hire a professional installer.
Also, it’s important to conceal security camera cable and holes after the runs are finished. It’s not just more aesthetically pleasing but you can prevent an intruder from damaging the cables. Some practical tips for your reference:
- Use junction boxes to hide the cables, connectors, and other wires.
- If outdoor, use metal pipes for the cables. If indoor, use plastic conduits.
- Fill the drilled holes with waterproofing materials such as silicone, duct seals, cement.
4. Connect the cameras to the NVR and initialize the system
Once the wiring is done and the runs are terminated to RJ45 connectors, then you can connect all the devices together and power on the system.
Let’s check the PoE NVR diagram shown below. The cameras go to the back of the NVR (using just one cable), the NVR is powered on and connected to the network (router/switch). You can connect a TV/monitor to the NVR using an HDMI (or even VGA) cable.
 For other camera setups you may check the links below which provide detailed technical information:
- How to wire an IP camera to a PoE switch
- How to wire an IP camera to a Router or non-PoE Switch
- How to wire an IP camera to a PoE NVR
5. Bring the system online
The last step is bringing the cameras on the live mode. Once the cameras are plugged into the NVR, turn the recorder on.
Depending on the NVR model and manufacturer, you will need to initialize the unit by creating a password. Some NVRs come with a password which you should get from the seller. You also may check this article for the default password list.
The NVR will auto-configure and you should just see the cameras on the screen after a few minutes. If there’s a hard drive on the unit, the recorder will record in continuous mode, or you can set it on motion recording by adjusting the NVR’s settings.
If you want to view the cameras on the phone, then you need to install the system’s app. Each manufacturer uses its own apps, so you find out which is for the one you have purchased and install it on your phone.
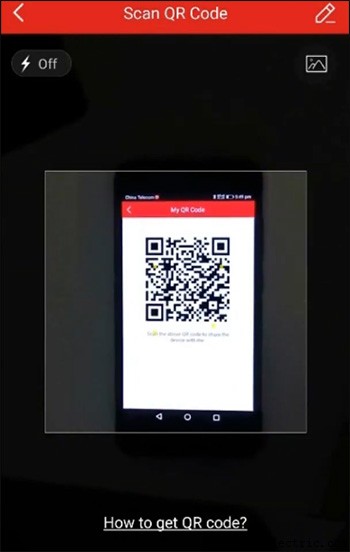
Nowadays, the procedure is pretty much the same regardless of the brand. You need to connect the recorder to the internet and then scan a QR code on the settings using the phone app, then you have to enter the password for the system and you should see all the cameras there.
We’d suggest checking the documentation of your system and finding out the steps for viewing the cameras on the phone. Usually, the unit comes with a paper sheet that indicates how to scan the QR code.
Additionally, almost all manufacturers come with camera management software that can be installed on computers, laptops, and other devices that will make it easier for you to monitor and manage the cameras.
Lastly, once the system is on, check each camera individually on the settings section to ensure that recording is enabled, or the motion is set properly.
Conclusione
Installing a home (or business) security camera system can be fun and challenging at the same time. While you may find it frustrating from time to time, at the end of the project you’ll learn a lot of tricks and gain a lot of experience.
We’d recommend purchasing a whole security system package with all the devices from the same manufacturer such as the ones reviewed here . These systems don’t need any network skills, all you have to do is install them and they’ll self-configure.
Simply go through the steps one by one. If you’re stuck on something, find helpful information on google, research the issues and continue with your installation.
Installing a camera system yourself will lower the cost since a professional installer charges on average $2K-$3K per job and sometimes they even charge extra fees for activating the system.
If you have any questions or you have stumbled upon some issues, let us know in the comment box and we will try to share our solutions with you!