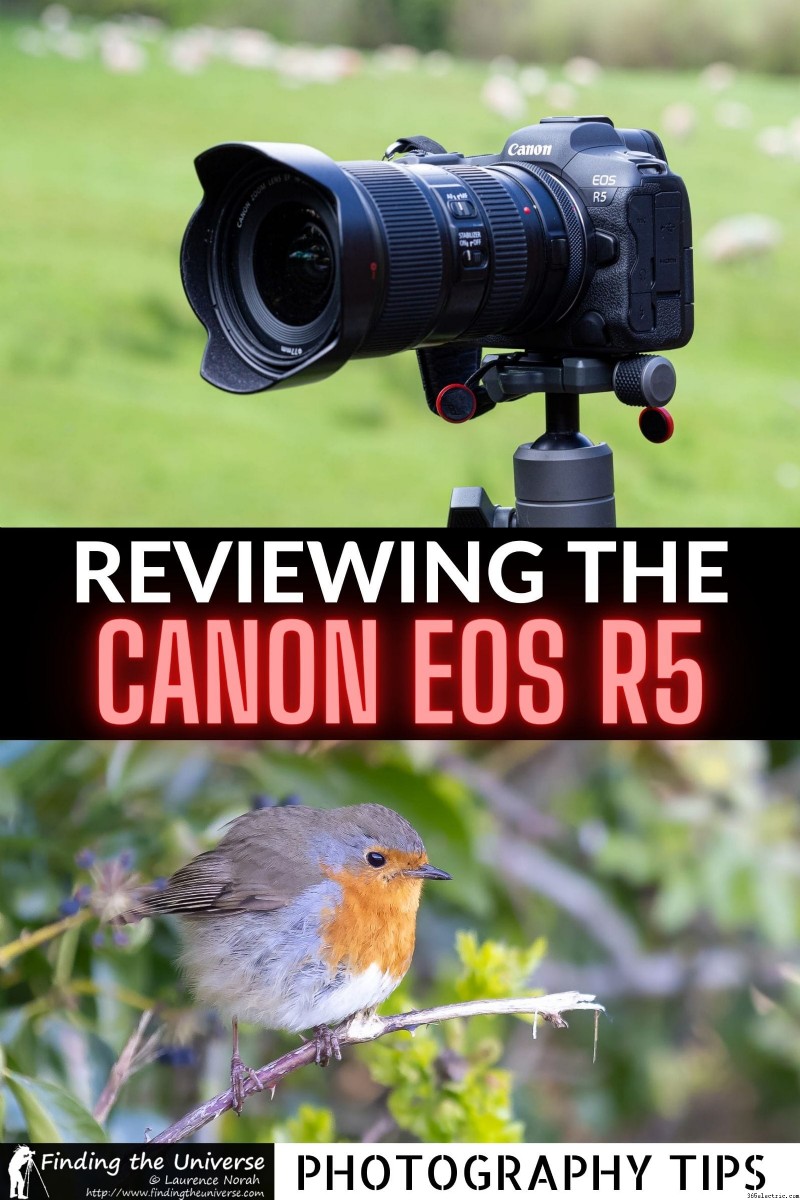
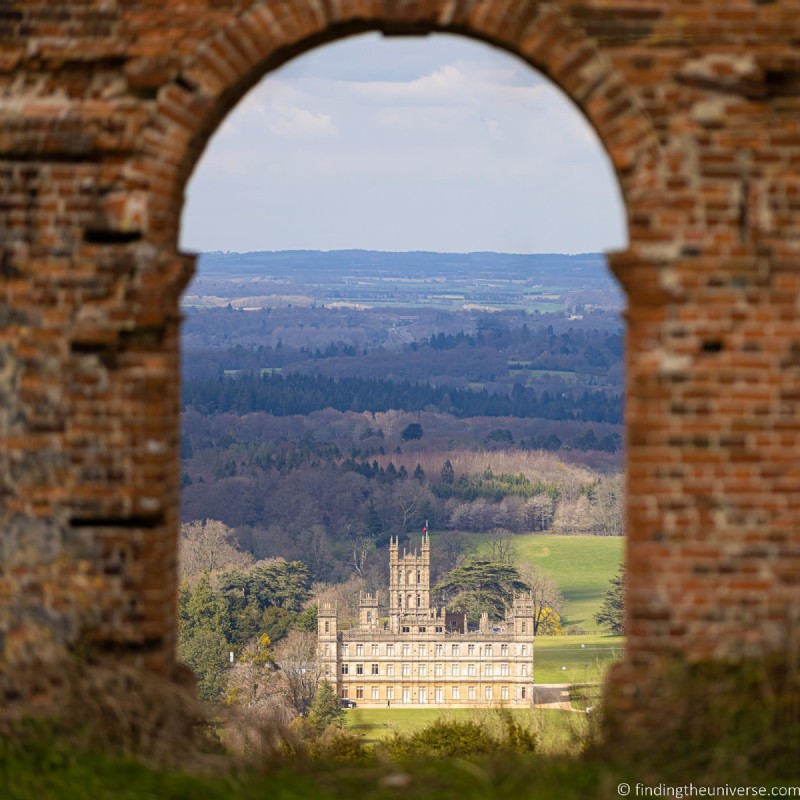
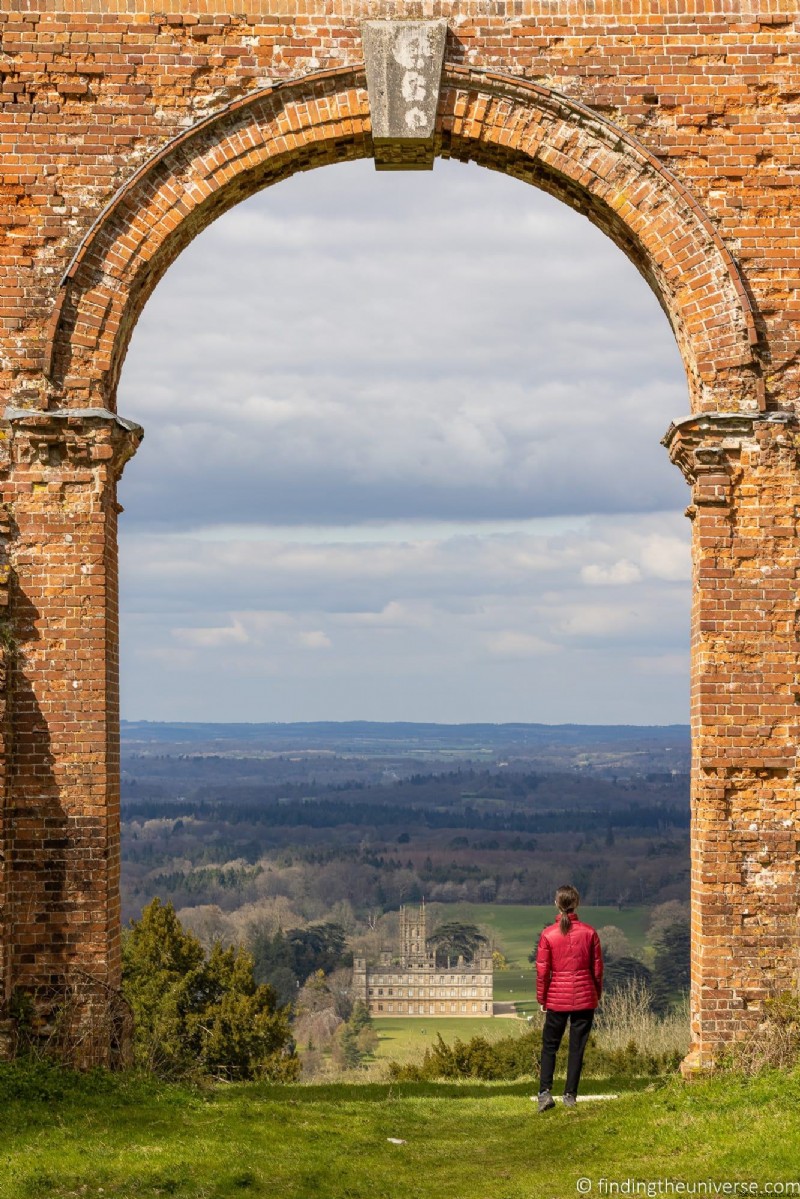
Recensione Canon EOS R5 per la fotografia di viaggio
Nel post di oggi, fornirò una recensione della fotocamera mirrorless Canon EOS R5 dal punto di vista della fotografia di viaggio professionale. Condividerò le mie esperienze con l'utilizzo della fotocamera nel mondo reale, includendo ciò che mi piace di essa e le cose che penso potrebbero essere migliorate.
Alcuni retroscena prima di iniziare. Sono un fotografo di viaggio professionista a tempo pieno e sono un utente Canon da molto tempo. La mia prima fotocamera reflex in assoluto è stata una Canon, la Canon AE-1. Da allora ho utilizzato una varietà di fotocamere Canon, e negli ultimi anni i miei cavalli di battaglia sono stati un paio di Canon 6D.
Questi offrivano tutto ciò di cui avevo bisogno da una fotocamera da viaggio:buone prestazioni in una gamma di condizioni di luce, un peso relativamente basso (per una DSLR comunque!) e un'interfaccia facile da usare. Vale anche la pena ricordare che penso che gli utenti Canon abbiano accesso ad alcuni dei migliori obiettivi sul mercato.
Aggiungo anche che non sono obbligato a Canon. Abbiamo anche una fotocamera micro quattro terzi Panasonic, oltre a una fotocamera compatta Sony RX100, e ho usato anche alcune delle serie Sony a6xxx. Anche mia moglie ha avuto una reflex digitale Nikon.
Oggi però parlerò della Canon EOS R5, che ho acquistato per sostituire una delle mie Canon 6D. Quindi lo confronterò con quello, così come con la più recente DSLR Canon serie 5, la 5D Mark IV, che sostanzialmente sostituisce la R5.
Dovrei anche notare che quando Canon ha rilasciato la R5 ha rilasciato anche la Canon EOS R6, che è una fotocamera simile a un prezzo inferiore. Condivide molte delle stesse funzionalità, quindi questa recensione potrebbe essere utile anche per coloro che considerano quella fotocamera.
Questa recensione sarà puramente dal mio punto di vista come fotografo di viaggio, usando la fotocamera per la fotografia. Sebbene questa fotocamera sia fantastica per i video, non faccio molto lavoro video, quindi questa recensione di Canon EOS R5 non tratterà in modo approfondito le funzionalità solo video.
Immergiamoci con una rapida panoramica delle caratteristiche principali di questa fotocamera.
Caratteristiche principali e panoramica di EOS R5
Canon EOS R5 è una fotocamera full frame mirrorless. Se vuoi sapere cosa significa, consulta la mia guida all'uso di una fotocamera mirrorless che copre i concetti di una fotocamera mirrorless e cosa la distingue dalle altre fotocamere sul mercato.
Le caratteristiche principali di questa fotocamera sono:
- Sensore full frame da 45 MP
- Stabilizzazione dell'immagine con spostamento del sensore integrato nel corpo che fornisce fino a 8 stop di stabilizzazione
- Sistema di messa a fuoco automatica a doppio pixel in grado di tracciare gli occhi su persone e animali
- Touchscreen da 3,2″ e mirino elettronico
- Montaggio obiettivo RF (compatibile con obiettivi EF ed EF-S con adattatore)
- 12 fps (otturatore meccanico), 20 fps (otturatore elettronico) – richiede un obiettivo compatibile
- Pesa:738 g / 26 once con batteria
- Dimensioni:138 x 98 x 88 mm (5,43 x 3,84 x 3,46")
- Peso:738 g (26 once) con scheda e batteria
- Supporto video 8K
- Due slot per schede (SD standard + CFExpress)
- Supporto WiFi 2,4 Ghz e 5 Ghz + Bluetooth
- Segugio alle intemperie
- Shoe flash (senza flash integrato)
- Ingresso microfono/ingresso linea/presa per cuffie, uscita micro HDMI, presa sincronizzazione flash, porta USB-C per terminale telecomando tipo N3.
Puoi vedere le specifiche complete sul sito Web Canon qui.
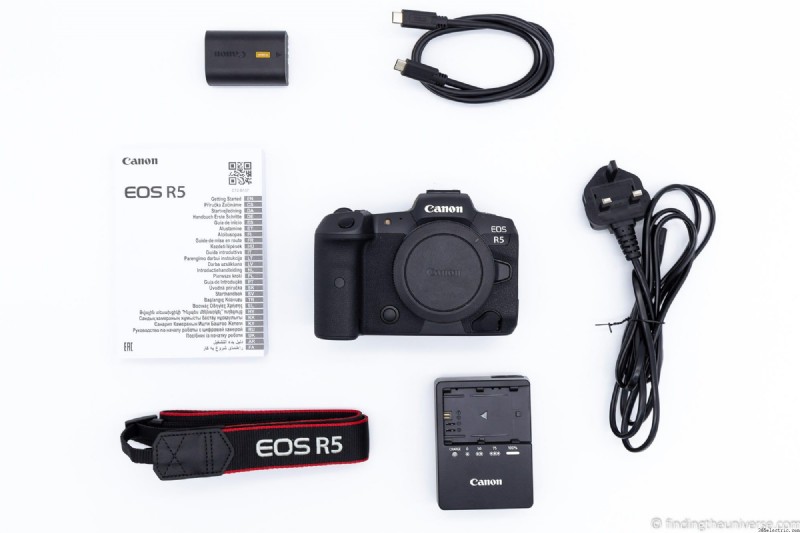
Cosa c'è nella confezione di EOS R5?
La confezione di EOS R5 ha quanto segue:
- Il corpo macchina della fotocamera EOS R5
- Cover fotocamera R-F-5
- Una batteria LP-E6NH con coperchio della batteria
- Un caricabatteria Canon (con cavo, nel Regno Unito)
- Un cavo da USB-C a USB-C
- Un cinturino per fotocamera con marchio EOS R5
- Una protezione per cavi
- Una guida introduttiva (il manuale completo è online)
Come è tipico per una fotocamera di questo livello, il corpo macchina non è dotato di obiettivi inclusi. Quindi, se desideri aggiungere obiettivi, dovrai preventivare e acquistarli separatamente.
È principalmente quello che ti aspetteresti, anche se ci sono state due delusioni per me riguardo agli accessori non inclusi che penso sarebbero utili per molti tiratori.
Innanzitutto, sebbene EOS R5 supporti la ricarica USB-C tramite un caricabatterie compatibile con PD, Canon non fornisce un caricabatterie compatibile nella confezione. Tuttavia, puoi acquistare un alimentatore Canon PD-E1 come accessorio aggiuntivo se desideri caricare la batteria LP-E6NH nella fotocamera.
Avrei davvero apprezzato anche un adattatore EF-RF nella confezione. Ritengo che la maggior parte degli utenti che si avvicinano a questo sistema di fotocamere avranno probabilmente obiettivi esistenti o potrebbero prendere in considerazione l'acquisto di alcuni obiettivi EF, quindi averlo nella confezione sarebbe stato bello. Così com'è, puoi prenderne uno qui.
A cosa serve la mia Canon EOS R5?
Penso che sia importante qualificare ciò per cui utilizzo la mia fotocamera, poiché tutti abbiamo esigenze diverse dalla nostra attrezzatura.
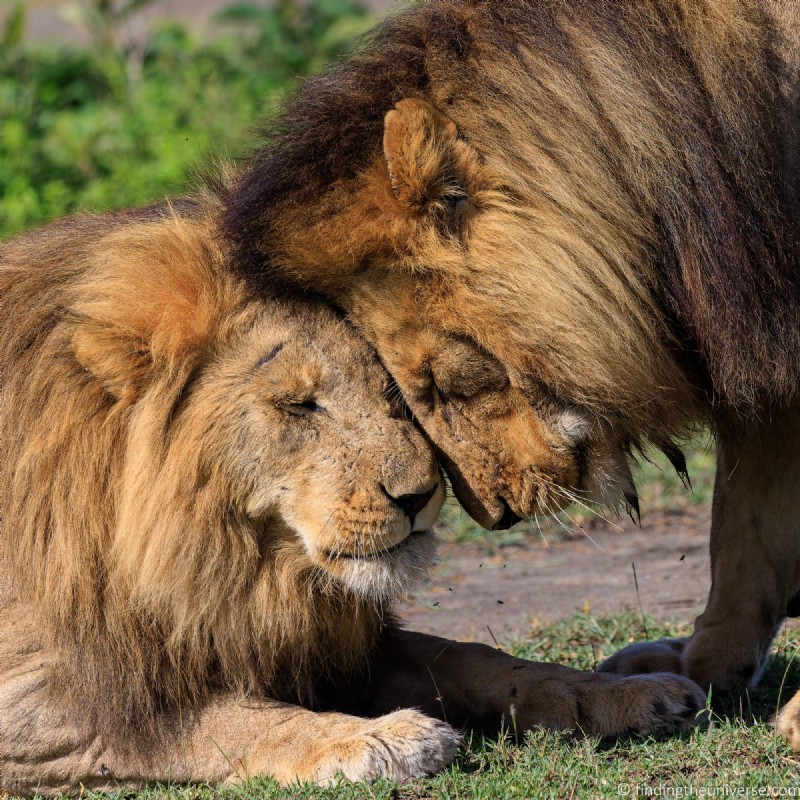
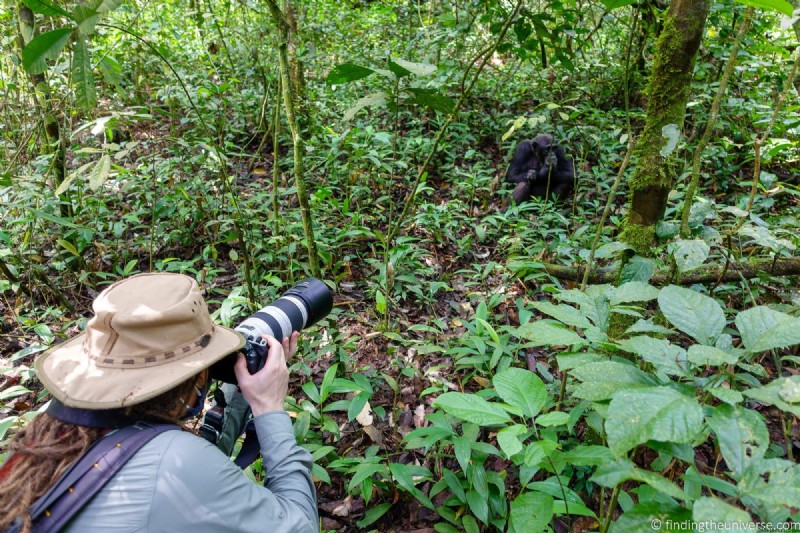
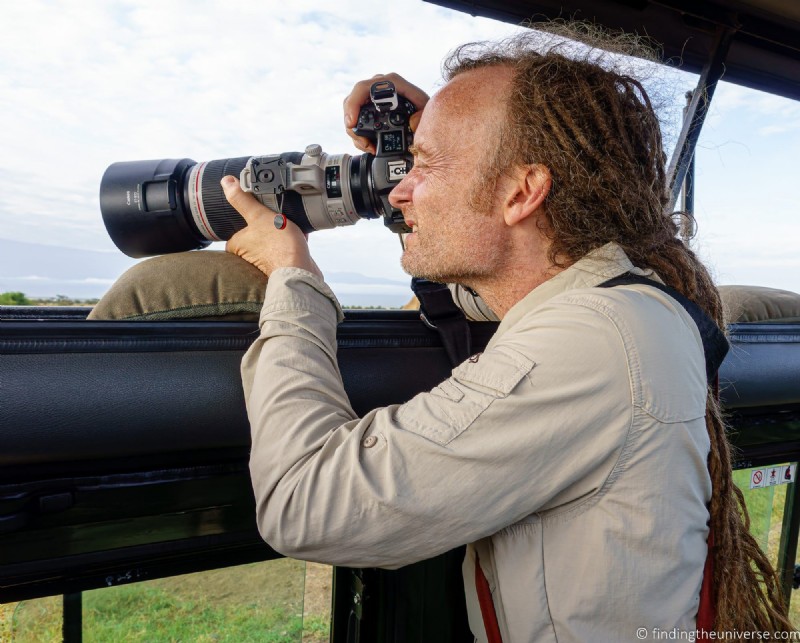
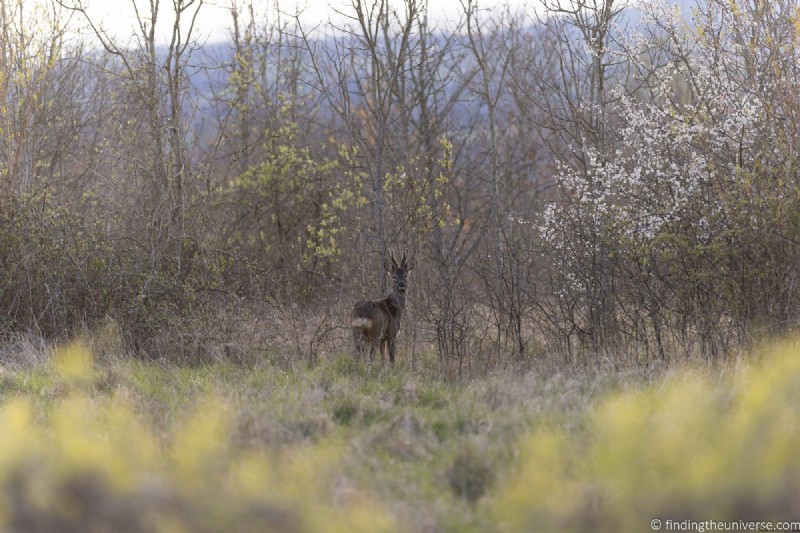
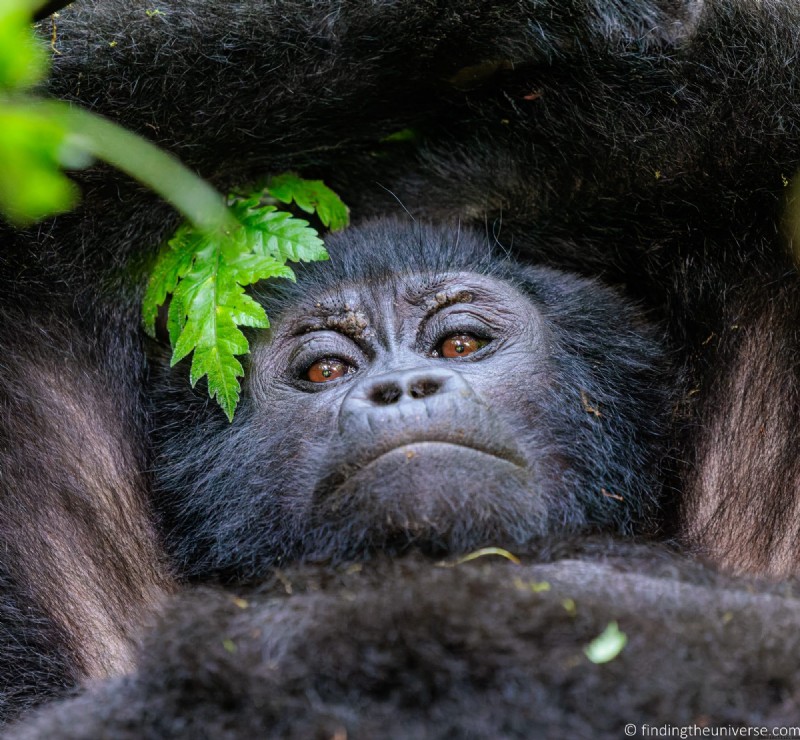
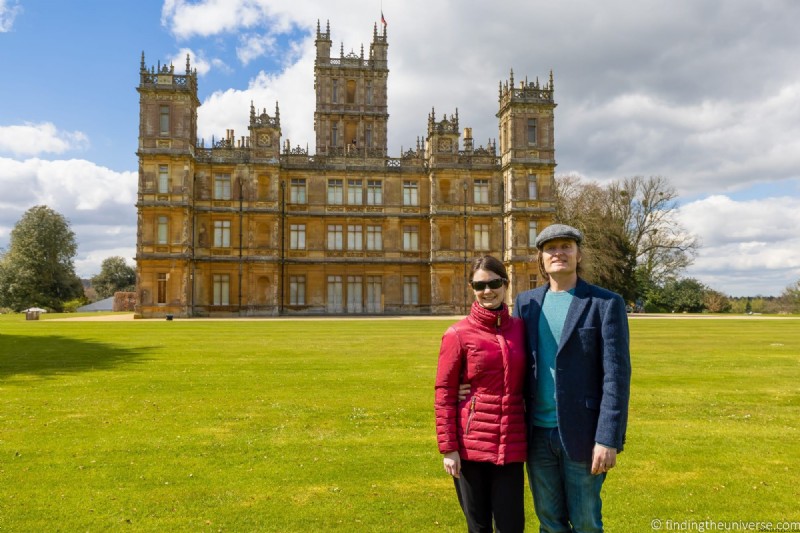
Sono principalmente un fotografo di viaggio, il che significa che fotografo una vasta gamma di soggetti durante i nostri viaggi. Questi includono paesaggi, nonché scene di città, strade, persone, eventi, edifici, fauna selvatica e cibo. Scatto spesso anche in interni (ad es. musei, hotel, luoghi di culto) dove il treppiede potrebbe non essere consentito.
Quindi ho bisogno di una fotocamera che sia capace in un'ampia gamma di scenari. Deve anche essere in grado di resistere alle intemperie per le riprese all'aperto ed essere ragionevolmente portatile poiché viaggerò con esso e lo porterò in giro tutto il giorno. Quel fattore di peso è stato uno dei motivi principali per cui avevo inizialmente scelto la Canon 6D rispetto alla serie Canon 5D molti anni fa.
Cose che amo di Canon EOS R5
Piuttosto che approfondire ogni aspetto di questa fotocamera, parlerò delle cose che amo e delle cose che penso potrebbero essere migliorate con questa fotocamera, in base alla mia esperienza con essa fino ad oggi.
Ho acquistato la fotocamera a marzo 2021 e l'ho utilizzata in viaggi nel Regno Unito, negli Stati Uniti e in numerosi paesi dell'Africa orientale.
Sistema di messa a fuoco automatica
Sarò onesto, il sistema di messa a fuoco automatica è stato uno dei motivi principali per cui ho scelto di passare alla nuova Canon EOS R5 dalla 6D. Per la fotografia paesaggistica diurna, ovviamente, non è stato un grosso problema in quanto non c'è molto movimento del soggetto di cui preoccuparsi e di solito scatto a una profondità di campo abbastanza ampia con una buona luce.
Quella storia cambia quando fotografo persone, animali selvatici in rapido movimento o in situazioni di scarsa illuminazione. In quelle situazioni, in particolare negli scatti d'azione, la 6D stava decisamente limitando alcuni dei miei scatti e non stavo mettendo a fuoco in modo affidabile come avrei voluto.
Questo era particolarmente vero quando si scattava a tutta apertura a f/1.8 o f/2.8, il che significa che avrei usato spesso aperture più strette per ottenere una profondità di campo più profonda. Ciò aiuterebbe a garantire che avrei messo a fuoco l'occhio del soggetto piuttosto che la punta del naso, ma in qualche modo ho mancato il punto di avere un obiettivo ad ampia apertura. Anche il monitoraggio di soggetti in movimento a volte era una vera sfida.
Questi problemi non sono più un problema grazie al sorprendente sistema di messa a fuoco automatica che Canon ha inserito nella Canon EOS R5.
Ci sono una gamma di opzioni di messa a fuoco automatica sulla R5. Il più impressionante è l'autofocus di rilevamento del soggetto, che può identificare e bloccare automaticamente persone, animali e veicoli. Lo farà in appena 0,05 secondi. Per le persone e gli animali, il sistema bloccherà i loro occhi se riesce a trovarli, altrimenti si bloccherà sulla testa o sul corpo.
È difficile spiegare quanto sia eccezionale questo sistema, perché sembra letteralmente una magia, anche con gli obiettivi EF. Apprezzo che descrivere qualcosa come magico in una recensione potrebbe non essere soggettivamente utile, ma onestamente, ti sfido a usarlo e non a sorridere ai tuoi nuovi poteri di concentrazione.

Ancora più impressionante, puoi mettere a fuoco praticamente l'intero mirino. La mia 6D aveva un piccolo grumo triste di 11 punti di messa a fuoco automatica raggruppati attorno al centro del mirino. Ovviamente potevo passare al live view e aspettare qualche secondo prima che la fotocamera mettesse a fuoco, ma non è mai stato davvero pratico in situazioni riguardanti un soggetto in movimento.
L'R5 è sicuramente un miglioramento quando si tratta di punti di messa a fuoco automatica.
Ricordiamo che la 6D ha 11 punti di messa a fuoco. La 5D Mark IV ha 61 punti di messa a fuoco. L'R5 alza un po' la posta, con 5.940 punti AF! C'è molta scelta di messa a fuoco.
Ci sono ovviamente una serie di altre opzioni di messa a fuoco, quindi non devi fare affidamento sul sistema di messa a fuoco automatica di rilevamento del soggetto. Puoi anche impostare pulsanti diversi per attivare diversi metodi di messa a fuoco automatica, in modo da avere un pulsante per bloccare gli occhi, ad esempio, e un altro per la messa a fuoco del punto centrale.
Qualunque sia il sistema di messa a fuoco utilizzato, l'R5 bloccherà la messa a fuoco sulla maggior parte del mirino a una velocità sovrumana e supporta persino la messa a fuoco con obiettivi che hanno un'apertura massima fino a f/22. Per fare un confronto, il sistema di messa a fuoco automatica 6D non si concentrerebbe su un obiettivo con un'apertura massima maggiore di f/5.6. Anche la lodata 5D Mark IV ha raggiunto obiettivi fino a f/8.
Mi rendo conto che non ci sono molti obiettivi con un'apertura massima di f/22, ma è una testimonianza di quanto sia davvero un balzo in avanti questo nuovo sistema di messa a fuoco automatica.
In termini di luce disponibile richiesta per mettere a fuoco, l'R5 può mettere a fuoco con livelli di luce di -6EV. Ciò significa che è possibile ottenere la messa a fuoco anche in un paesaggio notturno illuminato esclusivamente da mezza luna o quando si utilizzano filtri a densità neutra ad alta resistenza. In confronto, la 6D con cui stavo scattando aveva una capacità di messa a fuoco in condizioni di scarsa illuminazione di -3EV, che all'epoca era considerata impressionante. Questa è più o meno la luce disponibile di notte con la luna piena e la stessa della 5D Mark IV che si è concentrata anche su -3EV.
Vale la pena notare che Canon EOS R6 ha prestazioni di messa a fuoco in condizioni di scarsa illuminazione leggermente migliori, fino a -6,5 EV!
Fondamentalmente, se ti piace l'astrofotografia, la fotografia in condizioni di scarsa illuminazione o le riprese con un filtro a densità neutra, il sistema di messa a fuoco automatica R5 (e R6) funzionerà benissimo per te.
Ho provato questo sistema di messa a fuoco automatica su una vasta gamma di soggetti ed è davvero sorprendente quanto funzioni bene per bloccare e mantenere la messa a fuoco anche su un soggetto in rapido movimento o su soggetti relativamente distanti. Con più soggetti nel mirino, puoi passare da uno all'altro utilizzando il joystick.
Avendo sostanzialmente rinunciato a qualsiasi cosa diversa dalla messa a fuoco del punto centrale sulla mia 6D, utilizzando la tecnica "messa a fuoco e ricomponi" per la maggior parte dei miei scatti, avere un sistema di messa a fuoco automatica che identifica e segue efficacemente i soggetti è una rivelazione.
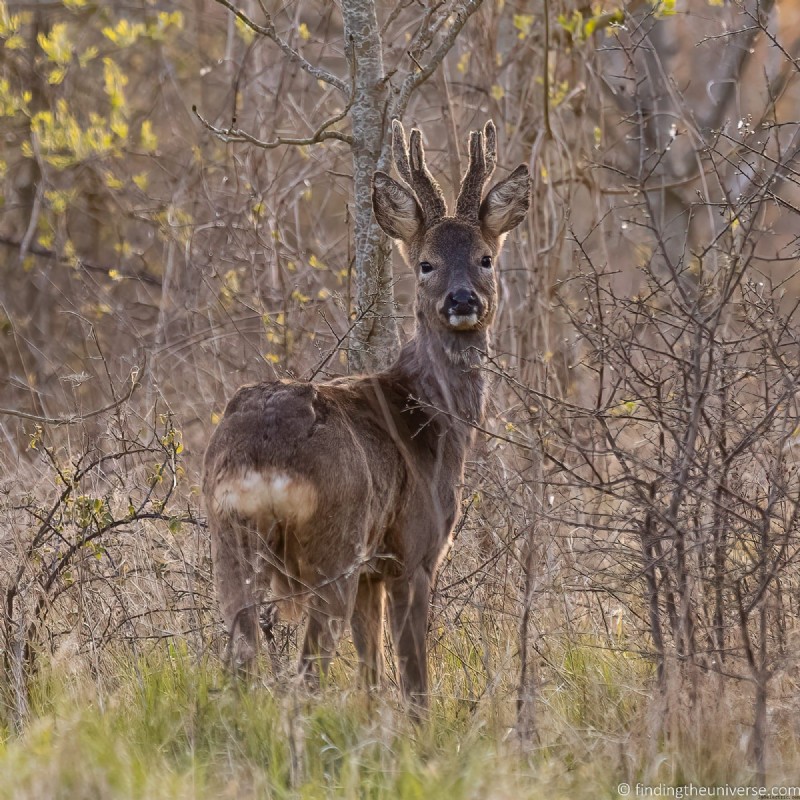
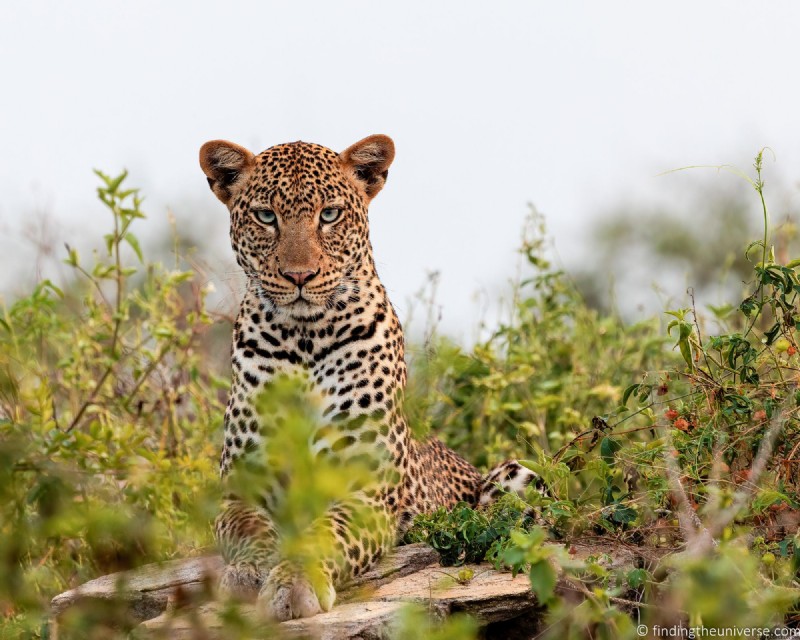
Vale la pena ricordare che mentre sono entusiasta del sistema di messa a fuoco automatica di rilevamento del soggetto sulla R5, non è infallibile. Questo è particolarmente vero quando si riprendono soggetti con cui la fotocamera non ha familiarità. Ad esempio, fotografando la fauna selvatica nell'Africa orientale, di tanto in tanto ha deciso che il soggetto era il filo d'erba davanti al rinoceronte e non il rinoceronte. O che le macchie del leopardo fossero l'occhio, piuttosto che l'occhio vero e proprio.
Si trattava di casi limite piuttosto che normali, ma sottolinea l'importanza di non fare troppo affidamento su alcun sistema automatizzato. Per gli uccelli in rapido movimento in volo, secondo la mia esperienza si è bloccato su un occhio se visibile il 95% delle volte. Per gli animali, era più simile all'80-90% di affidabilità, a seconda dell'animale.
Naturalmente, puoi anche assegnare e spostare manualmente il punto AF con il punto AF, oppure utilizzare il touchscreen per selezionare un soggetto da inseguire. Personalmente ho assegnato il pulsante DOF sulla parte anteriore della fotocamera a un punto AF centrale. Questo mi dà il meglio di entrambi i mondi, poiché utilizzo il pulsante Indietro per la messa a fuoco per il soggetto/l'inseguimento degli occhi e il pulsante DOF per la messa a fuoco del punto centrale.
Quando guardi attraverso il mirino, puoi impostare la fotocamera in modo da poter utilizzare il pollice destro sul touchscreen per spostare il punto AF. Quindi, se la fotocamera seleziona il soggetto sbagliato, puoi facilmente ignorarlo. È simile a un sistema che ho usato nella Panasonic GX8, che pensavo fosse molto intelligente, e sono entusiasta che sia entrato in EOS R5 perché è così intuitivo da usare.
Un'altra opzione è impostare il sistema di rilevamento del soggetto (in modalità Servo AF) in modo che abbia un punto AF iniziale (che puoi spostare). Ciò significa che la fotocamera cercherà comunque il viso, gli occhi o il busto di un soggetto, ma avvierà la ricerca in un'area da te definita.
Questa è una buona opzione se una scena ha più soggetti e vuoi selezionarne uno rapidamente, o se la fotocamera sembra faticare a distinguere tra un filo d'erba e un rinoceronte. Puoi vedere come farlo nel manuale qui.
Non sto dicendo che il sistema di messa a fuoco sia l'unico motivo per passare a questa fotocamera, ma per alcuni potrebbe essere sufficiente. Diamo un'occhiata ad alcune altre funzionalità che mi sono piaciute.
Stabilizzazione dell'immagine
La R5, ed è la sorella della nuova Canon R6, sono state le prime fotocamere Canon ad essere lanciate con un sistema di stabilizzazione dell'immagine integrato (IBIS). Per anni Canon ha lanciato il messaggio che la stabilizzazione dell'immagine interna al corpo non era realmente necessaria, perché la stabilizzazione basata sull'obiettivo era abbastanza buona.
Si scopre però che, con quasi tutti gli altri produttori là fuori che rilasciano fotocamere con stabilizzazione dell'immagine interna, Canon non poteva più ignorare la tendenza.
Non volendo fare le cose a metà, il sistema che Canon ha sviluppato per IBIS è davvero spettacolare. Offre fino a 8 stop di stabilizzazione se combinato con un obiettivo supportato. In teoria, ciò significa che se riesci a tenere a mano l'obiettivo a 1/250 di secondo, dovresti essere in grado di ottenere gli stessi risultati nitidi in 1 secondo!

Per confrontare con altre ammiraglie full frame attualmente sul mercato, la fotocamera a9 II di Sony offre 5,5 stop di compensazione, la loro A7 III offre 5 stop e la Z6 II di Nikon offre 5 stop.
Naturalmente, ci sono molte variabili da considerare, non ultima è che ottieni solo gli 8 stop completi di stabilizzazione sull'R5 con obiettivi RF specifici.
Tuttavia, il sistema IBIS funziona con obiettivi EF stabilizzati e non stabilizzati. Per gli obiettivi EF che hanno già la stabilizzazione dell'immagine incorporata, c'è qualche miglioramento ma non è enorme. La fotocamera fa un po' di lavoro per stabilizzare ulteriormente l'immagine, ma non ci sono enormi salti nelle prestazioni.
Tuttavia, se hai obiettivi EF non stabilizzati, il sistema IBIS della fotocamera può fornire da 2 a 4 stop di stabilizzazione dell'immagine, il che è sicuramente un vantaggio.
Ho tre obiettivi IS EF (16-35 f/4, 70-200 /f.28 II e 100-400 IS II) e i miei test hanno dimostrato che la stabilizzazione dell'immagine interna non fa molta differenza in quanto la stabilizzazione dell'obiettivo negli obiettivi EF è già abbastanza buona a circa 4 stop.
Tuttavia, per gli altri miei obiettivi Canon EF che non sono stabilizzati, inclusi un obiettivo macro da 100 mm f/2,8 e un obiettivo per ritratti da 85 mm f/1,8, è fantastico poterli scattare con velocità dell'otturatore inferiori, se necessario.
Sicuramente non scartare i tuoi obiettivi EF, poiché l'R5 è in grado di dare loro nuova vita. Ho scoperto che posso tenere a mano obiettivi EF non stabilizzati fino a quattro stop più lentamente del solito con il sistema IBIS abilitato. Sei anche a prova di futuro quando e se scegli di acquistare il vetro RF.
Velocità di scoppio
La Canon 6D a cui sono abituato a usare ha una velocità di scatto massima di 4,4 fotogrammi al secondo piuttosto scarsi. Ciò significa che quando tieni premuto il pulsante di scatto, la fotocamera scatterà circa quattro immagini al secondo.
Potrebbe sembrare molto, ma nella fotografia d'azione un secondo è molto tempo e una velocità di scatto lenta può significare che si perdono gli scatti.
Canon EOS 5D Mark IV ha una velocità di scatto di 7,7 fps, che è abbastanza rispettabile.
La EOS R5 ha una velocità di scatto piuttosto impressionante rispetto alla mia 6D e persino alla 5D Mark IV. Può eseguire fino a 12 fotogrammi al secondo con l'otturatore meccanico e 20 fotogrammi al secondo con l'otturatore elettronico.
Quest'ultimo è particolarmente inquietante perché è totalmente silenzioso. Quindi punti la fotocamera verso qualcosa, tieni premuto il pulsante e la tua scheda di memoria inizia a riempirsi molto rapidamente.
Naturalmente, ci sono alcuni avvertimenti a queste velocità di scoppio. Per l'otturatore meccanico, è necessario utilizzare un obiettivo supportato (elenco completo qui) e la batteria LP-E6NH con una carica superiore al 60%. La maggior parte degli obiettivi EF dal 2012 in poi dovrebbe funzionare, ad esempio non ho avuto problemi con il mio 70-200 IS II f/2.8L e 100-400 IS II.
Se utilizzi batterie meno recenti, batterie con una carica inferiore, obiettivi non supportati o funzioni come Wi-Fi abilitate, la velocità di scatto meccanico sarà più lenta. La fotocamera te lo rende chiaro tramite icone colorate diverse. Un "H+" verde sullo schermo di visualizzazione significa che otterrai i 12 fps. Questa icona diventa bianca e perde il "+" se non sono possibili velocità più elevate.
L'otturatore elettronico scatterà quasi sempre a 20 fps, anche se ciò può causare alcuni problemi con soggetti in rapido movimento, quindi dovrai essere selettivo quando scegli di usarlo.
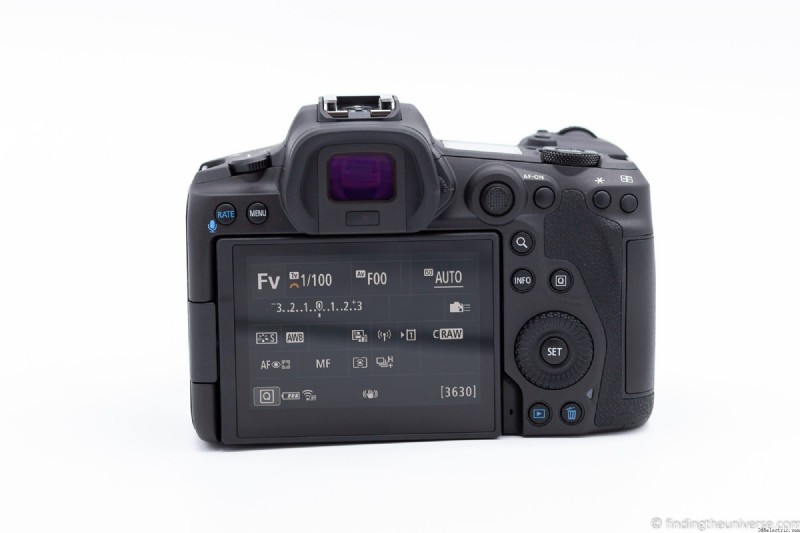
Modalità Fv
Le fotocamere DSLR e mirrorless sono dotate di una gamma di modalità, che vanno dalla modalità "Auto" completamente automatica in cui la fotocamera fa tutto per te, fino alla modalità "Manuale" in cui devi impostare tu stesso diaframma, velocità dell'otturatore e ISO per ottenere la corretta esposizione.
Tra queste modalità ci sono altre modalità parzialmente automatiche. Per molti anni, questi sono stati gli stessi nella maggior parte delle fotocamere. C'è una modalità di priorità dell'apertura, in cui si imposta l'apertura e la fotocamera imposterà la velocità dell'otturatore e l'ISO. C'è una modalità di priorità dell'otturatore, in cui imposti l'otturatore e la fotocamera imposterà l'apertura e l'ISO.
Personalmente, ho sempre fatto la maggior parte delle mie riprese in modalità a priorità di diaframma o completamente manuale. Priorità di apertura significa che posso impostare l'apertura per controllare la profondità di campo, che è uno strumento compositivo chiave per la fotografia che mi piace fare. Se sto facendo fotografie d'azione rapide, di solito scatto con la priorità dei tempi o manualmente.
La EOS R5 ha una modalità nuova per me, nota come "Fv", o modalità valore flessibile. È stato introdotto per la prima volta con la fotocamera mirrorless EOS R ed è presente anche su R5 e R6.
La modalità Fv tenta di offrire al fotografo il meglio di tutti i mondi. Fondamentalmente, puoi lasciare che la fotocamera sia completamente automatica e selezionare per te apertura, velocità dell'otturatore e valori ISO, oppure puoi scegliere quale di questi tre desideri regolare. In questa modalità puoi anche utilizzare la compensazione dell'esposizione.
Questa modalità è davvero utile e, con un po' di pratica, sta rapidamente diventando la mia opzione preferita. Significa che posso essenzialmente scattare con la fotocamera nell'equivalente della modalità priorità diaframma, ma con la possibilità di ignorare la velocità dell'otturatore e le impostazioni ISO in base allo scatto, se lo desidero, senza dover passare alla modalità manuale.
Con la ghiera di controllo aggiuntiva disponibile sugli obiettivi RF, che può essere assegnata per modificare la velocità dell'otturatore, ad esempio, posso regolare rapidamente la velocità dell'otturatore e il diaframma o lasciare che sia la fotocamera a decidere. È una modalità davvero flessibile, da cui immagino derivi il nome!
Compatibilità obiettivo
Per la maggior parte dei fotografi professionisti, il costo della loro collezione di obiettivi è generalmente superiore al costo dei loro corpi macchina. Cambiare marchio significa investire in un nuovo set di obiettivi, e questo è stato uno dei motivi principali per cui mi sono affidato a Canon per così tanto tempo.
Mentre molti dei miei colleghi stavano abbandonando la nave e si trasferivano a marchi come Sony, ho continuato a sperare che un giorno Canon avrebbe rilasciato un sistema mirrorless che mi avrebbe permesso di continuare a utilizzare i miei obiettivi esistenti che ho imparato ad amare, fornendo allo stesso tempo sufficienti aggiornamenti per far valere l'investimento.
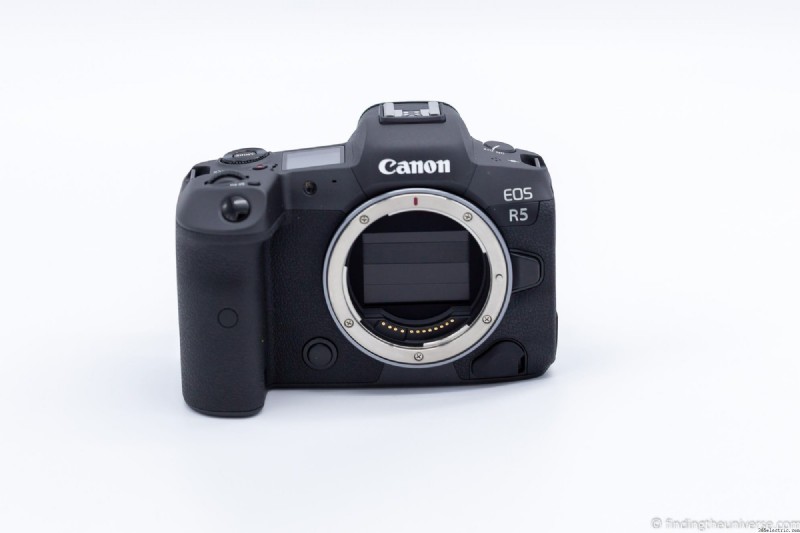
Canon EOS R5 utilizza un nuovo innesto, introdotto per la prima volta su Canon EOS R, l'innesto RF. L'innesto dell'obiettivo è ciò a cui si attacca l'obiettivo sulla fotocamera e, oltre ad essere un attacco meccanico, è anche il punto in cui avviene la comunicazione elettronica tra l'obiettivo e il corpo.
Quindi non puoi semplicemente prendere un obiettivo EF o EF-S e collegarlo direttamente a una fotocamera con attacco RF come la R5. Hai bisogno di un adattatore per obiettivi, in particolare questo adattatore per innesto RF.
Tradizionalmente, gli adattatori per obiettivi hanno una reputazione un po' negativa. Questo di solito è perché sono più comunemente usati per adattare obiettivi da un sistema di fotocamere a un altro sistema di fotocamere, ad esempio da una fotocamera Canon a una fotocamera Sony. Questo di solito ha lo svantaggio che l'obiettivo finisce per funzionare più lentamente a causa dell'interfaccia elettronica che deve tradurre da una marca all'altra.
Inoltre, se è presente del vetro all'interno dell'adattatore dell'obiettivo, ciò può ridurre la qualità dell'immagine. Pertanto, molti fotografi sono diffidenti nell'utilizzare qualsiasi forma di adattatore.
Posso confermare che l'adattatore per innesto Canon EF-EOS R non presenta questi problemi. In realtà è solo un passaggio elettronico per l'innesto dell'obiettivo da EF a RF, altrimenti è solo aria vuota che allontana gli obiettivi EF dal sensore per emulare lo spazio occupato dallo specchio in una DSLR.
Le prestazioni dei miei obiettivi EF sulla mia R5 sono state stellari. In effetti, direi che è anche meglio che su 6D, perché ottieni i vantaggi di quel sistema di messa a fuoco automatica fulmineo e della stabilizzazione dell'immagine interna.
Naturalmente, sono supportati tutti gli obiettivi EF e persino EF-S di Canon. Nota che gli obiettivi EF-S produrranno immagini ritagliate come se fossero su un sensore APS-C. Ciò significa che hai accesso a una vasta libreria di obiettivi poiché puoi utilizzare gli obiettivi EF con l'aiuto dell'adattatore e gli obiettivi RF.
Inoltre, funzioneranno anche obiettivi di terze parti come Sigma e Tamron progettati per l'innesto EF o EF-S. Non li ho provati perché non ho obiettivi di terze parti, ma ho sentito parlare di altri fotografi che li usano su R5 e R6 senza problemi.
In generale, se sei preoccupato che i tuoi obiettivi EF non funzionino correttamente con l'R5 e l'innesto, non pensare che funzionino tutti bene.
Touch screen mobile
Le fotocamere di fascia alta Canon, per molto tempo, non hanno avuto uno schermo che si muove. Il motivo principale addotto per questo è che è più difficile sigillare uno schermo che si apre.
Quindi la 6D e la 5D Mark IV hanno entrambi uno schermo posteriore statico. Poiché sono progettati principalmente per essere utilizzati con il mirino, questa non è stata una grande omissione.
Tuttavia, con una fotocamera mirrorless, l'esperienza è la stessa tra il mirino e lo schermo posteriore in termini di ciò che vedi. Entrambi sono display elettronici. Pertanto, Canon ha finalmente implementato uno schermo che si apre, il che aumenta enormemente l'usabilità dello schermo posteriore. È anche completamente abilitato al tocco, il che semplifica lo scorrimento dei menu (anche se puoi continuare a utilizzare i pulsanti se preferisci).
Uno schermo ribaltabile che ruota è meraviglioso per molte ragioni. Per le riprese dal basso, puoi capovolgere lo schermo e guardarlo in basso senza dover contorcere il tuo corpo per vedere cosa stai facendo. In mezzo alla folla, puoi tenere la fotocamera sopra la testa e capovolgere lo schermo in modo che sia rivolto verso il basso come te. Quando scatti su un treppiede che non è abbastanza alto, come molti treppiedi da viaggio, puoi capovolgere lo schermo e guardare in basso invece di chinarti e romperti la schiena.
Il touchscreen aggiunge anche alcune funzioni davvero utili. Oltre alla suddetta opzione per selezionare un punto AF quando guardi attraverso il mirino trascinando il pollice sullo schermo, puoi semplicemente toccare un punto sullo schermo in modalità normale per selezionare un punto AF.
Un touch screen in movimento forse non è un motivo sufficiente per passare a questa fotocamera da qualcosa come la 6D, ma è sicuramente una caratteristica molto interessante da avere.
Mirino elettronico
Venendo da una DSLR, uno dei più grandi cambiamenti è il passaggio da un mirino ottico a un mirino elettronico. La mancanza di uno specchio in una fotocamera mirrorless significa che invece di poter guardare direttamente fuori dall'obiettivo come in una DSLR, devi guardare ciò che vede il sensore.
L'R5 non è la mia prima esperienza con un mirino elettronico. Li ho usati su una varietà di fotocamere, da una Sony NEX 6 fino a fotocamere mirrorless di Panasonic e altre.
Nella mia esperienza fino ad oggi, i mirini elettronici possono essere molto incostanti. Anche se è sicuramente bello ricevere feedback in tempo reale sull'aspetto effettivo della tua immagine, la risoluzione e la qualità dell'immagine possono sicuramente essere carenti.
Sono lieto di segnalare che questo non è assolutamente il caso dell'R5. Il mirino elettronico è grande e luminoso grazie alla tecnologia OLED che lo alimenta e i 5,76 milioni di punti significano che puoi vedere tutti i dettagli che devi vedere.
Puoi anche scegliere tra una frequenza di aggiornamento di 60 Hz e una frequenza di aggiornamento di 120 Hz. Quest'ultimo offre risultati più fluidi durante la panoramica, il che è molto utile per la fotografia naturalistica o per l'azione rapida, ma a scapito di una durata della batteria molto ridotta.
Mi piace anche il modo in cui posso scegliere di sovrapporre le informazioni sul mirino elettronico come un istogramma in tempo reale o una livella elettronica, nonché le impostazioni della fotocamera. Puoi configurare ciò che viene visualizzato nel mirino e persino salvare i preset tra i quali puoi passare da uno scenario all'altro, dal nulla, a più informazioni di quelle di cui avresti mai bisogno.
Il mirino elettronico si accende solo quando lo tieni d'occhio, per risparmiare la batteria. Vale la pena notare che l'utilizzo del mirino elettronico consuma più batteria rispetto all'utilizzo dello schermo posteriore, cosa che tratterò più avanti in questa recensione.
Compatibilità della batteria
Come notato sopra, la durata della batteria dell'R5 non è esattamente spettacolare. Tuttavia, questo è compensato dal fatto che è compatibile con le vecchie batterie Canon. Quindi, sebbene Canon sia dotata di una batteria LP-E6NH di potenza superiore, funzionerà comunque con le vecchie batterie LP-E6N e persino LP-E6.
Ho accumulato una collezione di queste batterie nel corso degli anni ed è bello poterle ancora usare in un pizzico. Dato il prezzo al dettaglio delle batterie LP-E6NH, anche questo mi fa risparmiare parecchio, perché hai assolutamente bisogno di batterie di riserva con questa fotocamera per superare una giornata di riprese.
Tuttavia, ci sono alcuni svantaggi nell'utilizzo di queste batterie più vecchie. In primo luogo, e soprattutto, è che potresti non ottenere le prestazioni di scatto a raffica più veloci in assoluto da loro. Quindi, se stai scattando in una situazione in cui hai bisogno di velocità di scatto elevate, assicurati di utilizzare una batteria LP-E6NH completamente carica.
In secondo luogo, le batterie più vecchie hanno una capacità leggermente inferiore rispetto alla batteria LP-E6NH, quindi non dureranno a lungo. Ma se come me ne hai una collezione che non ti dispiace portare con te, almeno avrai alcune opzioni di ripiego.
Personalmente, ho scaricato tre batterie in un solo giorno di riprese principalmente di animali selvatici, ma questo utilizza la fotocamera in modo abbastanza intensivo e acquisendo oltre 1.000 immagini, nonché molto uso dello schermo per osservare la fauna selvatica. Per la fotografia di paesaggi, la batteria dura un po' più a lungo.
Strumenti integrati
Sulla mia Canon 6D, ho eseguito un firmware di terze parti personalizzato chiamato Magic Lantern. Ciò ha aggiunto una serie di funzionalità, in particolare per me un intervallometro e un timer per la lampadina. Questo mi ha evitato di dover utilizzare un hardware esterno per queste funzionalità, cosa in meno da portare con me.
Per fortuna, Canon si è resa conto che cose come un intervallometro integrato e un timer lampadina dovrebbero essere solo funzionalità incluse nel software di una fotocamera e queste sono incluse nella R5. Supporta anche il focus stacking e le immagini HDR (inclusa l'opzione per salvare i file originali).
Puoi anche girare video timelapse, sia con l'intervallometro integrato sia con uno strumento che crea il video per te dai fotogrammi. Ciò ti consente di creare facilmente video timelapse fino a 8K con il minimo sforzo e funziona molto bene nei miei test limitati.
Un'altra caratteristica divertente che rende il video 8K utile anche per qualcuno come me che non fa davvero video è che puoi inquadrare fotogrammi JPEG ad alta risoluzione (35,4 MP) da clip video 8K. Questo può essere un modo pratico per ottenere un tiro che altrimenti avresti mancato o come alternativa all'intervallometro per determinate situazioni.
Sebbene queste siano cose che potrebbero non essere estremamente importanti individualmente, sicuramente aumentano il valore della fotocamera.
Copertura del sensore
Uno dei problemi con un sistema di fotocamere mirrorless rispetto a un sistema DSLR è che la mancanza di uno specchio davanti al sensore lo rende molto più suscettibile alla polvere. Ogni volta che si cambia l'obiettivo di una fotocamera, c'è il rischio che piccole particelle di polvere entrino nella fotocamera e si depositino sul sensore.
Ciò introduce difetti nelle immagini e, sebbene di solito possano essere facilmente rimossi dal software, è meglio cercare di evitarli in primo luogo.
La soluzione di Canon è avere una piccola copertura che si ribalta sul sensore quando la fotocamera è spenta, che puoi abilitare o disabilitare nelle opzioni del menu. Questo aiuta a evitare che la polvere penetri sul sensore ed è una di quelle soluzioni davvero ovvie che ti fa chiedere perché altri marchi non hanno fatto lo stesso.
Una cosa da tenere presente se si proviene da una DSLR è che è necessario abituarsi a mettere il copriobiettivo sull'obiettivo quando non lo si utilizza. Su una DSLR, la luce dell'obiettivo viene riflessa attraverso il mirino. Su una fotocamera mirrorless, la luce colpisce sempre il sensore o, nel caso dell'R5, il coperchio del sensore. This is quite a delicate bit of kit, and direct sunlight focused through a powerful lens can damage it over time.
So putting your lens cap on is definitely a habit to get back into if, like me, you’d fallen out of it.
CRAW Format
One of my concerns with moving to a higher pixel count camera was the additional file storage requirements of these larger files. The 20MP sensor on my 6D produced RAW image files of around 20MB – 25MB.
The 45MP sensor on the R5 captures RAW files that are around 45MB -50MB in size. Over time this definitely adds up, and whilst storage is cheap, that doesn’t mean I want to keep buying hard drives and paying extra for cloud storage.
Canon’s solution is a new compressed RAW format, known as CRAW. This still offers the 45MP resolution, but it compresses the image files. This is a lossy compression, so in theory some image quality is lost. The resulting files are around 22MB – 30MB.
In my testing, I can tell no difference at all between the normal RAW files and the CRAW files. This is the same experience reported in more thorough tests others have done on CRAW files. So I have had no hesitation in adopting this lower file size format.
Of course, I’d recommend that you do your own comparison tests for your own usage scenarios before adopting the format wholly.

Customisation
The EOS R5 is a hugely versatile camera which works well in a range of scenarios, from landscape photography through to event, portrait, action, and wildlife photography. It’s also an incredibly capable video camera.
All these different use cases mean that the camera appeals to a wide range of photographers, all of whom have their own preferences for how a camera is set up.
Canon has long recognised that photographers have different needs, and their cameras have excellent customisation options as a result.
To start with, nearly every button on the R5 can have its function changed. So you can set up a button to trigger eye focus tracking, and one for centre point focus. You can switch dial directions for dialling in settings like aperture, ISO, and shutter speed, and you can change which dials change which setting.
If you don’t use video often, you can change the video record button to something more useful (in my case, toggling between servo AF and one-shot AF). I have my DOF button set up for centre point focus, so I can have the camera in eye tracking mode but override that for specific situations.
Beyond the buttons, you can also customise a whole range of other features. For example, you can enable or disable focus modes and even camera modes. If you never use Auto for example, you can remove that from the mode dial so you don’t have to keep skipping past it. You can also set up custom menus in the menu system for fast access to key features.
Finally, there are three custom shooting modes on the mode dial, and you can even set up each of these so the buttons in each custom mode do something different. The potential for customisation is huge.
It does take a bit of time to come up with a setup that works for you, and it might take a bit of tweaking before you land on a final configuration, but it is wonderful to have the choice to set the camera up in a way that works for you.
Image Quality
Obviously I can’t wrap up my thoughts on the great things about the R5 without mentioning image quality. I find the image quality, dynamic range, and ISO performance on this camera to be fantastic. However, at this price point that should be a given rather than a positive.
I honestly feel that camera technology has reached the point that pretty much every high-end full frame camera is going to produce fantastic images. If you want to pixel peep and quibble over a stop of dynamic range here or there, there are some great resources for that level of detail.
For me, the main thing is that the camera produces fantastic images in a range of conditions, that the noise performance at high ISO is good thanks to the dual gain sensor, and that the files it produces have room for lots of manoeuvrability in post processing. The R5 delivers fully on all those counts based on my experience. It is a camera I can rely on to do the job of capturing the images I want
Cons of the EOS R5
Coming from the EOS 6D, a camera which was released in 2012, you might think I would find little to fault with a camera that was released eight years later. In general you would be right, but there are definitely a few things I have found aren’t that great about the R5. Here they are.
No built-in GPS
This is definitely a feature that I appreciate is a bit niche. However, as a travel photographer, having my photos GPS tagged is something I personally find incredibly useful, and having a built-in GPS that tagged my photos with location information is something I used every day on my 6D.
Now, a built-in GPS obviously has downsides. It eats into the battery, and obviously it adds to the weight and cost of the camera. So I can sort of understand why Canon would leave it out as I suspect it’s a bit of a niche feature.
But this is a review from my perspective, and I really miss the convenience of the feature.
Now, there are some workarounds of course for those, like me, who really loves to have their photos GPS tagged.
First, it’s possible to connect the camera to my smartphone using either a low energy Bluetooth connection or a WiFi connection, and pull location data from the smartphone which is added to images. This mostly works, but I do have to load the app on the smartphone to make sure it’s all connected, so it’s another thing to remember.
When the camera goes to sleep, sometimes the smartphone app closes, despite my best efforts to configure the phone not to do that. This loses the GPS connection and means I have to start over with launching the app.
Another option I could try would be to pick up Canon’s external GPS tagging unit, the GP-E2. This interfaces with the camera via the flash hot shoe and would solve the problem. But it’s another thing to buy and remember to pack, charge, and turn-on.
In general, the smartphone app seems to be working OK for me, so I will stick with that. It’s just another thing to have to remember.
Battery Life
That beautiful rear screen and electronic viewfinder are very impressive, but powering them definitely requires a significant amount of power. Add in in-body image stabilisation and the energy required to juice up that bogglingly fast autofocus system, and you are looking at a camera which eats batteries for breakfast.
This is definitely an area where rivals like Sony have the edge. The Sony a9 II for example has a battery life rating of 690 shots. The 6D I am used to has a battery life rating of a staggering 980 shots.
The EOS R5 is rated for 490 shots if you use the rear display, and only 320 shots if you use the viewfinder. And that’s only if you are using those in power saving modes. If you ramp up the refresh rate to its full performance, which you’ll want to do for fast moving subjects, the camera will punish you by dropping to a battery life of 320 on the rear screen and only 220 if you use the viewfinder. Honestly, that is awful.
Of course, real world performance varies. If you are taking a lot of photos in sequence, say burst shots of wildlife photography, you’ll likely get many more photos out of it than that. However, get used to carrying more spare batteries if you are switching from say a DSLR.
With my 6D I’d easily be able to do a day or two or photography on one battery charge. With the R5, I’m yet to finish a full day without having to swap batteries at least once, and sometimes two or three times.
The bad news is that the new battery, the LP-E6NH, is rather expensive. The good news is that the R5 is backward compatible with the previous generations of Canon batteries, including the LP-E6N and even the LP-E6. So all my 6D batteries still work.
There are some caveats to using older batteries. They don’t last as long, and the super-fast burst speeds aren’t available. However, as I personally don’t need those ultra-fast burst speeds very often, my old batteries still work fine.
Learning Curve
You might think that having used Canon cameras for many years, that I’d be able to just pick up the R5 and start using it without trouble.
While that’s true to a point, and much of the interface is similar, there are quite a few differences between this camera and my previous DSLR cameras. If I had been coming from something like the EOS R, or even the 5D range, I suspect it might have felt more intuitive.
As it is, some of the buttons are not quite where I expect them to be, so I am having to retrain my muscle memory. In addition, whilst the camera is highly customisable, many of the buttons I got used to on my previous cameras like single-button access to settings for things like ISO, drive mode etc. aren’t there.
Instead, I have to either customise existing buttons, use the touch screen interface, or get used to pressing a sequence of buttons. It didn’t take long for me to get used to it, but it certainly wasn’t a question of picking it up and being able to get the most out of it straight away.
This isn’t a major issue of course. Every camera has a slightly different way of doing things, and I suspect this will soon become second nature. However, for me, coming from a 6D, there has definitely been a learning curve in terms of getting to grips with quickly accessing key functions on the fly.
If you purchase this camera, or any new camera really, set some time aside to practice with it before heading on an important shoot. With the R5 in particular, you will want to spend time getting used to the various autofocus modes, and learning how to override them to select a focus point if necessary.
Price
There’s no denying it, the Canon EOS R5 is an expensive camera. The retail price of the camera is $3899 / £4299, and right now prices are pretty similar across the main online camera sellers like Amazon.com, B&H Photo, Adorama and Wex Photo Video.
It has been out for long enough that you might find a second hand deal if you check the popular used camera stores like KEH and MPB, but the price difference might not be that great. However, if you trade in some older gear, you might get a good deal.
As a stills photographer, I am definitely paying for video features that I’m rarely likely to use. 8K video support in particular makes for nice headlines, but it’s not a feature I personally need.
It’s also worth remembering that you’re just buying a camera body. If you want some lenses to go with that camera, you’re looking at quite a bit more expenditure. A high megapixel camera like the R5 demands high quality glass, and good quality lenses tend to be expensive as well.
The good news is that all EF and EF-S lenses will also work with the camera with an adaptor, which means that if you already have a good collection of lenses, you don’t necessarily need to buy new lenses.
Over time the price of this camera will likely come down and may be more affordable for more photographers, but it will likely remain at a higher price point for the next year or two given its lack of competition in the marketplace.
In the meantime, the EOS R6 is also an excellent camera which offers the majority of the features of the R5 at a much lower price point.
To give you an idea of the two cameras and how they compare, here’s an overview of the key differences between the EOS R5 and the EOS R6.
R5 vs R6 Key Differences.
- Sensor: The R5 has a 45MP sensor, R6 has a 20MP sensor
- Image Stabilisation: Both cameras offer the same five axis IS system, good for up to 8 stops
- Burst mode: Both cameras offer up to 12fps with mechanical shutter and 20fps with the electronic shutter. The R6 can maintain these burst speeds for longer due to the smaller file sizes
- Autofocus: The camera’s share the same dual pixel AF system with eye tracking autofocus
- Storage: The R5 has a CF Express slot and an SD card slot. The R6 has two SD card slots.
- Weather Sealing and Build :Both cameras are weather sealed, with the R5 offering slightly better weather sealing than the R6. In addition, the R5 has a more rugged all magnesium body that makes it a bit tougher and slightly heavier than the R6.
- Viewfinder and LCD screen: The R5 has a 5.76M dot EVF and a 3.2″ 2.1M dot rear LCD. The R6 has a 3.68M dot EVF and a 3″ 1.68m dot rear screen
- Video :The R5 supports up to 8K video, whilst the R6 tops out at 4K. The R5 also has more video exposure controls.
- Top Screen: The R5 has a top information screen that the R6 is missing
- Battery life: The R5 is rated for 320 shots (viewfinder) and 490 shots (rear screen). The R6 is rated for 380 shots (viewfinder) and 510 shots (rear screen).
- Connectivity :The R5 offers 2.4Ghz and 5Ghz connectivity as well as Bluetooth. The R6 only has 2.4Ghz and Bluetooth support.
- Dual Pixel Raw: Only the Canon R5 offers dual pixel RAW, which allows the camera to capture depth information and adds some additional post processing options on images, including adjusting micro focus and relighting portraits.
To be honest, the R6 is a fantastic camera. Canon has been known in the past to reduce the features of their lower priced cameras in order to differentiate them, but the standout features of the R5 like image stabilization and the autofocus system are exactly the same between the cameras. In some ways (battery life, low-light autofocus, burst depth), the R6 even outperforms the R5.
Considerations When Buying the Canon EOS R5
There are a few things to think about when considering buying the Canon EOS R5.
First, the high megapixel count. This certainly has its advantages, particularly if you plan on printing your work very large or if you tend to crop quite a bit.
However, a high megapixel sensor also has disadvantages. These include larger file sizes, and the fact that at higher megapixels, any movement is going to be exacerbated. That might be subject movement or movement due to hand shake. So you will want to get used to shooting at higher shutter speeds than you are currently using if you’re coming from a lower megapixel camera.
Traditionally, higher megapixel sensors have also tended to perform worse in low light and at higher ISOs. However I can confirm that this is definitely not the case with the R5, which performs admirably in low light. It produces perfectly usable images all the way up to 12800 ISO in my experience, and you can even push to higher ISOs if you really must.
Next, the size and weight. Many users thinking about switching to mirrorless from a DSLR system will likely have a reduced size and weight compared to a DSLR as a reason. And this can often be the case. However, whilst the EOS R5 is smaller and lighter than something like the EOS 5D Mark IV, it is by no means a small camera.
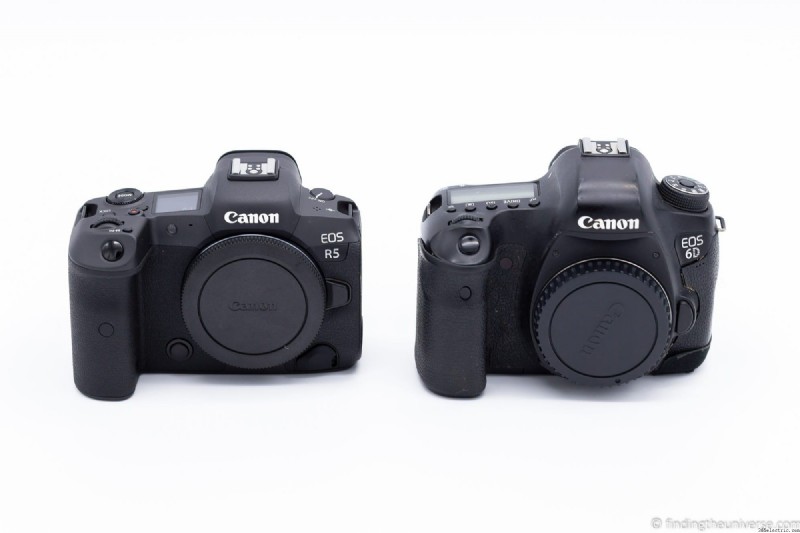
Here are some comparisons against my Canon EOS 6D, with the R5 on the left and the 6D on the right. As you can see, it’s a bit smaller, but it’s not a massive difference.
In terms of weight, the EOS R5 with card and battery comes in at 738g / 26oz. By comparison, my 6D is 770g / 27.1oz. However, as I have to use the EF-RF adaptor, which weight 110g (3.88oz), overall the R5 ends up weighing a bit more.

The R5 is also marginally larger and heavier than many other full frame mirrorless cameras, including the Sony a9 II and the Sony Alpha a7R IV.
That said, once you add a decent lens to any full frame mirrorless camera, you’re really not going to notice a few ounces difference in body weight. Personally I love the size and feel of the R5. It doesn’t feel cramped in my hands and I can easily get to all the buttons.
Is the Canon EOS R5 Worth It?
The short answer to this question is yes (for me anyway). The longer answer is, it depends.
I would say that if you are looking for a camera that can handle pretty much every type of photography, this is it. I waited for a long time for Canon to release a camera that was compelling enough to justify an upgrade from my 6D, and I firmly believe the R5 is it. I’d also say it’s worth the upgrade from the 5D Mark IV, although this will of course depend on what you are shooting and whether the features are worth it for you.
Even though I won’t be using the 8K video features for the most part, I still firmly believe the R5 was worth the price. The autofocus, all round performance, and compatibility with all my existing lenses means it was definitely worth it for me.
If you make a living from your photography, this is a fantastic workhorse camera that should last you for years to come. It has a wonderful range of features, and delivers excellent images. This is a camera that will allow you to get on with the art of photography, and give you all the tools you need to get the results you want.
If you are just getting into photography or don’t need the higher megapixel count or 8K video, then I would suggest that the Canon EOS R6 would also be superb. This has nearly all the same features as the R5, but with a 20MP sensor and a slightly less weather sealed body. It retains the same blistering autofocus system and I’d suggest most users will be more than happy with it. It also comes at a much lower price tag!
If you’re trying to decide between the Canon EOS R5 and EOS R6 and wondering about the real-world difference between 45MP and 20MP, it’s not as great as you might think. Here is the same image shot from the same location with the same lens on my 6D and R5 to show you the difference.

As you can see, the 45MP sensor does give you a bit more latitude when it comes to really cropping in, and the image at the equivalent zoom is obviously sharper on the R5. Of course, this isn’t an apples to apples comparison, as I’m comparing an 8 year old sensor to something brand new.
I’d also suggest that it’s pretty rare to be zooming to 100% like this, and you can get around these limitations with a longer lens or simply moving closer to the subject where possible. That said, it is definitely nice to have the latitude to crop more if absolutely necessary.
Alternatives to the Canon EOS R5
Depending on what you are looking for in a camera, there are a few alternatives to the Canon EOS R5 on the market today. These are all full frame mirrorless cameras. The main contenders are:
- Sony Alpha 1 (MSRP $6498)
- Sony A7r IV (MSRP $3499)
- Nikon Z7 II ($2997)
- Panasonic S1R (MSRP $3697)
- Canon EOS R6 (MSRP $2499)
I’ll be honest, I don’t think anyone buying one of the above cameras is going to be disappointed. If you are starting fresh with no existing lenses, then my suggestion is to decide which camera system has the lenses you are interested in and the features you want.
If you have an existing lens collection or system you are used to, it will definitely be easier to upgrade inside the same camera system, and in many cases you might be able to keep using your existing lenses.
If you are a Canon user with a good collection of glass, and you don’t need the higher megapixel count of the R5, then I would suggest the Canon EOS R6 would be a fantastic choice.
It has nearly all the strengths of the R5, including the spectacular autofocus system and in body image stabilisation, but at a much more reasonable price point.
Where to Buy the Canon EOS R5
You have a number of options for where to buy the Canon EOS R5. The best place and where it is available is going to depend on where you live. Supplies were limited in 2020, but it is now available in many camera shops around the world.
For online purchases, I’d suggest checking Amazon.com, B&H Photo and Adorama. You might also check out used deals on KEH. These are particularly suited for those living in the USA, but some will also ship globally.
If you are in the UK, I’d also recommend checking out Wex Photo Video. This is where I purchased my EOS R5 body. I purchased my RF lens adapter mount on B&H as it was not available in the UK or elsewhere in Europe at the time.
When the camera originally launched there were stock issues but as of April 2021 these appear to have been resolved and availability is now pretty good both online and in shops.
I’d always recommend purchasing a camera like this from an authorised retailer with a good warranty and support process in place.
Summary and Final Score
Overall I’m going to give the Canon EOS R5 4.8/5. It is a fantastic camera that works well in the majority of scenarios, making it a real work horse for photographers of all genres.
In an ideal world it wouldn’t be quite so expensive, and gimmicks like 8K video which push up the price but aren’t of value to the majority of users could have been left off the spec sheet.
But overall, this is an excellent bit of equipment that should last you for years to come. If you are a Canon user who has been waiting to make the move from a DSLR to mirrorless, this is the camera that should convince you now is the time to do so.
Further Reading
That just about wraps up my Canon EOS R5 review. Before you go, I wanted to share some more resources that you might find useful in your photography journey.
- We have a guide to how to use a compact camera, how to use a DSLR camera, and how to use a mirrorless camera. We also have a guide to how a DSLR works
- Knowing how to compose a great photo is a key photography skill. See our guide to composition in photography for lots of tips on this subject
- We have a guide to what depth of field is and when you would want to use it.
- We are big fans of getting the most out of your digital photo files, and do to that you will need to shoot in RAW. See our guide to RAW in photography to understand what RAW is, and why you should switch to RAW as soon as you can if your camera supports it.
- We have a guide to the best photo editing applications which includes both paid and free options
- You’re going to need something to run your photo editing software on. See our guide to the best laptops for photo editing for some tips on what to look for.
- Color accuracy is important for photography – see our guide to monitor calibration to ensure your screen is set up correctly.
- If you’re looking for a great gift for a photography loving friend or family member (or yourself!), take a look at our photography gift guide,
- If you’re in the market for a new camera, we have a detailed guide to the best travel cameras, as well as specific guides for the best cameras for hiking and backpacking, the best compact camera, best bridge camera, best mirrorless camera and best DSLR camera. We also have a guide to the best camera lenses.
- If you want a camera or lens, but the prices are a bit high, see our guide to where to buy used cameras and camera gear for some budget savings options.
- We have a guide to why you need a tripod, a guide to choosing a travel tripod, and a round-up of our favourite travel tripods
- If you’re looking for more advice on specific tips for different scenarios, we also have you covered. See our guides to Northern Lights photography, long exposure photography, fireworks photography, tips for taking photos of stars, taking photos in snow, and cold weather photography.
- Finally, if you want to take your photography to the next level, check out my online photography course!
And that’s it! As always we’re always open to hearing your feedback and answering your questions.
If you’ve tried out this camera, would love to hear your own thoughts below! If you have any questions about the Canon EOS R5 or about selecting a mirrorless camera in general, just pop them in the comments below and we’ll get back to you as soon as we can.