12 Linee guida per la risoluzione dei problemi di Hoover WindTunnel – Video inclusi
Quando eri abituato a Hoover WindTunnel, a volte non funziona bene o smette di funzionare. Oggi parleremo della risoluzione dei problemi di Hoover WindTunnel. Bene, prima di procedere, devo tornare al passato.
Amo il mio cane – un laboratorio di cioccolato – ma negli ultimi tempi la casa stava iniziando a maleodorare. Forse avevo bisogno di un aspirapolvere diverso per sostituire l'aspirapolvere a cestello.

Essendo di un'età particolare ho avuto molti anni di esperienza nelle pulizie domestiche. Sono cresciuto con un aspirapolvere a cestello e ho usato un aspirapolvere a cestello nella mia vita principale. No, non lo stesso, ne avevo di più.
Odiavo l'odore di scarico del mio attuale aspirapolvere anche se cambio la borsa ogni volta e mi chiedevo quanto bene stesse raccogliendo i peli degli animali domestici.
Ho fatto una piccola ricerca su Google, controllato con vari esperti di recensioni e ho trovato il miglior aspirapolvere a meno di $ 100.
E – questo modello Hoover Windtunnel è venuto fuori come un salvatore e non troppo prezzo. Quindi, anche se immagino che mettere dei soldi decenti per un buon elettrodomestico di solito non sia una cattiva strategia.
Questo Hoover WindTunnel ha pulito le mie coperte e i miei tappeti come se non fossero stati lavati da secoli e durante la notte la mia casa ha avuto un odore migliore. I miei tappetini erano più luminosi ed erano piacevoli. Davvero – ha sollevato la massa. Sono felice, per non dire altro, e sono disposto a esprimere le sue cose cattive finché continua a pulire la mia casa.
Quando usavi Hoover WindTunnel, a volte non funziona bene o smette di funzionare.
Oggi risolveremo questo problema.
Le 12 linee guida principali
Questo è uno dei problemi più comuni di Hoover WindTunnel. Le ragioni del problema discusso di seguito.
Controlla l'intasamento
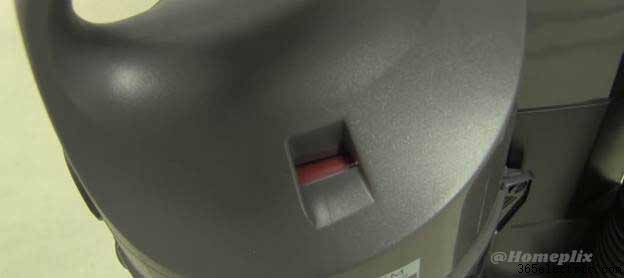
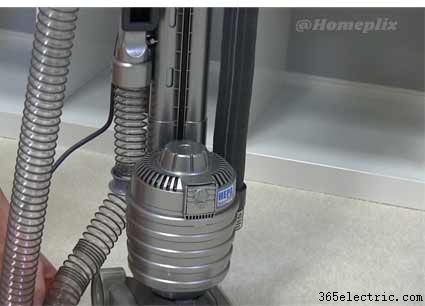
Per prima cosa controlla la spia delle prestazioni, quando diventa rossa di solito significa che c'è qualcosa che ostruisce il tuo aspirapolvere.
Quindi, è un intasamento che causa lo spegnimento dell'aspirapolvere.
Rimuovi il tubo da entrambe le estremità e controlla tutto. Prendi un manico di scopa puliscilo con un bastoncino per eliminare tutto ciò che potrebbe essere bloccato.
Quindi rimuovere il cappuccio dalla bocchetta e controllare il tubo inferiore.
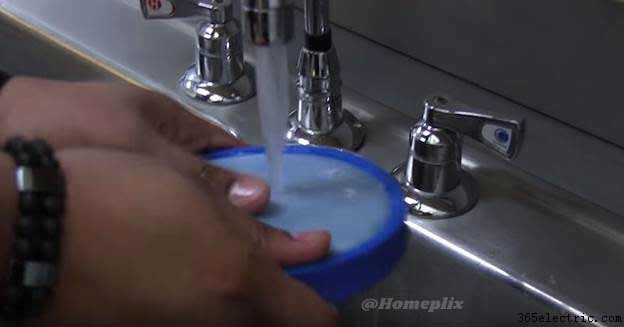
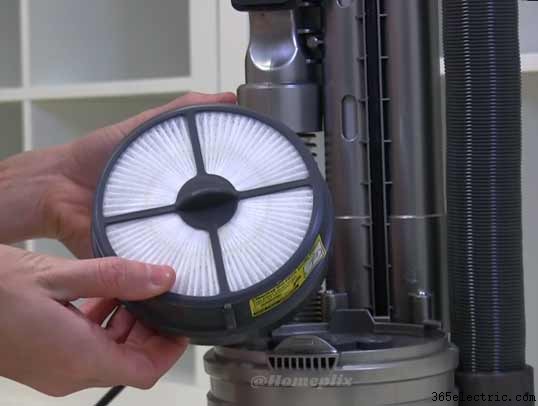
Se non ha funzionato correttamente, potrebbe essere un filtro intasato per verificarlo rimuovi la coppa dello sporco e solleva il filtro.
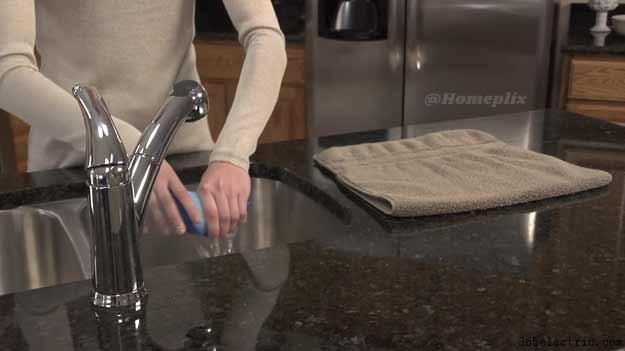
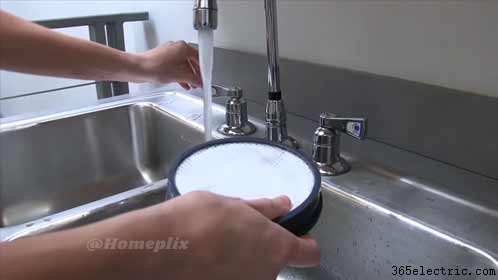
Devi pulire la sua polvere e risciacquare per uno o due minuti sotto l'acqua tiepida e dovrai lasciarlo asciugare per un'intera giornata.
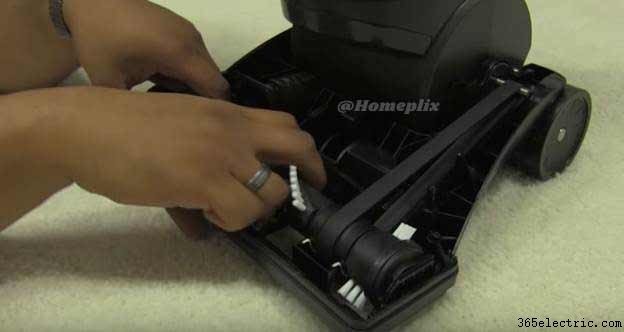
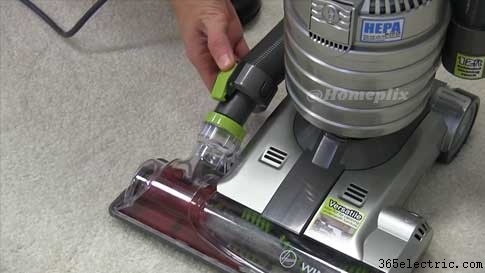
Controlla il rullo della spazzola
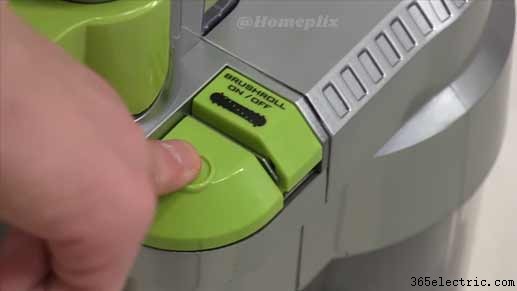
Controlla il rotolo di spazzole del tuo WindTunnel . Se il tuo pennello non gira, ricontrolla la modalità di commutazione per assicurarti che non sia la modalità solo inizio.
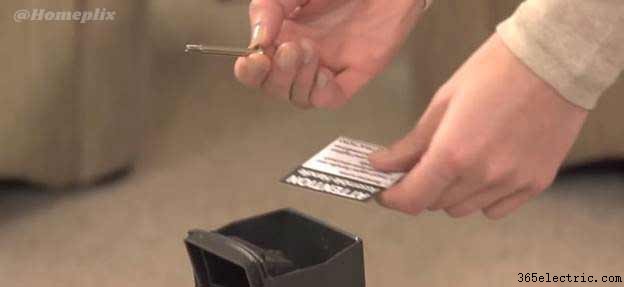
Se c'è qualche blocco o capelli, prendi un coltello per tagliare lungo questo rotolo di spazzola e togli tutti i capelli extra da una forma.
Puoi trovarlo facile da fare, devi solo togliere le viti della piastra per estrarre la piastra dalla macchina e sostituirla al meglio. Questo è tutto ciò che devi fare per la manutenzione.
Puoi trovare questa cintura nella maggior parte dei posti e questo dovrebbe risolvere il tuo problema.
La maggior parte dei casi di una barra della spazzola inceppata è facile da pulire, devi semplicemente estrarre i detriti dalla barra della spazzola.
Ma in alcuni vuoti, questo metodo non funziona correttamente. Se devi eliminare un blocco problematico come la barra delle spazzole Dyson che non gira, puoi estrarre facilmente la barra delle spazzole dall'alloggiamento, per una rapida manutenzione.
Pulizia del filtro
WindTunnel ha due filtri. Il filtro principale dovrebbe essere pulito ogni due mesi secondo necessità.
Infine, se i problemi persistono, controlla il filtro HEPA estraendolo e se il filtro è molto sporco o usurato, dovresti pulirlo.
Puoi ordinare un filtro sostitutivo per circa $ 10 sul sito Web ufficiale di Hoovers, puoi trovarlo su Amazon.
Se hai altri problemi con il tuo aspirapolvere, dovresti chiamare il servizio clienti. Hai una garanzia limitata di 2 anni su questa macchina.
Ecco una soluzione semplice, quando il tuo WindTunnel perde potenza di aspirazione. Di solito provoca intasamenti.
Per prima cosa, controlla la spia nella parte superiore del tazza dello sporco . Se è rosso c'è qualcosa che limita il flusso d'aria.
Qui abbiamo discusso di come risolverlo.
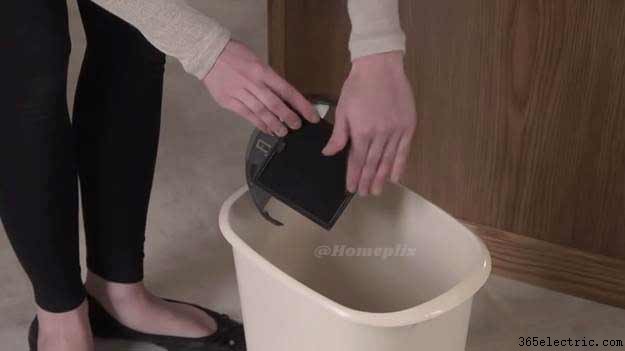
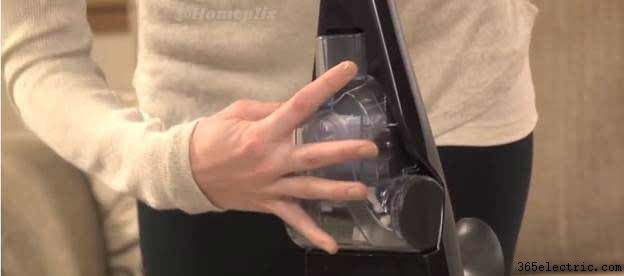
Per prima cosa, rimuovi il contenitore dello sporco, aprilo e controlla il filtro.
Dovresti controllare la parte inferiore se è sporca, sciacquarla con acqua tiepida e lasciarla asciugare per 24 ore.
Assicurati di posizionarlo sul bordo in modo che si asciughi uniformemente. Anche se lo risciacqui regolarmente, posizionare un filtro che non reinserisce completamente nella tazza dello sporco potrebbe intasare il filtro ancora più facilmente.
Quindi, controlla che il tuo tubo principale non sia intasato. Dovresti rimuoverlo dalla macchina e utilizzare il manico di una scopa per eliminare eventuali detriti che potrebbero essere rimasti lì dentro.
Ora c'è un altro posto che puoi controllare. Se quei due sono chiari e non hai ancora una forte aspirazione.
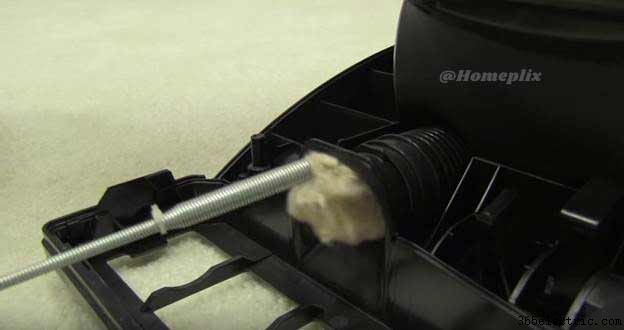
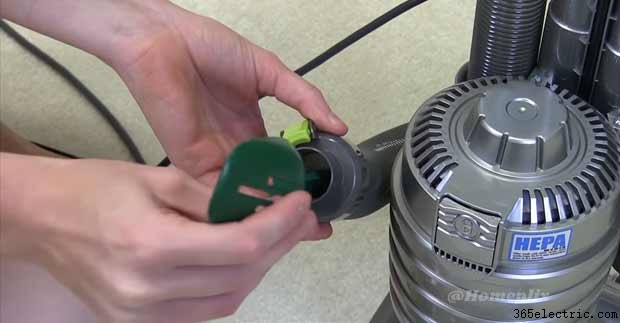
Rimuovi il cappuccio, quindi estrai il rullo della spazzola e ora controlla che il tubo inferiore non presenti ostruzioni.
Puoi utilizzare uno strumento di acquisizione per rimuovere eventuali zoccoli.
Lo strumento Grabber è uno strumento importante di cui è necessario prima di eseguire una risoluzione dei problemi simile come il ripristino del motore del vuoto Shark. Assicurati di averli prima di iniziare la risoluzione dei problemi.
Ora tutto sulle guide di riparazione dei semoventi WindTunnel.
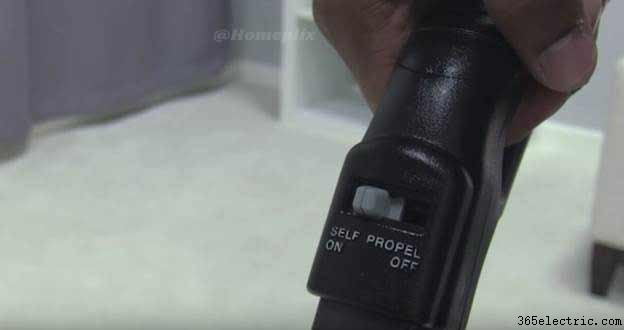
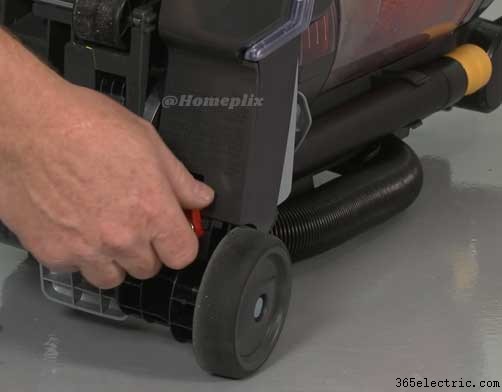
Se le tue riprese sono difficili da spingere, assicurati che il pulsante semovente sia acceso.
Se non vedi un miglioramento immediato, la maniglia potrebbe essere troppo allentata.
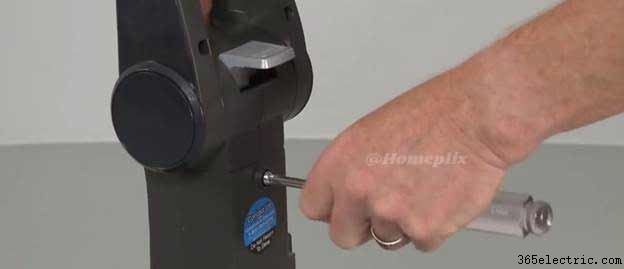
È una soluzione semplice per prima cosa spegnere e scollegare il tuo Hoover. Quindi rimuovi le viti dal retro della maniglia.
Assicurati che l'interruttore semovente e l'interruttore di accensione siano impostati su off sulla maniglia.
Inoltre, assicurati che l'interruttore di alimentazione sul corpo della macchina sia impostato su spento.
Inoltre, reinserisci la maniglia nell'unità e avvitala saldamente. Ora collegalo, fai scorrere l'interruttore di alimentazione su e attiva la funzione semovente.
Infine sulla regolazione dell'altezza. All'inizio, devi iniziare con l'impostazione più alta.
Quindi procedi verso il basso finché non puoi sentire le setole del rullo della spazzola toccare il tappeto e dovresti sentire l'aspirapolvere scivolare uniformemente sul tappeto.
La pulizia dei filtri ti aiuterà a mantenere il tuo aspirapolvere WindTunnel al massimo delle prestazioni.
Sono disponibili due filtri:il primario deve essere pulito ogni due mesi o secondo necessità e i filtri HEPA devono essere puliti ogni sei mesi per prestazioni ottimali.
Per iniziare, metti l'aspirapolvere in posizione verticale. Spegni e scollega il cavo di alimentazione.
Rimuovi il contenitore per lo sporco dall'aspirapolvere e gira il coperchio per aprirlo. Quindi rimuovere il filtro risciacquabile e risciacquare con acqua per due minuti o finché l'acqua non è limpida, spremere l'acqua in eccesso e lasciare asciugare per almeno 24 ore.
Non rimettere mai un filtro risciacquabile bagnato nell'aspirapolvere. Una volta che è completamente asciutto, sostituire il filtro e girare il coperchio della tazza dello sporco per chiuderlo.
Il secondo filtro è un filtro HEPA. Potresti trovarlo sopra la piastra di base, per pulirlo ed estrarlo.
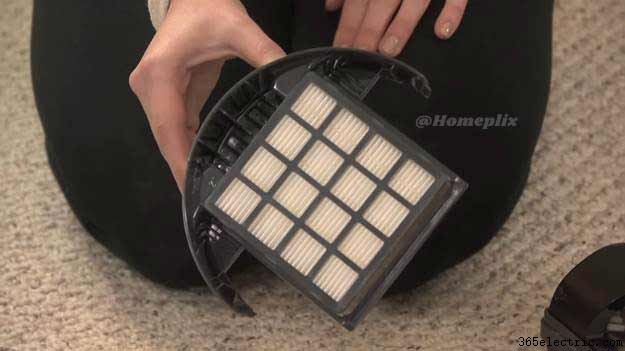
Non lavare questo filtro con acqua, batti semplicemente il filtro contro l'interno di un bidone della spazzatura per eliminare sporcizia e detriti.
Sostituisci il filtro e assicurati di sentirlo scattare in posizione, per sostituire i filtri assicurati di utilizzare solo parti autorizzate Hoover.
Per prima cosa, devi rimuovere il filtro HEPA estraendo il telaio del filtro in plastica. Il filtro deve essere solo picchiettato e non lavare o risciacquare il filtro HEPA.
Dopo aver toccato il filtro, è sufficiente reinserire il telaio del filtro nella base dell'aspirapolvere finché non scatta.
Nota:se utilizzato e mantenuto correttamente, il filtro HEPA non deve essere sostituito entro il periodo di garanzia.
Se è necessaria una sostituzione, assicurati di avere il filtro HEPA Hoover progettato per il tuo aspirapolvere.
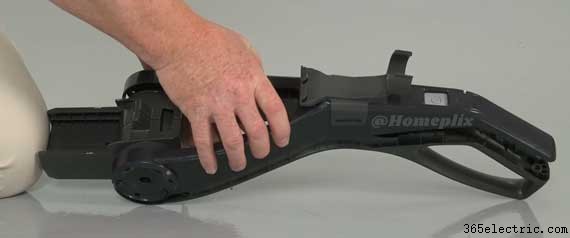
Hoover WindTunnel repairs will require you to disassemble the product before you attempt this make sure the power cord is unplugged.
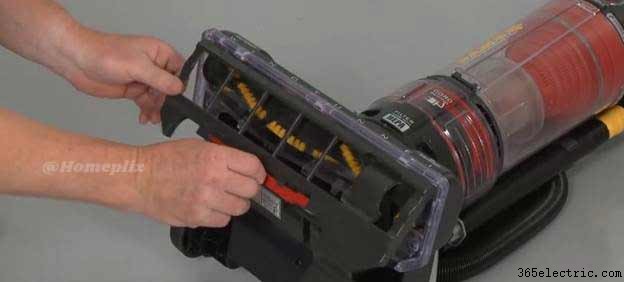
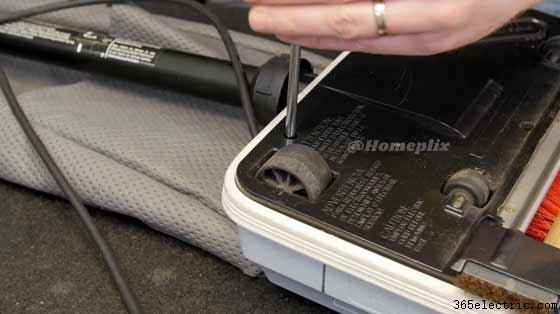
To access the belt or brush roll you will need to remove the bottom plate.
The plate may be secured by screws or by latches remove the screws or slide the latches out of the way and pull the plate off.
Then you should pull out the brush roll and detach it from the belt if necessary.
When the repair is complete first loop the belt around the brush roll and aligns the tabs on the sides of the roll with the notches in the frame.
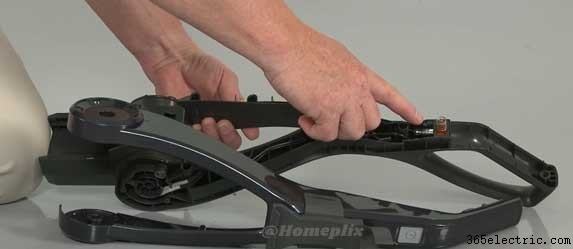
Then reposition the bottom plate and secure the latches or screws. To access the start switch first remove the upper filter assembly.
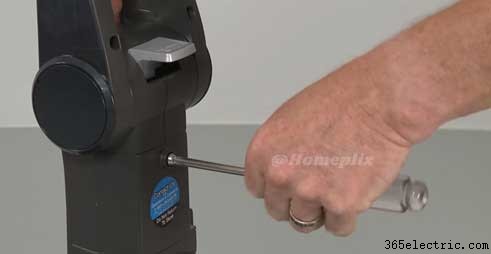
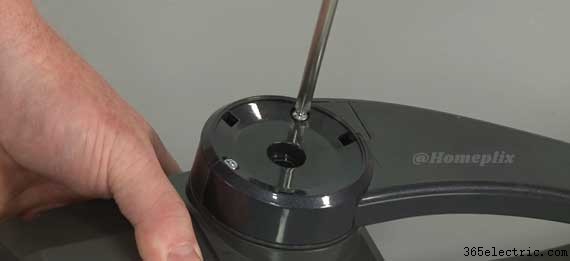
Now remove the screw to release the handle assembly.
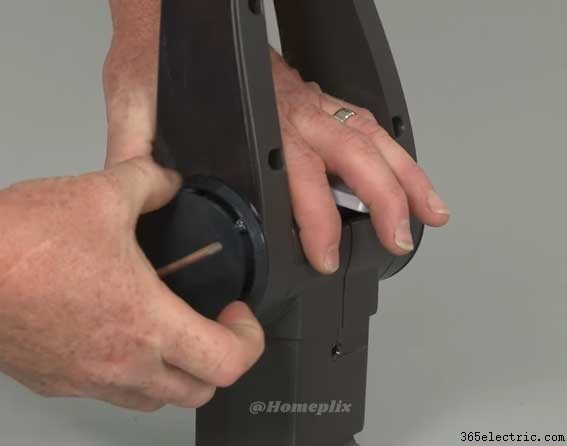
Remove the screws holding the handle assembly together use a small flat-head screwdriver to detach the hinge caps.
Now remove the bolt and remove the hinge screws to separate the two halves of the handle assembly.
When the repair is complete join the two halves of the handle assembly together.
Replace the hinge screws then insert and secure the bolt. Snap-on the hinge caps. Reinstall the rest of the handle assembly screws and slide the handle into position.
Secure the screw and snap the upper filter assembly into place.
If applicable to your model you can access the rewind cord housing and motor assembly by first removing the HEPA filter.
Now lift off the upper filter assembly and remove the screws to release the cord housing plate.
Your next step is to remove the hose.
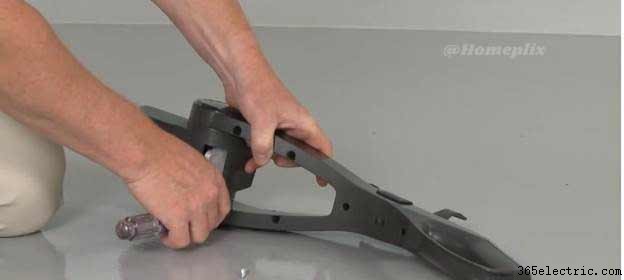
Now uninstall the screws to release the hose fitting remove the screws securing the vacuum cleaners back panel and any guides or supports.
Then pull the panel off.
Remove the screws securing the hinge covers and unclip both covers.
Now unhook the belt from the motor shaft and lift the handle cord reel and motor assembly of the base.
Remove the screws securing the motor housing pull off the retaining clip if necessary and separate the housing.
If required you can now remove all of the screws securing the cord housing cover.
When the repair is complete reinstall the cord housing cover and secures the screws.
Join together the two halves of the motor housing. Snap the retaining clip into place if necessary and replace the screws to secure.
Now align the motor housing with the base and hook the belt onto the motor shaft.
Snap the hinge covers into place and replace the screws to secure. Next, reposition the back panel as well as any guides or supports and secure them with the screws.
Realign the hose fitting and secure the screws, reattach the hose replace the cord housing plate and reinstall the screws to secure.
Reposition the upper filter assembly and reinsert the HEPA filter with the vacuum cleaner fully reassembled you should test the product to make sure it’s functioning properly.
The main pieces to your WindTunnel Hoover are.
- The vacuum base
- The handle
- The dirt cup
- Extension tube
- Crevice tool
- Upholstery tool
- An air-powered turbine hand tool
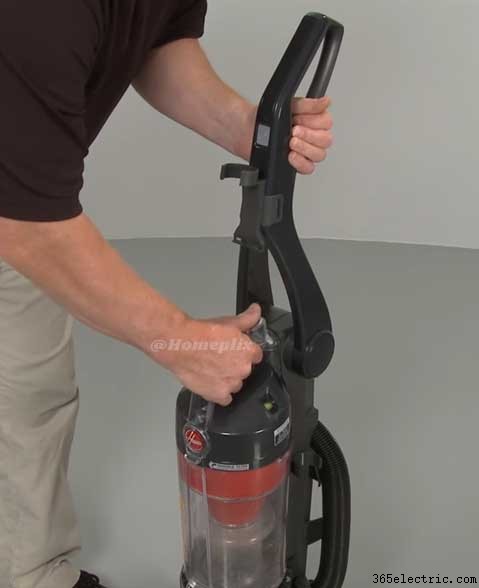
To assemble first remove the main screw from the handle base.
Slide the handle into the vacuum base push down firmly and tighten the screw with a Philips screwdriver.
Attach the dirt cup by sliding it in. Attach your tool so you’ll be able to easily reach for them. When you need them to put the air-powered turbo tool on the handle.
Slide the crevice tool into the extension tube and place it on the left side of the cleaner and the upholstery tool goes on the right side.
Set the hose onto the carriage. There is an automatic cord rewind feature that lets you pull out and rewind the power cord to need easy storage.
Your cleaner is now fully assembled and ready to use. A few things to keep your WindTunnel to rewind running well.
There are two filters the primary should be cleaned every two months or as needed and the HEPA filter should be cleaned every six months.
You will need to keep your brush roll clear of thread pet hair and other debris. See the maintenance and troubleshooting topic for more detailed guidance.
Hoover WindTunnel has some pro feature and innovative technology like
- Automatic rewind cord
- Five-position adjustment
- Easy maintenance filter
- Other accessories
Automatic rewind cord
Hoover WindTunnel holds 27 feet rewind power cord and that is very enough long to clean any large space and it doesn’t need to plug out and replug the power cord.
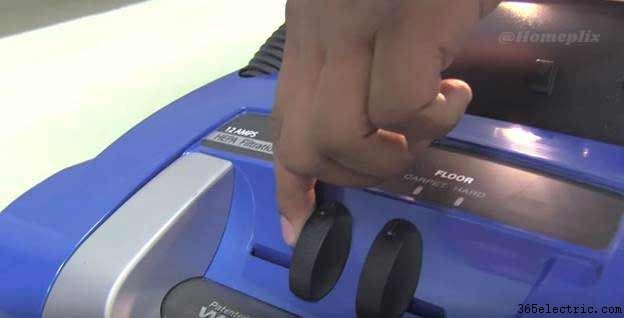
Five-position adjustment
Five-position adjustment of Hoover one of the innovative technology. This five-position adjustment very effective to clean all types of floors and surfaces.
Easy maintenance filter
This WindTunnel represents a bagless technology and it maintains optimal suction power. It has a rinsable filter that can be cleaned with warm water. It also has a high-quality HEPA filter.
Other accessories
- Comfortable grip handle
- Fingertip nozzle
- Thirteen and a half-inch wide nozzle
- No-scuff bumper
- 12-inch extension wand
- A crevice tool
We sometimes hear from you guys that your WindTunnel is overheating and shutting off. This can happen when there’s a clog somewhere in the system.
On some of the versions of the vacuums, you might hear a whistling or hissing sound when your vacuum is on the verge of shutting off.
That’s the system performance indicator. First, turn the vacuum off and remove the dirt cup.

Take the lid off and inspect the filter, if it’s dirty.

Rinse it with warm water for two minutes and let it dry for at least 24 hours.
Your vacuum also contains a HEPA filter. Take the cover off and check this filter.
If it’s dirty. Don’t get it wet instead, tap it into a wastebasket.

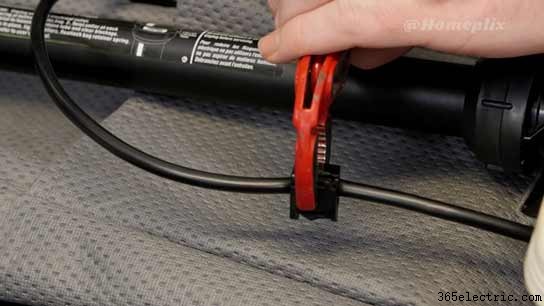
Next release the hose by pressing green clip.
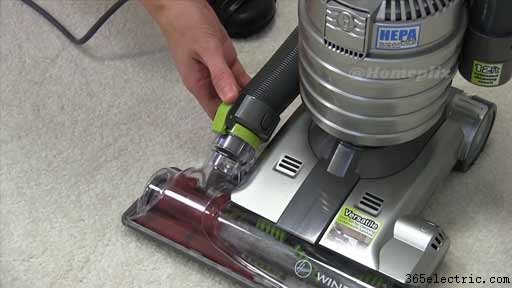
It’s on most versions of the WindTunnel and sees if there are any blockages inside of it.
You can use a wooden spoon handle or another household object. Just don’t use anything sharp that could damage your hose.
Lastly, leave your vacuum turned off for about half an hour.
The thermal protector that activated the shut-off will deactivate.
You can start cleaning again. These tips should get your WindTunnel in great working.
I’ll be showing you, how to replace a Hoover WindTunnel power cord.
The power cuts out, then do check the main cable, with the cable still plugged in and the machine running give the wire a wiggle around. If the power cuts on and off either at the plugins or at the machine end, then the cable has failed and it needs replacing.
Safety first! Always unplug an appliance before carrying out any work.
I’ll be doing this fix on this Hoover vacuum cleaner.
The process should be quite similar to your make and model.
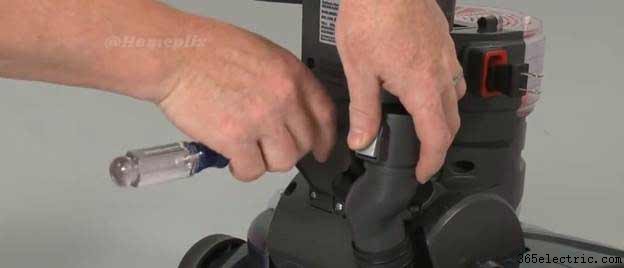
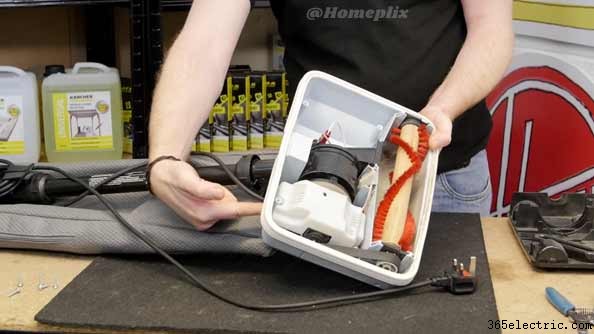
To access the mains cable, I need to first remove the underneath of the vacuum cleaner by undoing the screws that hold it in place.
To access where the cables are going, the mains cable comes directly into the machine.
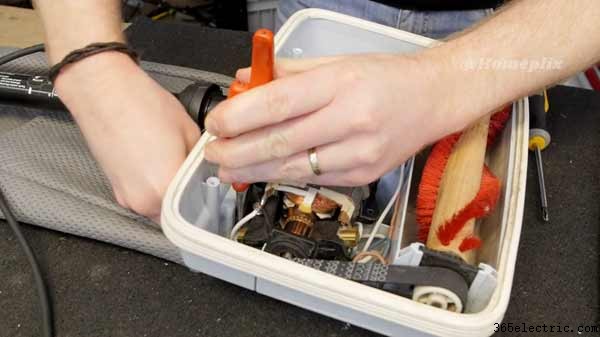
Wires go underneath this cover. I’m going to remove this cover by undoing the two screws that hold it in place.
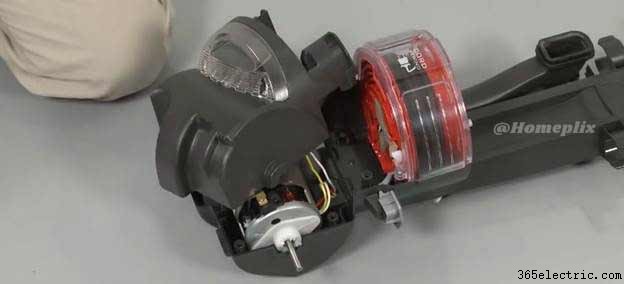
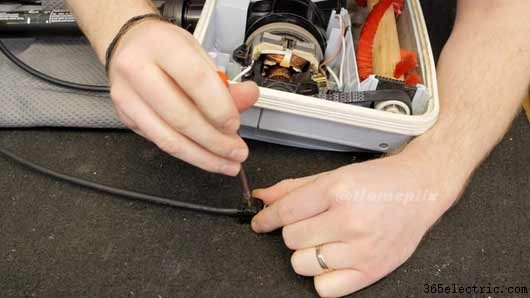
If the motor cover removed, we can see the cable clamp that holds the main cable in place.
To release cable, I’m just going to take a pair of pliers and pinch the two tabs should release the mains cable from the back of the machine.
Then you can just use a screwdriver just to push the wire down.
The mains cable released.
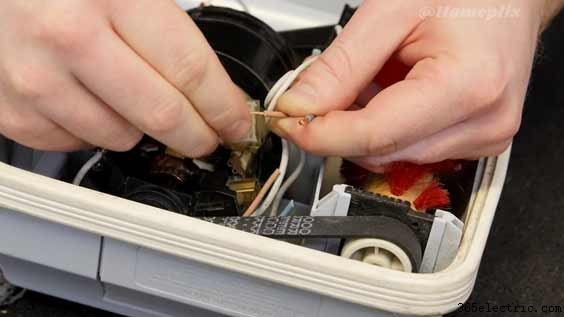
I forget to give it a little pull. I can tell which wires are connected inside, if I just pull these wires out as well you can see that more clearly.
It’s the blue and the brown here that are connected inside the mains cable.
What I want to do, because these the blue has been crimped here and I don’t want to disturb the brown wire that goes to the switch.
There is a little bit of space next to the motor, where I can put a terminal block and connect the new wires from the new mains cable to the old wires inside the machine.
The new mains cable does not come with any connection.
I’ll be using this electrical terminal block to connect the wires.
I’m going to snip the brown and the blue wire. Then feed those out by the old mains cable. I’ll just cut those cables now.
I’m also going to do is just strip back the insulation to expose the copper inside.
Then give a nice twist. It looks nice and solid and then just fold it back on itself, that it will fit nice and firmly inside the terminal block.
I’ll do exactly the same with the brown one.
I can then remove the mains cable from the vacuum cleaner.
Now the old cable is out of the way. I can grab my new one. Now what I’ve done is pre-stripped down the insulation. It gives me enough space to feed the wires under the motor. Of course, connect blue to blue and brown to brown using the terminal block.

It’s worth pointing out that the new mains cable. The two ends have been crimped already. So, I don’t have to prepare those.
You can use a terminal block to connect the wires up.
With the wires all wired up nicely in the terminal block. I’m just going to push them down the side of the motor.
I need to do is to replace the old clamps that were on the old mains cable and put them on the new one.
The clamp-on your model may take a little bit of squeezing to get it into position. So, I’m just using a pair of pliers to do that on this one.
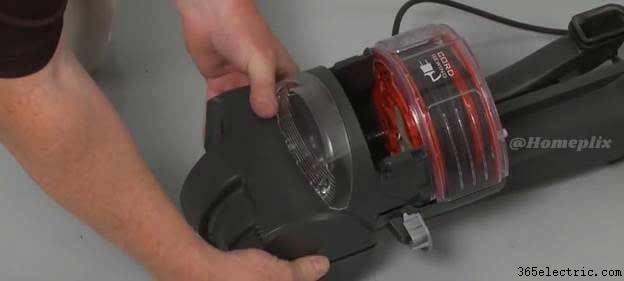
With the mains cable now in position. I can replace the motor cover. I’m just going to make sure there are no wires in the position of the screw holes. So, they’re not being pinched by the motor cover.
Lastly, now I can replace the base.
We have it one brand new mains cable fitted to this Hoover vacuum cleaner.
It has been having problems with, my Hoover vacuum cleaner switch.
I’ve decided to replace it.
This is a Hoover WindTunnel.
To replace the switch, remove the attachment.
Just connect hose again.
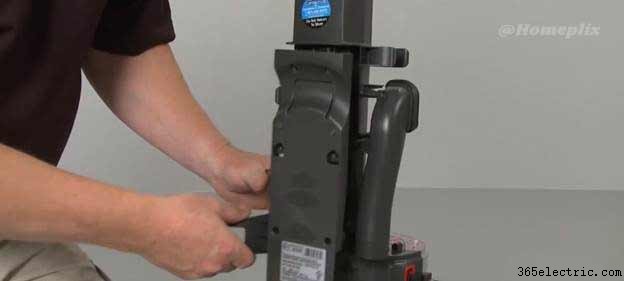
I’m going to remove screws from Handel.
Remove the canister.
Once you have that out, you can remove that holds the switch.
Once that’s done remove the two screws on the bottom and separate the unit using just a standard screwdriver.
I’ve got my unit apart here and see here is the link between the vacuum cleaner and the switch.
There’s your switch and there’s your link, at this point you’re going to just connect those two electrical contacts.
Remove the switch and pull it out. I was able to kind of pull it out with my bare hands.
I’m going to disconnect these two wires take the switch out of this housing.
You can see the housing that holds the switch has those two little clips on it.
I’m going to take a screwdriver, stick it under there and remove the switch from the Hoover housing.
So, you can see I’m about to take this switch out of here.
Let’s go and push up on it.
Take my new switch. Put it in the housing.
Put your switch back in the vacuum cleaner.
You have it reroute your wires screw everything back together be good to go.
I’m going to take apart or don’t get you.
Just steps there back together make sure that your peace doesn’t fall into the wrong orientation as you close it.
Just make sure this you have put all your screws back in and you’ve got a functioning switch.
Today we’re going to change the filters on the Hoover self-propelled WindTunnel vacuum cleaner.
- First, make sure that your vacuum is unplugged out of the wall.
- Click the switch and lay vacuum down.
- Lay your vacuum down on a raised surface such as a table.
- Remove the top sole plate first.
- Take out the bag.
- Take out the filter cover.
- Replaces the old filter.
- Take the cover motor filter cover put that on top.
- Replace your final filter for this vacuum.
- Take out the old filter.
- Replace it with your new vacuum filter.
- Replace your bag.
- Pop the top back on.
Final Sentences
Hoover WindTunnel gets four-star up with positive reviews in different marketplaces. Hoover WindTunnel is easy to move, simple maneuverability. You can get optimal suction power from it.
Your Hoover WindTunnel is your most precious cleaning partner and it cleans different types of surfaces like hardwood floors or carpet.
Sometimes your Hoover WindTunnel needs troubleshooting. Here we have solved all Hoover WindTunnel possible problems. If you have a Bissell vacuum and experiencing any difficulty with this, then you can also read our Bissell Proheat troubleshooting guideline.