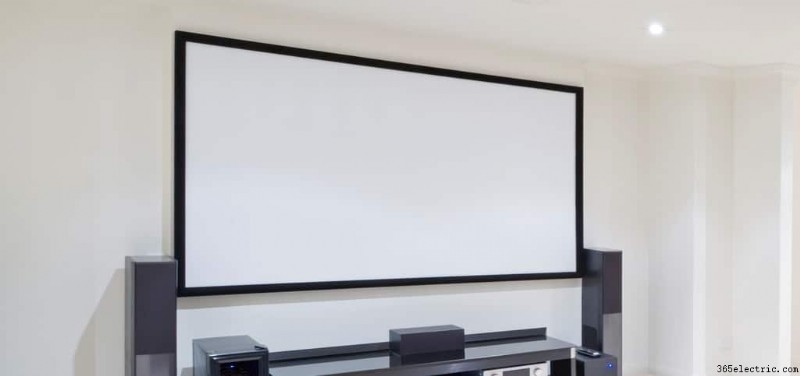
Come misurare e regolare le dimensioni dello schermo del proiettore
Anche se quasi tutti i proiettori sul mercato odierno sono dotati di funzioni di regolazione delle dimensioni dello schermo, può comunque essere difficile adattare perfettamente la proiezione allo schermo. Tuttavia, determinando la dimensione ideale dello schermo del proiettore e prendendo le sue misure attuali, sarai in grado di regolarla di conseguenza per ottenere una vestibilità perfetta.
Ecco come misurare e regolare le dimensioni dello schermo del proiettore:
- Determina la dimensione di proiezione ideale per il tuo spazio.
- Esegui le misurazioni.
- Sposta il proiettore.
- Regola l'angolo.
- Gioca con la funzione di zoom.
- Regola la forma.
Nelle sezioni seguenti ti guiderò attraverso il miglior approccio passo dopo passo per misurare e regolare le dimensioni dello schermo del tuo proiettore.
Alla fine di questa lettura, sarai in grado di determinare con precisione la dimensione ideale del tuo proiettore, misurarla e apportare le modifiche necessarie.
Inoltre, leggi la mia guida su Dimensioni del proiettore e dello schermo TV per l'home theater
Come misurare e regolare le dimensioni dello schermo del proiettore?
Puoi misurare le dimensioni dello schermo del proiettore calcolando la distanza tra gli angoli in alto a sinistra e in basso a destra dello schermo. È possibile regolare le dimensioni dello schermo del proiettore spostando l'attrezzatura, modificando l'angolazione, regolando la forma e giocando con la funzione di zoom.
Quindi, esaminiamo insieme i passaggi!
1. Determina la dimensione di proiezione ideale per il tuo spazio
Il primo passo per misurare e regolare con precisione le dimensioni dello schermo del proiettore è determinare lo spazio ideale che dovrebbe occupare all'interno dell'area di visualizzazione. In caso contrario, non saresti in grado di modificare le dimensioni dello schermo dopo aver effettuato le misurazioni necessarie.
Quando si determina la dimensione ideale dello schermo di un proiettore, il fattore più cruciale sono le sue proporzioni. Questa funzione determinerà la tua capacità di modificare e regolare in seguito, limitando notevolmente le tue scelte.
Un altro componente cruciale di cui vorrai tenere conto è lo scopo. A seconda di ciò che visualizzerai sullo schermo, i requisiti di dimensione potrebbero variare.
Ad esempio, se miri a proiettare immagini dettagliate e di alta qualità, potresti voler cercare uno schermo di dimensioni maggiori. In alternativa, una semplice presentazione potrebbe non trarre molto vantaggio da una proiezione che copre l'intera parete, il che significa che uno schermo più piccolo potrebbe essere migliore.
Inoltre, assicurati che la tua attrezzatura possa supportare le dimensioni dell'immagine che stai cercando di proiettare senza una significativa perdita di qualità. Pertanto, consulta sempre le istruzioni fornite dal produttore per saperne di più sulle specifiche del tuo proiettore.
Infine, non dimenticare di tenere conto delle dimensioni e del design della tua area di visualizzazione quando decidi la dimensione ideale del proiettore. Mentre gli spazi più grandi e arredati in modo semplice potrebbero essere in grado di ospitare una proiezione lunga una parete, le stanze più piccole e più affollate di solito funzionano meglio con schermi di dimensioni più piccole.
2. Prendi le misure

L'esecuzione di misurazioni accurate è probabilmente la fase più impegnativa del processo, poiché richiede un po' di pratica, esperienza e pazienza.
Stimare le dimensioni di una proiezione dello schermo non è facile come un nastro che misura la tua normale TV. Tuttavia, con informazioni sufficienti, sarai in grado di effettuare misurazioni estremamente accurate in pochissimo tempo.
Come accennato in precedenza, la maggior parte dei display sono misurati in diagonale. However, the process becomes a bit more complicated for more sizable screens.
You’ll want to start by accounting for the type of projector you have. If you’re mounting the equipment somewhere, you’ll have to be much more precise to avoid mistakes that would take time and effort to fix.
Even if you won’t be mounting your equipment, the first step you want to take is to determine where you’ll place it. Then, measure the distance between the wall and your equipment’s lens. Multiply this measurement with the throw ratio; that’ll be the width of the projection.
Afterward, determine the projection’s height using your equipment’s aspect ratio. You can turn the aspect ratio into a fraction and multiply the width you just measured by the resulting number.
Lastly, as discussed earlier, measure the screen diagonally and input all three measurements into this calculator to find your projector’s screen size.
3. Move the Projector
Now that you’ve determined your projector’s ideal and current screen size, all that’s left to do is make the necessary adjustments.
The quickest, most straightforward way is to move the projector (provided you aren’t using a mounted piece of equipment).
If you’re looking to make your projector’s screen size more extensive, you’ll want to move the equipment away from the wall slowly. The keyword here is slowly, as the slightest movement can significantly impact your projection’s size.
Alternatively, if you’re looking to make the projection smaller, you’ll have to move the equipment closer to the wall or screen.
If you can’t achieve the exact right results you’re looking for through this approach, you can always use it in conjunction with the following methods I’ll be diving into.
Think of it this way:while you’re making the most significant adjustments by moving your equipment closer or farther away from the wall or screen, achieving the exact size you’re looking for might require some further fine-tuning.
As you move the projector around, make sure to adjust the focus so that your image quality doesn’t suffer. Consult the manufacturer-issued owner’s manual to learn how to access the focus knob, which allows you to achieve a sharp, high-quality image regardless of how zoomed in or out it is.
Achieving the right level of focus might require a bit of practice with the knob, so take your time figuring out your equipment’s settings and trust the process.
4. Adjust the Angle
Most people often fail to notice that the issues with screen alignment are caused by projection angle rather than its size. Therefore, before moving on to any other approaches, it’s essential to ensure that the projection and the screen are perfectly in line.
As you’ve moved your equipment around trying to get that perfect size, you’ll have to deal with some angle misalignment afterward. It’s hard to describe a step-by-step solution for this issue, as it mostly takes some fiddling around before finding the equipment’s perfect positioning.
However, some tips and techniques can significantly help you out during this process. There are even some digital tools you can purchase whose purpose is to ensure that the projection and the screen are perfectly aligned.
For example, if you’re using a wall-mounted projector, you can always angle the mount to result in the most perfectly aligned projection. Alternatively, if you’re simply placing the equipment on a flat surface, you can raise or lower the legs on the projector or add some props (like some old books) to lift it.
Lastly, you can adjust your projection’s angle by fiddling with the lens’ shift controls. Instead of trying to move the mount, legs, or the equipment itself in search of that perfect alignment, you can simply move the lens itself. Even though this isn’t a widely popular feature in most commercial projectors, if you’ve invested in a higher-end brand, you might be able to adjust the lens directly. However, always consult with the owner’s manual before doing so.
5. Play With the Zoom Feature
If moving the whole projector around or fiddling with its components doesn’t seem ideal (or possible) to you, the zoom feature is your best bet for achieving the projection size you’re looking for.
In this instance, the zoom range and quality of your projector determine the projection size you’ll ultimately be able to achieve without sacrificing image clarity.
Again, consult the owner’s manual to locate the zoom function on your equipment. Then, depending on the disparity between your ideal and current projection size, you can dial it up or down until you achieve the result you’re looking for.
If the projected image is too big, slowly start zooming out until you reach the desired size, and vice versa. Unfortunately, even though this approach is one of the quickest and most straightforward on today’s list, it may lead to some issues like slanted images, unevenness, etc. However, most of these glitches are easy to remedy by reading the equipment’s instructions.
6. Adjust the Shape
Even after you’ve got the size and alignment right, the projection quality might suffer from shape distortion. Most commonly, the picture will take on a trapezoid shape, with the upper and lower corners not lining up with one another.
Luckily, this is an easy issue to remedy. A trapezoid-shaped projection indicates that the equipment isn’t situated precisely in the middle of the screen, causing either the upper or bottom half to appear smaller due to distance inconsistencies.
This issue is called “keystoning,” and it can either be dealt with manually by adjusting a projector’s angle, or you can fix it digitally through software that can alter an image before it even reaches the screen.
Final Thoughts
Measuring and adjusting your projector’s screen size is a process that requires practice, experience, and patience. You’ll always want to start by determining the ideal projection size for your space, as doing so will help you more efficiently make the necessary adjustments later on.
Then, you can calculate the necessary measurements, including screen height, width, and diagonal distance, using the techniques mentioned throughout this article—these three measurements, when input into a screen size calculator, will give you your current projection size.
Eliminate the disparity between your ideal and current projection sizes by making the necessary adjustments.
Also, read my guide on 1280X800 Resolution and Screen Sizes