Suggerimenti e trucchi per Nexus 7 (2013)
Il . Al centro di tutto, c'è fondamentalmente una versione più grande degli smartphone Nexus di Google, ma allo stesso tempo fondamentalmente diversa. Pertanto, ho compilato un elenco di alcune funzionalità e suggerimenti utili che potresti trovare utili per il Nexus 7.
Leggi la nostra recensione su Nexus 7 (2013) per scoprire tutto ciò che devi sapere sul dispositivo Google.
Evita lo sblocco facciale
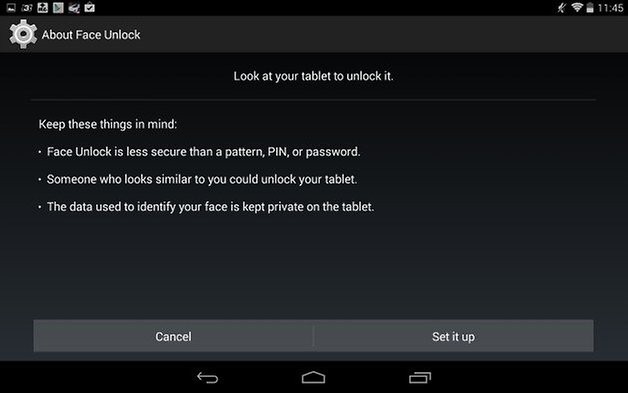
Il Nexus 7 2013 offre una serie di metodi di sblocco dello schermo per proteggere i dati che tiene a bordo, dal PIN, a una sequenza, una password e, infine, e cosa più interessante, Face Unlock. Anche se questo può sembrare il più eccitante, ne starei lontano. Come mai? Perché non presenta il livello di sicurezza più alto di tutti i metodi e, dopo aver letto vari forum, potrebbe essere facilmente violato.
Il concetto è di tenere il dispositivo all'altezza del viso e sbattere le palpebre, in modo che il sistema riconosca che sei un vero essere umano e non solo un'immagine. Se sei disposto a correre il rischio su questo, puoi configurarlo facilmente accedendo alle impostazioni del tuo dispositivo, quindi Sicurezza e infine Blocco schermo. Lì puoi scegliere Face Unlock. Immediatamente, ti dirà che questo metodo è meno sicuro di una sequenza, PIN o password e che qualcuno che ha lo stesso aspetto potrebbe sbloccare il tuo tablet:la tecnologia non è abbastanza avanzata. Molti siti tecnologici potrebbero dirti di usarlo, diciamo di no!
- Molti utenti non tengono conto della sicurezza di Android
Crittografa i tuoi dati
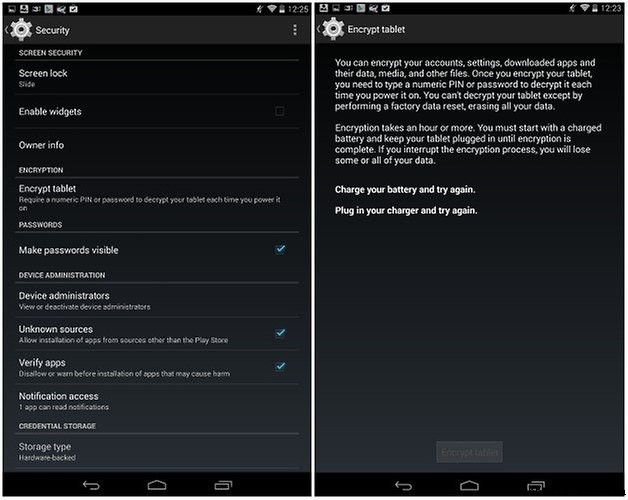
A volte non è sufficiente impostare un metodo di sblocco sulla schermata di blocco. Anche se è probabile che molti ladri vogliano solo guadagnare vendendo il tuo dispositivo, se mai ci mettono le mani sopra, potrebbe esserci solo un delinquente connivente là fuori che vuole commettere un furto di identità. È per questo motivo che gli utenti dovrebbero fare un ulteriore passo avanti e crittografare i dati sul proprio dispositivo, che è quindi accessibile solo con un PIN. Vai alle impostazioni del tuo Nexus 7, quindi tocca Sicurezza seguito da Crittografa tablet. Tieni presente che la crittografia del dispositivo richiederà più di un'ora, quindi è meglio avere una batteria completamente carica e tenerla collegata, perché se la crittografia viene interrotta, ciò potrebbe comportare una perdita di dati.
Abilita la rotazione automatica del display
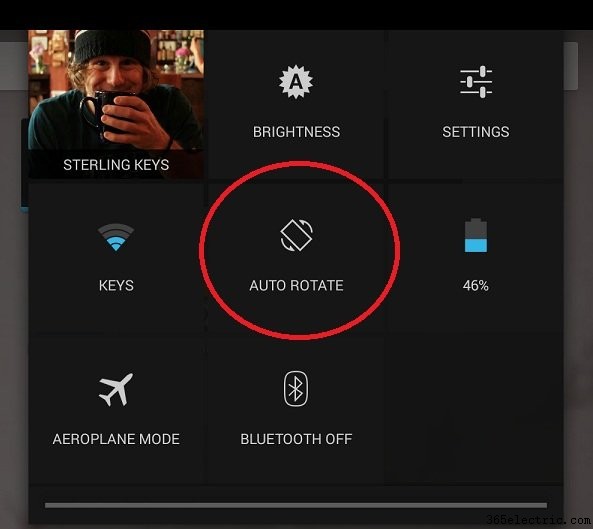
Può sembrare un po' controintuitivo, ma la rotazione del display non è abilitata per impostazione predefinita sul Nexus 7. In quanto tale, sei bloccato con un display fisso quando ricevi il dispositivo e può sembrare ingombrante per un dispositivo con un schermo molto più grande del tuo smartphone standard.
C'è un modo molto rapido per risolvere questo problema ed essere in grado di regolare liberamente lo schermo in qualsiasi orientamento tu voglia tenere il telefono, orizzontale o verticale. Scorri semplicemente verso il basso dalla parte in alto a destra dello schermo per visualizzare le tue Impostazioni rapide (questo potrebbe essere di per sé un suggerimento poiché molti utenti non sono nemmeno a conoscenza di come accedere alle Impostazioni rapide!) e tocca semplicemente Rotazione automatica quadrato per abilitare o disabilitare questa funzione. Voilà!
Abilita zoom schermo
Ci sono situazioni in cui quando stai cercando di raccogliere un particolare contenuto da un sito Web, come la visualizzazione di una foto, e vuoi essere in grado di scegliere più dettagli o ottenere un aspetto ingrandito. Bene, con la funzione di zoom dello schermo puoi avere una "lente d'ingrandimento immaginaria" che si libra intorno allo schermo.
Questo può essere abilitato andando su Accesso universale nelle tue impostazioni e scegliendo i Gesti di ingrandimento opzione. Quando è attivata, ogni volta che tocchi tre volte lo schermo, puoi ingrandirlo e quindi utilizzare un gesto di avvicinare per ingrandire lo schermo ulteriormente. To get back to a normal screen, just triple tap the screen again to return to normal.
Need more tips? Find out how to make your Nexus 7 awesome again.
Larger Text
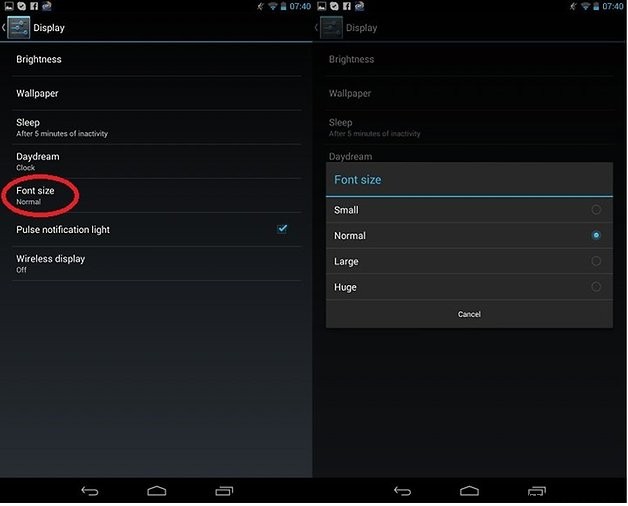
It is not really intuitive to hold your tablet extremely close to your face, such as is the case with most smartphones. Since it makes more sense to hold this larger device further away from you for reading purposes, it is also common to find situations where the text size displayed is often too small to be read at a comfortable distance. You can increase the default text size through your settings to combat this annoyance and make it so default text, such as display by a web browser, is automatically enlarged.
To do so, head to your settings and go to Display and Font Size , where you can choose from four sizes for your default font. Similarly, you can get the same results by going to Accessibility in your settings and and choosing the Large Text option.
Copy and Paste
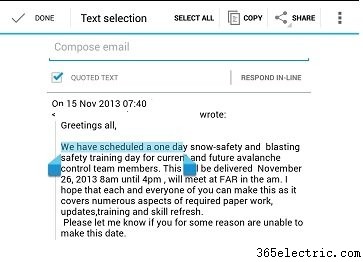
This may seem extremely trivial, but this is a very important feature when it comes to using tablets that can easily be overlooked just due to not knowing exactly how to do it. To select a portion of text that you want to use, just hold your finger over it for about two seconds. This will then highlight the text and a bunch of options will pop up at the top of your screen, such as copy, paste, cut, and more.
If you want to expand or constrict your highlighted portion of text, just use the two marking edges and drag them to the desired length that you want. It is hard to believe that there was a time on smartphones and tablets that this wasn’t even a standard feature.
- Do you feel your Google tablet is getting slow? Here are ways to speed up your Nexus 7.
Disable WiFi during sleep mode
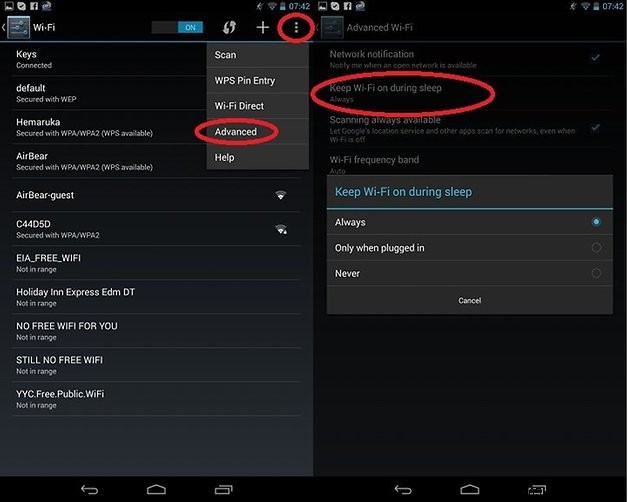
WiFi is a power hungry beast when it is being used, but did you know that by default that WiFi is still active, even when you’re not using your device or it is the middle of the night? Thankfully, your Nexus 7 has the option to disable using WiFi during these times that you can control.
If you head to your WLAN settings and then tap in the top right corner and choose Advanced , you’ll see a slew of options to choose from. By clicking on Keep WiFi on during sleep , you can choose from either having it on all the time, only when the device is plugged in, or never.
Keep in mind, this will limit the connectivity of the device so if you rely on WiFi to get messages or push notifications, you won’t receive them again until you physically wake the device up.
Disable auto sync on your accounts
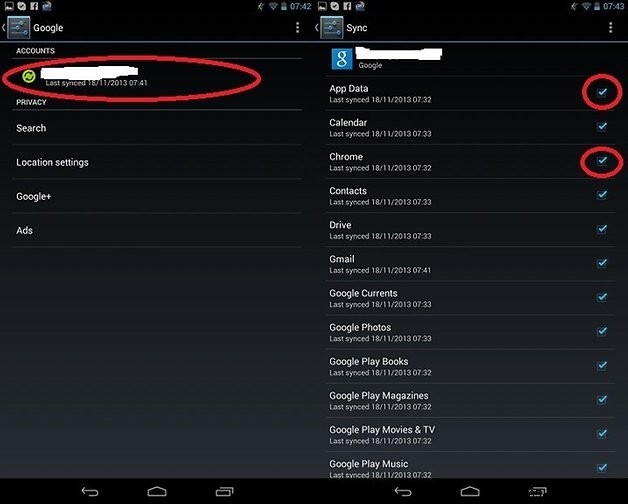
Google automatically syncs all your Google accounts to your Nexus device, such as Google+, Gmail, and app data. This can be a bit cumbersome if you don’t necessarily want or need all that stuff on your device or just want to keep it separate, due to multiple accounts or whatnot.
In your settings, you can head down to the Accounts area and click on whichever one you want to modify. In this case, we chose Google . From there, you can then unclick all the data that you don’t want synced on this device automatically, whether it be Google Calendar items or even Google Photos.
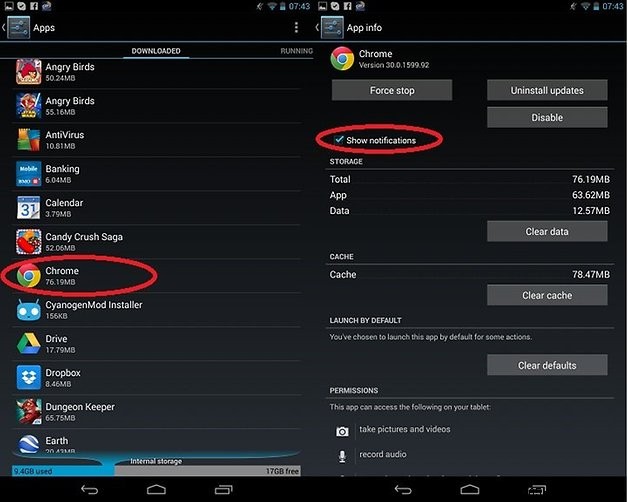
Disable app notifications
Do you have apps in which you constantly receive notifications from, but you really don’t want to see them anymore? If you head to the Apps portion of settings, you can select the offending app from the list of installed apps and then just uncheck the Show Notifications option just at the top of the opened page. That’s all it takes to remove the ability for that app to continue sending you notifications.
So, those are some of our favorite little tid-bits for the Nexus 7. What are some of yours? Feel free to share them below in the comment section!