Installazione e revisione dell'unità principale Double Din 2002 – 2005 Mercedes CLK 320
In questo articolo: Ti guideremo attraverso i passaggi per installare un'unità principale a doppio din in una Mercedes CLK 320 del 2002 - 2005 con una revisione dell'unità principale che abbiamo utilizzato.
- Installazione nel 2002 – 2005 Mercedes Benz CLK320
- Parti necessarie per l'installazione
- Passaggio 1:scollega la batteria
- Passaggio 2:rimuovi il rivestimento del cruscotto
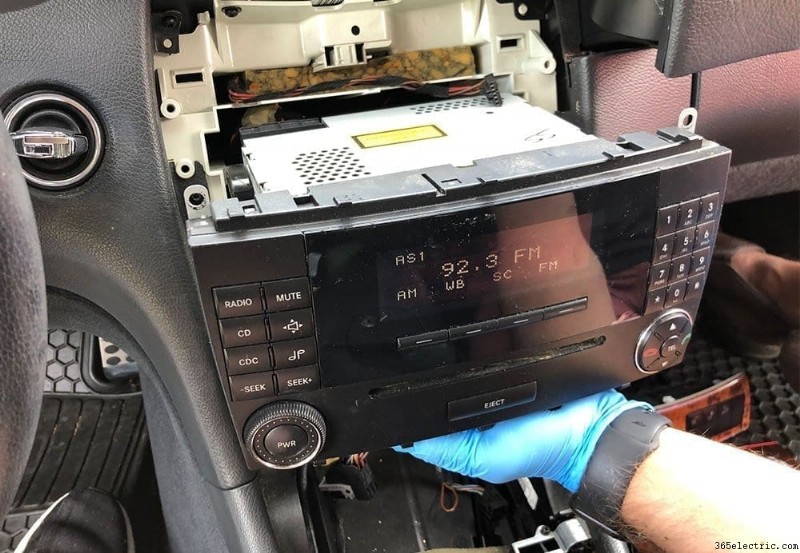
- Fase 3:svitare e rimuovere l'unità principale OEM
- Fase 4:preparare il cablaggio e l'unità principale
- Fase 5:Accessori di cablaggio:antenne, USB e microfono
- Passaggio 6:installazione della nuova unità principale
- L'unità principale:recensione PUMPKIN Android 9.0 Double Din
- Informazioni sulla ZUCCA
- Pronto all'uso
Panoramica dell'installazione:
- Veicolo:Mercedes Benz CLK 320 del 2005
- Unità principale:unità principale Pumpkin Android 9.0 Double Din
- Difficoltà:Media
- Tempo:3-5 ore
Ammettiamolo, la maggior parte dei veicoli nell'era degli anni 2000 ha unità principali, o solo la tecnologia dell'autoradio in generale, che è obsoleta. Il Bluetooth stava prendendo piede (sebbene gli ingressi ausiliari fossero la cosa), la navigazione GPS era un lusso e le unità principali del touchscreen erano poche e lontane tra loro dalla fabbrica. All'epoca, la 05 CLK 320 era un'auto eccezionale, elegante e lussuosa, ma per portarla nell'era moderna ha bisogno di un aggiornamento.
Abbiamo cercato un'unità principale economica ma potente per aggiornare lo stereo del nostro CLK 320 del 2005 e portarlo al passo con alcune delle ultime tecnologie per renderlo un pendolare decente. Siamo stati entusiasti quando PUMPKIN ci ha contattato con un'unità che potevamo testare per loro.
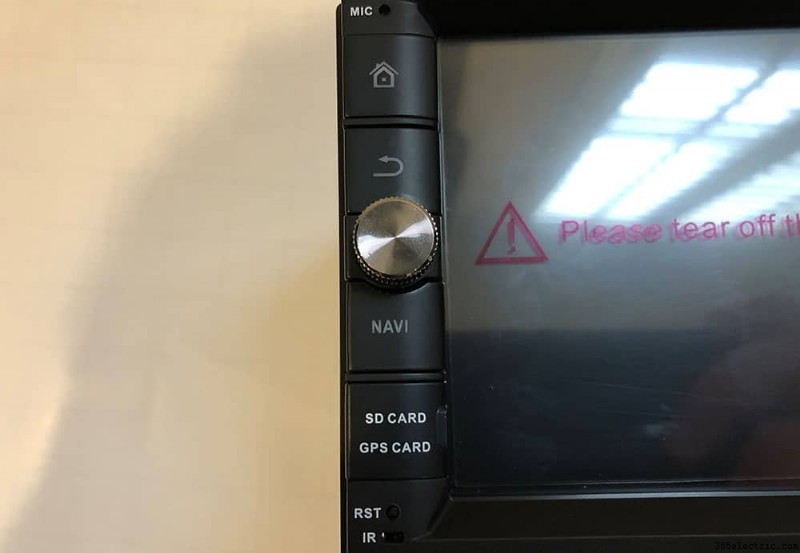
L'unità principale – PUMPKIN Android 9.0 Double Din
Questa installazione si applicherà a quasi tutte le unità principali con touch screen a doppio din, Apple CarPlay e Android Auto o unità principali multimediali a doppio din indipendentemente dall'unità che abbiamo scelto di installare. Se stai cercando di abbinare il prodotto che abbiamo utilizzato in questa installazione, l'unità principale che abbiamo scelto è stata Android 9.0 Double Din di PUMPKIN, modello AA0495B. Lo trovate su amazon e direttamente sul sito di Pumpkin qui.
Informazioni sulla ZUCCA
PUMPKIN è un produttore con sede in Cina fondato nel 2014. Si concentra principalmente sul mercato europeo, ma ha anche una presenza negli Stati Uniti. I loro prodotti di base includono unità principali di ricambio OEM, unità principali din doppie e singole, portatili e doppie schermo lettori DVD insieme a monitor poggiatesta. La maggior parte dei loro prodotti sono sistemi Android, incluso quello che abbiamo installato nel nostro CLK 320.
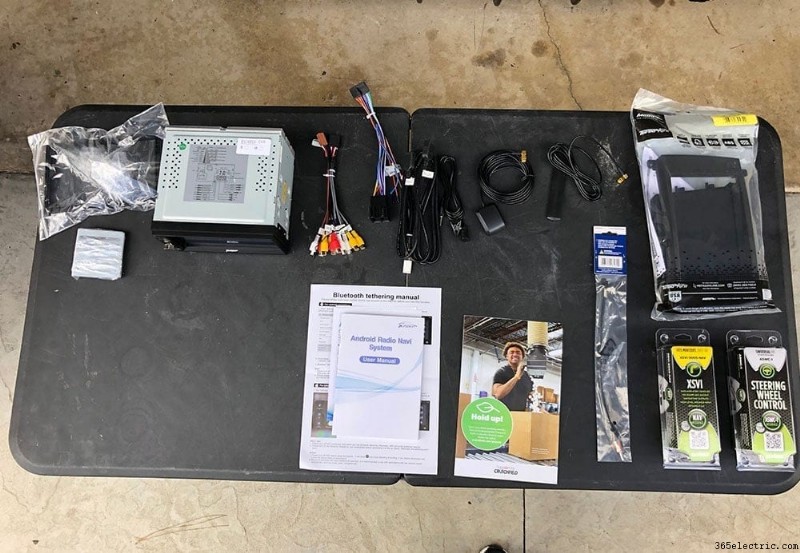
Pronto all'uso
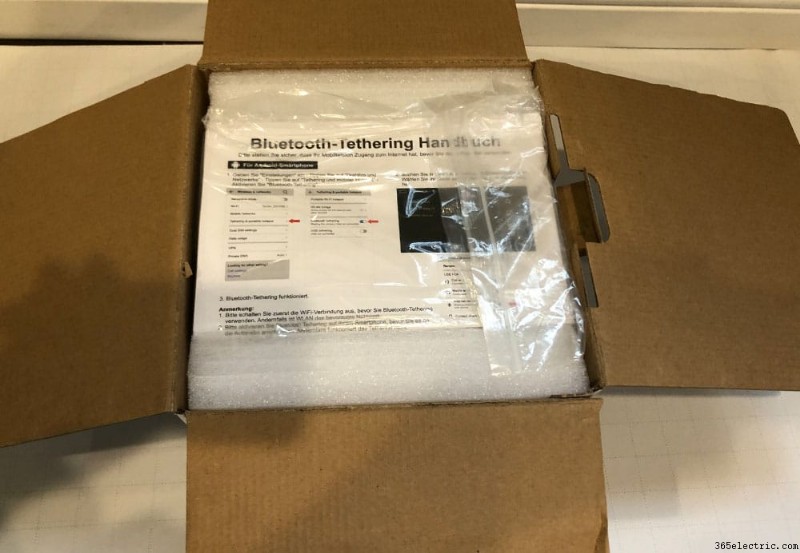
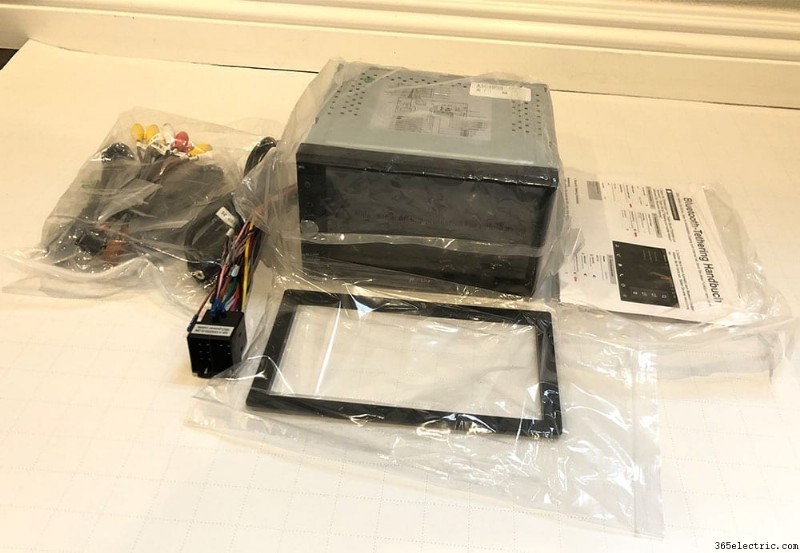
Nella confezione, l'unità principale PUMPKIN viene fornita con:
- 1x unità principale Android
- 1x cavo ISO
- 1x microfono esterno
- 1x cavo USB+ microfono
- 1x cavo di uscita audio
- 1x antenna wifi (4,9 piedi)
- 1x antenna GPS
- 1x cavo di ingresso AUX
- 1x cavo Cam-in
- 1x accessori per l'installazione (cablaggi)
- 1x Manuale utente


Installazione nel 2002 - 2005 Mercedes CLK320
Si noti che le istruzioni e le parti seguenti si riferiscono a un CLK320 SENZA Harman Kardon. Se stai cercando di installare un'unità principale in un CLK320 con Harman Kardon/stereo amplificato, avrai bisogno di un cablaggio speciale. È tutto in uno, quindi l'unica cosa che devi fare è sostituire questa imbracatura con le imbracature Axxess che mostriamo di seguito.
Parti necessarie per l'installazione:
- Unità principale (ovviamente) – Abbiamo utilizzato la nostra unità principale a doppio din PUMPKIN
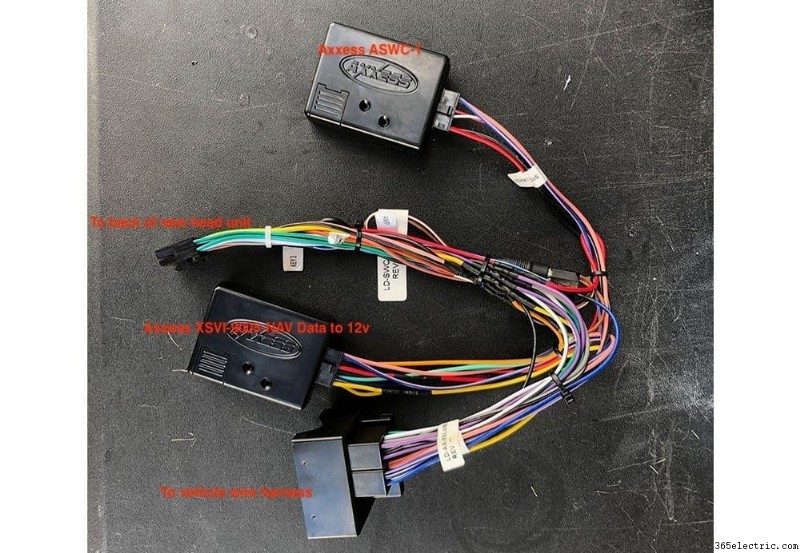
- Cablaggio Axxess XSVI-9005-Nav:adatta i cavi dell'unità principale Mercedes OEM all'unità principale aftermarket. Crea anche un accessorio di alimentazione 12v. Senza questo cablaggio e adattatore, dovrai trovare un'altra fonte per il cablaggio dell'alimentazione di accensione degli accessori. Questo cablaggio si collega anche all'ASWC-1 di seguito.
- Axxess ASWC-1 – Interfaccia di controllo del volante. Opzionale se vuoi mantenere i comandi al volante.
- Metra 40-EU10 – Adatta la spina dell'antenna radio OEM a una spina aftermarket.
- Metra 99-874B – Kit cruscotto che adatta il doppio din al ritaglio del cruscotto di fabbrica.
Ecco una rapida panoramica dei prodotti che abbiamo scelto di installare.
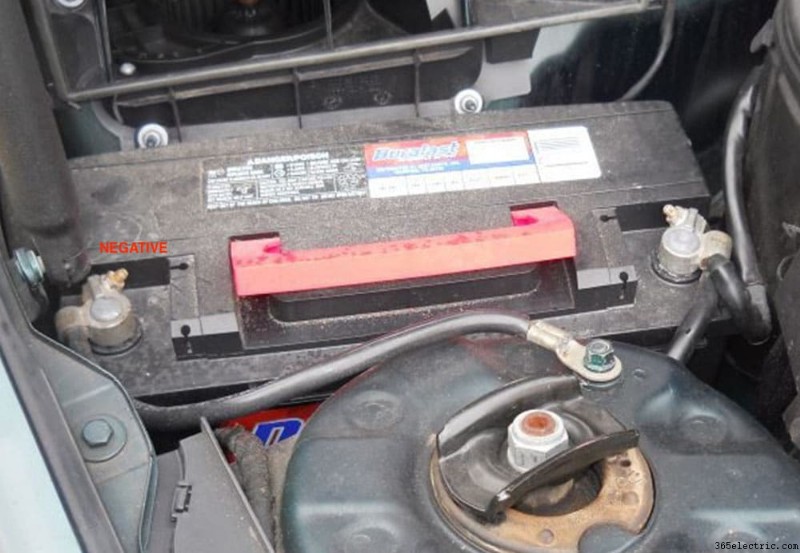
Passaggio 1:scollega la batteria
Per prima cosa:dovrai scollegare la batteria in modo da non bruciare i fusibili durante l'installazione. La batteria del CLK 320 si trova sul lato passeggero dell'auto, sotto il cofano, proprio davanti al firewall. Rimuovere il terminale negativo sul lato sinistro della batteria (di fronte ad esso).
Fase 2:rimuovi il rivestimento del cruscotto
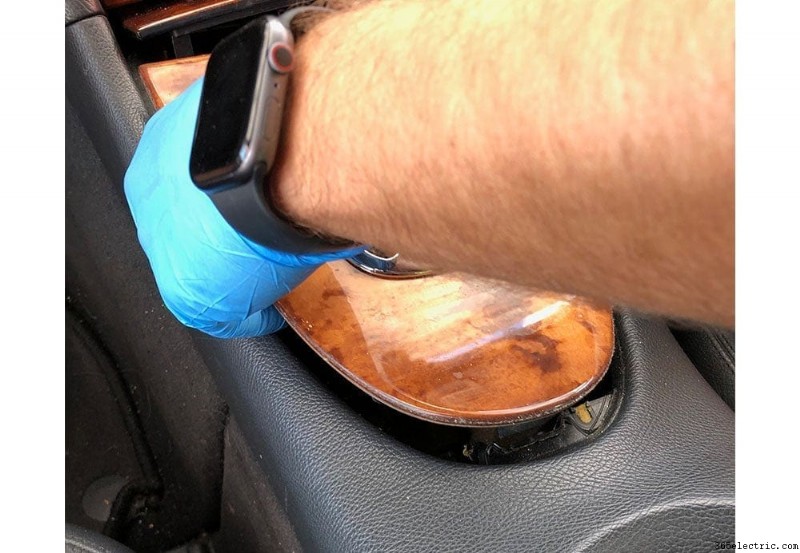
Inizia con il pezzo di rivestimento della console che circonda lo stivale del cambio. Aprire il posacenere e tirare verso l'alto partendo dal davanti, procedendo all'indietro. Quindi, fai leva delicatamente verso l'alto sul lato posteriore del rivestimento del bagagliaio del cambio e procedi verso la parte anteriore. Una volta che il rivestimento del bagagliaio è stato rimosso, puoi quindi far passare questo pezzo di rivestimento attraverso il foro nel pezzo di rivestimento della consolle e rimuovere completamente il pezzo di rivestimento della consolle.
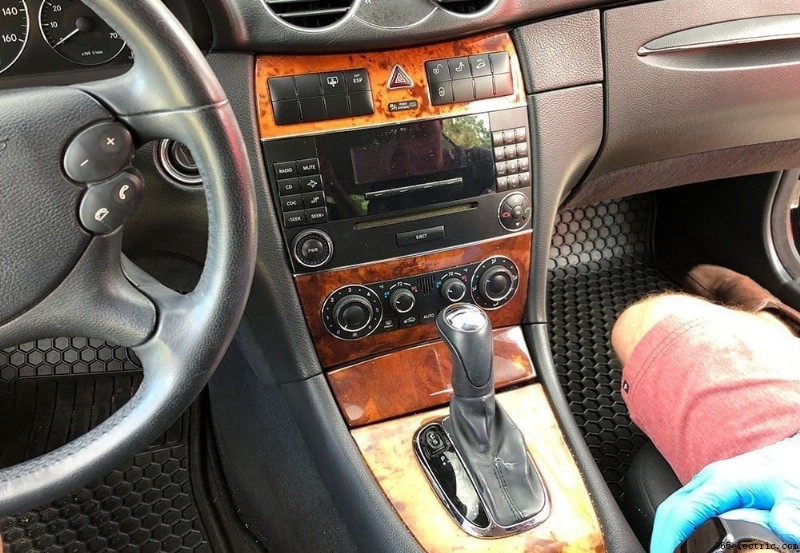
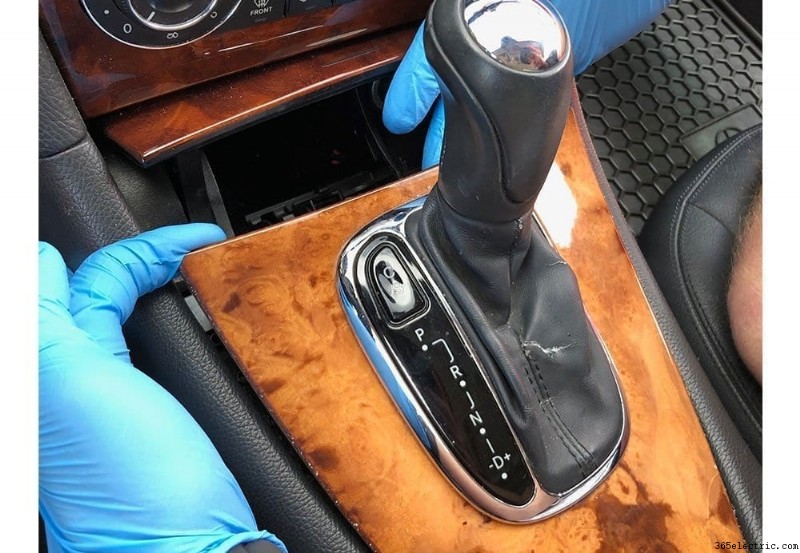
Successivamente, rimuoverai il posacenere tirando verso di te le due clip a forma di punta sul fondo e sollevandolo dal cruscotto.
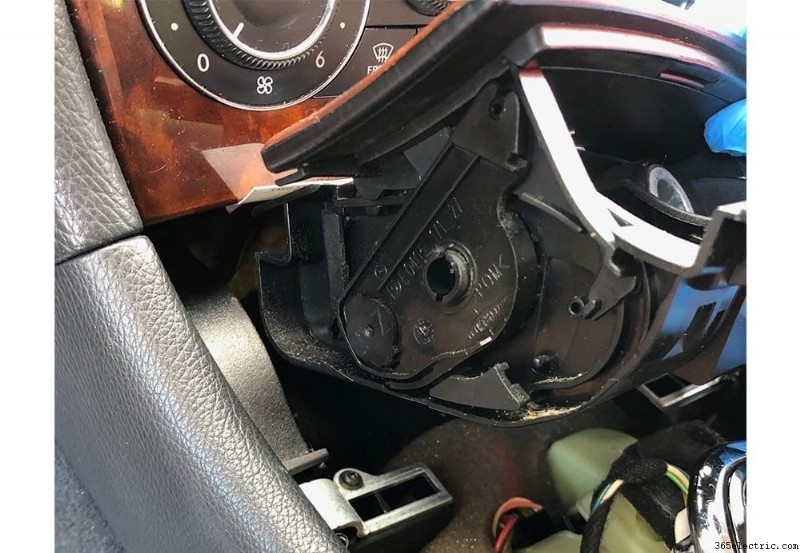
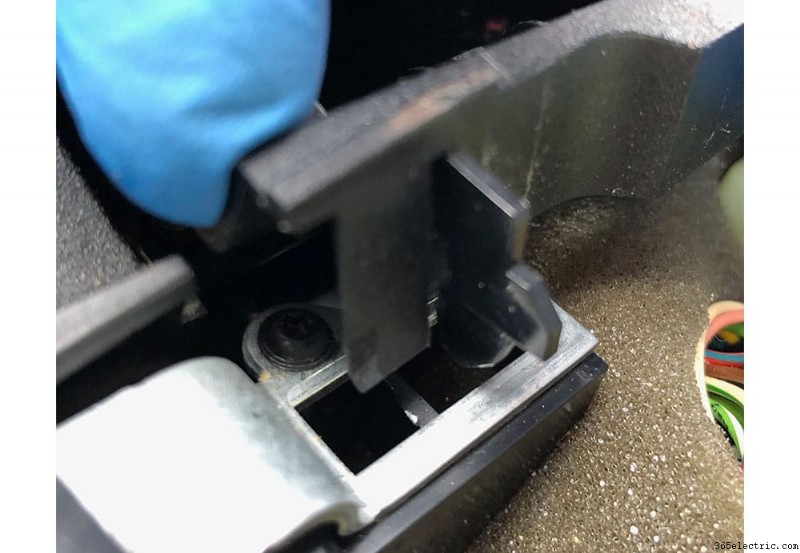
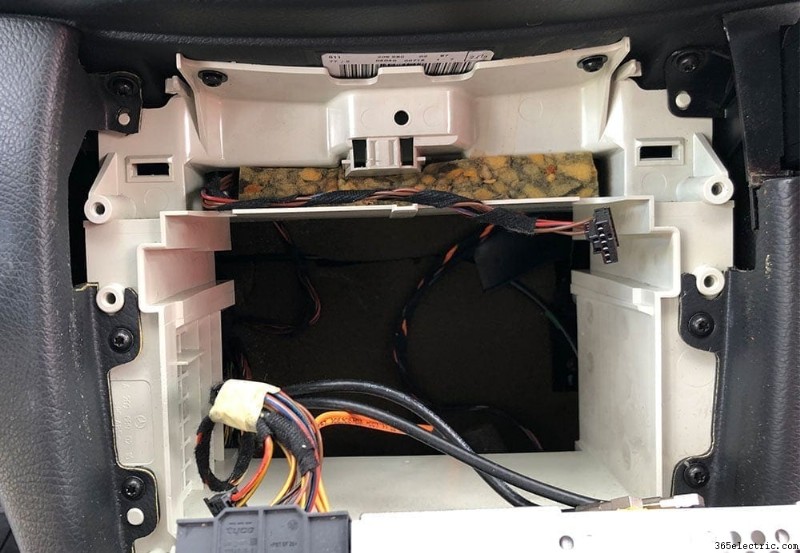
Ora che il portacenere è fuori dall'auto, avrai accesso a due viti torx sotto l'unità di climatizzazione. Rimuovere queste due viti ed estrarre il climatizzatore. Nota che ci sono due clip negli angoli superiori che lo tengono dentro che "spuntano" fuori mentre lo estrai. Una volta rimossa l'unità, tirerai i fili collegati:ce ne sono due da rimuovere. Rimuovere questi due fili e rimuovere l'unità dal cruscotto.
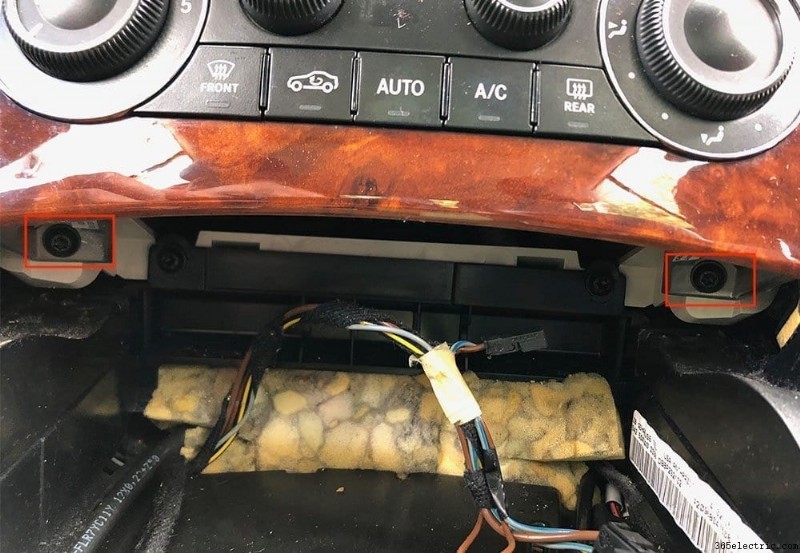
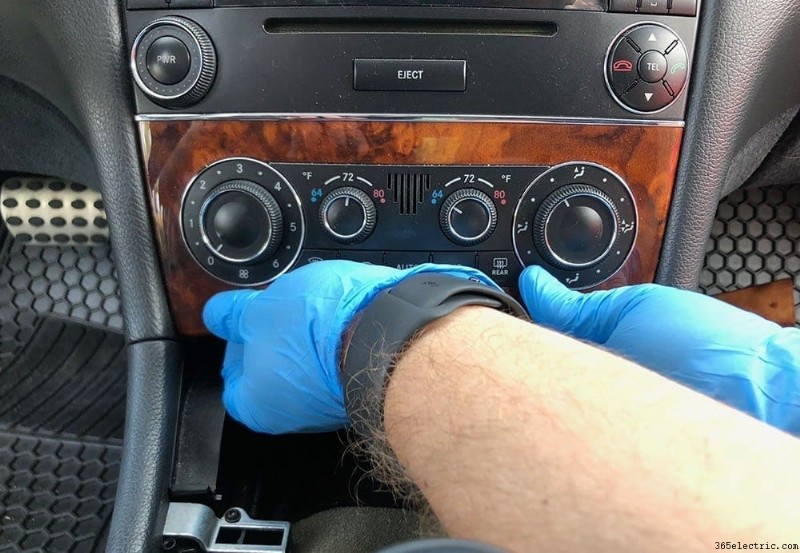
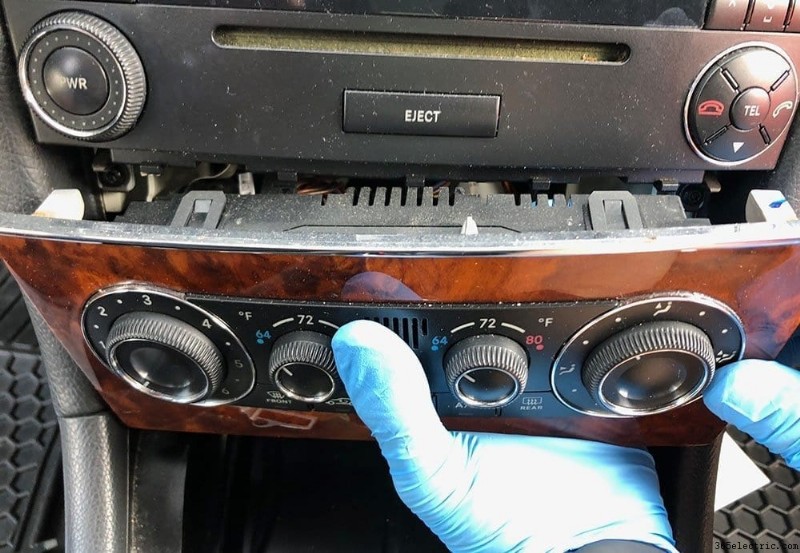
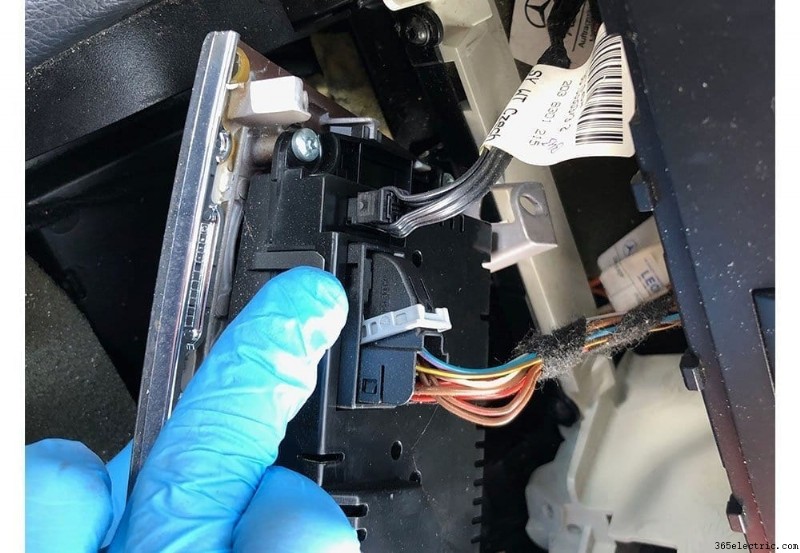
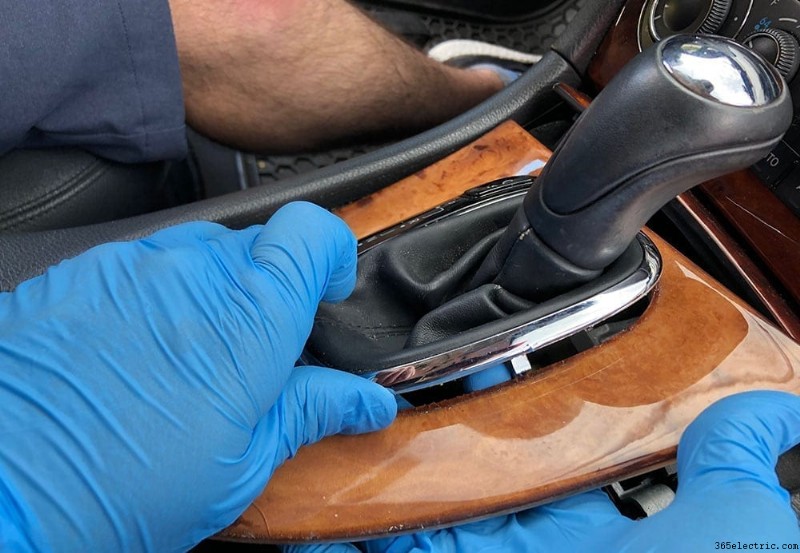
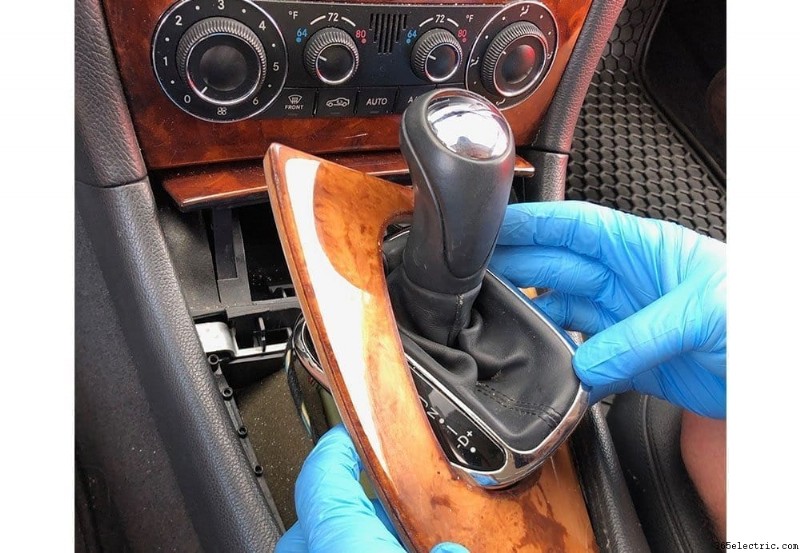
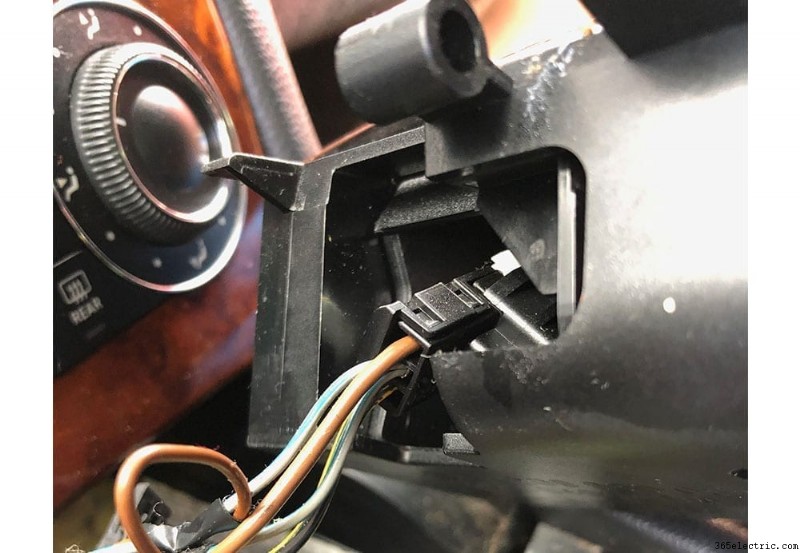
Con il climatizzatore rimosso, ora avrai accesso alle due viti inferiori che tengono nell'unità principale. Tuttavia, ce ne sono anche due sopra l'unità, quindi prima di rimuoverli, dovrai rimuovere il pannello di rivestimento e i pulsanti che si trovano sopra l'unità principale. A tale scopo, premere il portabevande per estendere il portabevande. Usando le dita, tira l'angolo interno destro del pannello per sganciare l'angolo, quindi procedi verso sinistra. Con il pezzo di rivestimento rimosso, sganciare il cablaggio dal retro dell'unità per rimuoverlo completamente.
Fase 4:prepara il cablaggio e l'unità principale
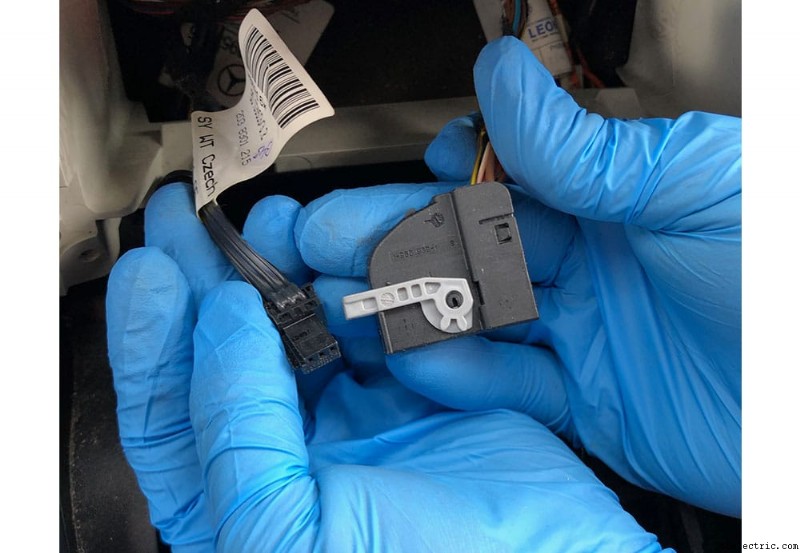
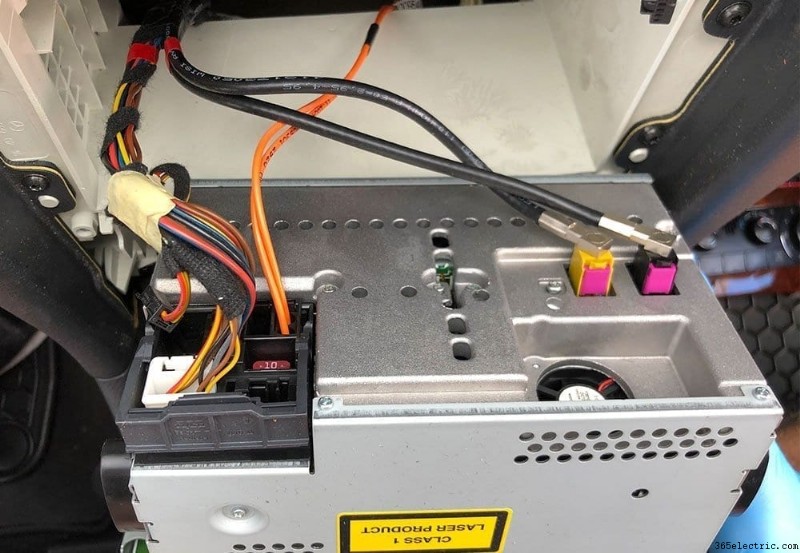
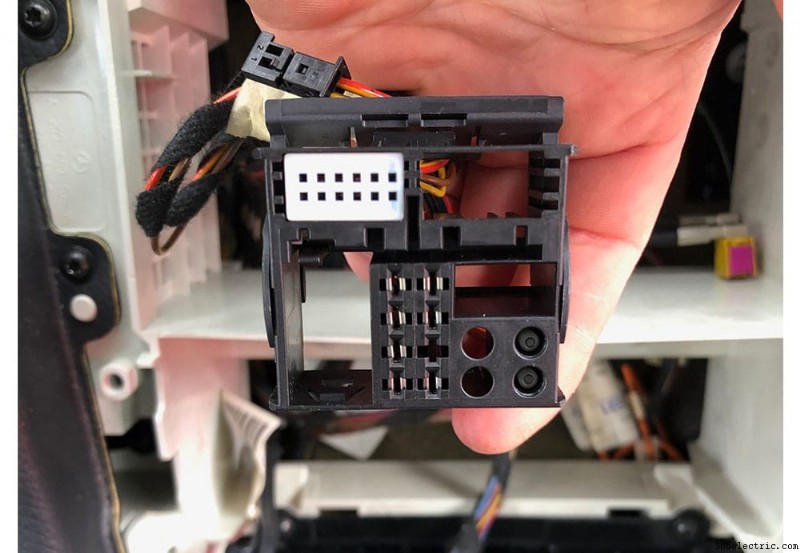
Con l'unità principale OEM fuori e il cruscotto pronto per la nuova unità principale, il passaggio successivo è preparare l'adattatore del cablaggio e l'unità principale per l'installazione nell'auto. Nel nostro caso, l'adattatore Axxess XSVI-9005-Nav e ASWC-1 è stato collegato insieme, ma dovevamo adattare il cablaggio dell'unità principale aftermarket al veicolo adattando i cablaggi Access. To do this, we soldered each of the wires from one harness to the corresponding wire on the other. Typically, all of the colors will match but just in case, we have a list of all of the aftermarket wire colors to help guide you.
Couple things to note:
- Brake wire – we typically just combine this with the main ground wire so that any features that are restricted by movement will be unlocked. Note that some units are smarter and use GPS to sense motion but this will typically open up any video or other features that are locked when your vehicle isn't in park.
- Steering wheel control – the ASWC-1 comes with a 3.5mm plug that will adapt to most head units by plugging into the rear of the unit. However, in some cases it needs to be further adapted into two wires:Key 1 and Key 2. These two wires will need to be connected to the corresponding Key 1 and Key 2 wires from the aftermarket head unit harness.
You can either solder each of the wires like we did, or use crimps and a crimping tool. Here's what the resulting wire harness looked like:
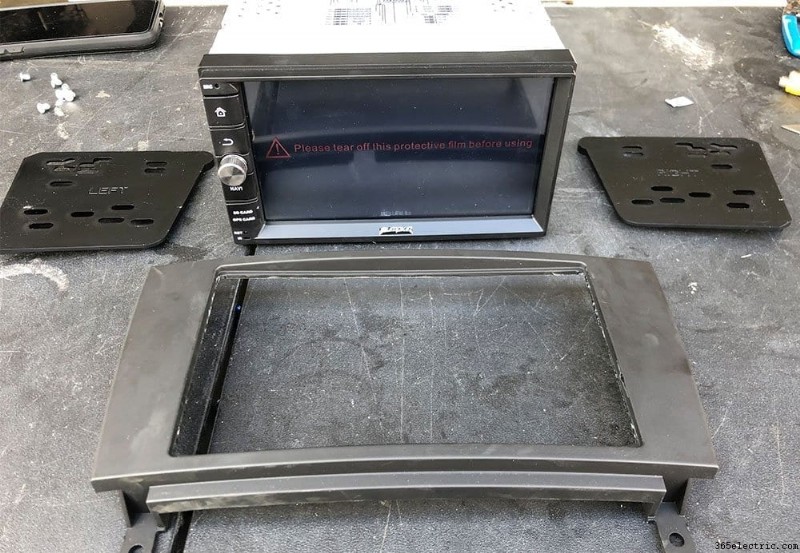
To prepare your head unit to be mounted into the dash, you'll need to mount your new aftermarket head unit to the Metra 99-874B dash kit. Do this by mounting the two left and right mounting plates to the head unit losely. Once they're mounted, place the adapting dash trim over the face of the head unit to check your mounting point and that the unit sticks out as far as you would like it. If your satisfied, tighten the side plates and mount the trim piece to the side plates.
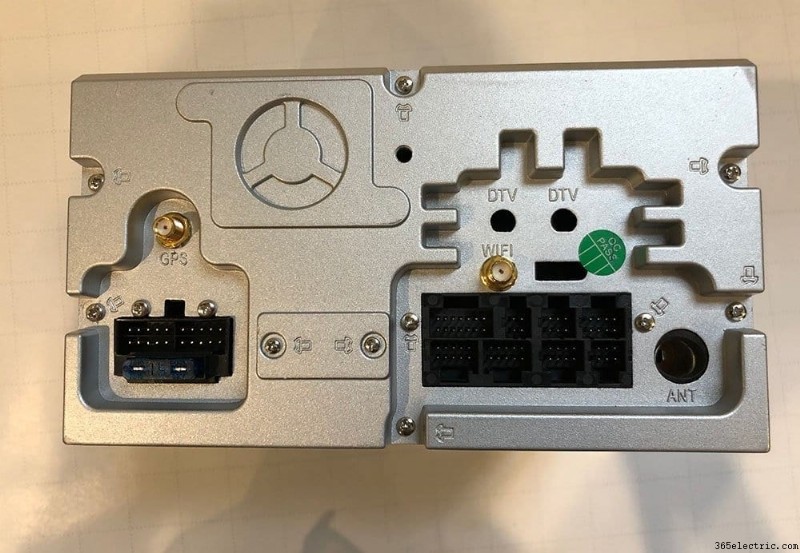
Step 5:Wiring Accessories – Antennas, USB &Microphone
Before you mount your new head unit in the dash, you need to make sure that all the wiring that plugs into the back of the head unit are wired into the back of the dash. This includes things like:
- USB chords
- GPS and WiFi Antennas
- Microphone
The PUMPKIN head unit that we chose had all of the above so we wired up all three to the back of the dash before we re-installed our new head unit.
USB Chords
Our head unit came with two usb inputs that are wired up to the back of the head unit, so we had to choose a spot for the new USB chords to go and then wire them. In our CLK 320, we decide to utilize the ash tray below the head unit. No need to cut holes, simply pull the removable ash tray component out of the ash tray cubby and feed the wires into the ash tray cubby.
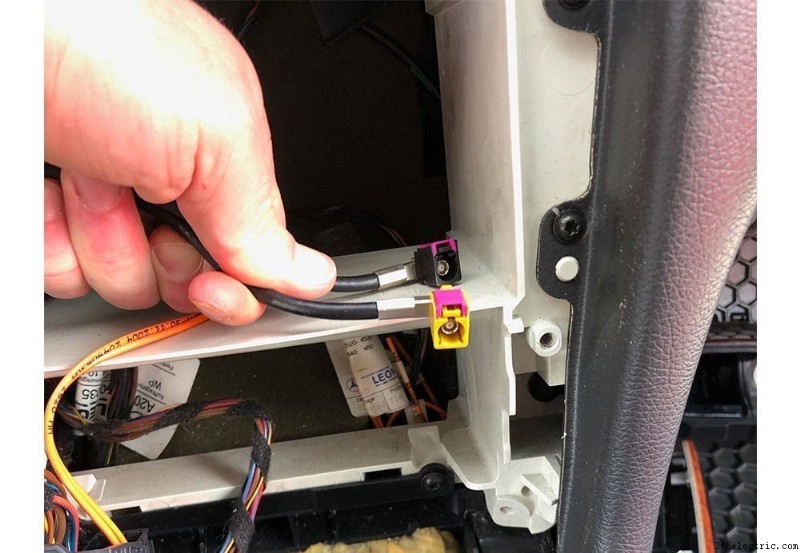
GPS &WiFi Antennas, Microphone
For all three of these components, we fed the wire from the dash area, underneath the steering wheel and to the far left side of the dash. To do this, there's a panel above your feet that has two torx screws. Remove the torx screws and pull the panel to gain access to behind the dash under your steering wheel. Then, remove the panel on the left hand side of the dash that faces the door (when closed). Feed the wires from the central dash area through to the left side of the dash. We used zip tie to fasten the wire under the dash.
Once your GPS, WiFi and microphone (or any combination of the three) are through the dash and out of the side panel of the dash, we mounted the WiFi antenna straight to the dash right next to the fuse box. Continue to feed your GPS and Microphone up through the pillar by placing the wire in between the pillar panel and the rubber seal. Tuck your wires behind the pillar panel.
At the top of the pillar, feed your wires across and to the window. We typically mount our microphones in the top left hand side of the windshield and clip it in between the head liner and the windshield. For the GPS, continue to tuck the wire behind the head liner through to the left hand side of the rear view mirror. This is where we mounted our GPS unit.
Step 6:Installing Your New Head Unit
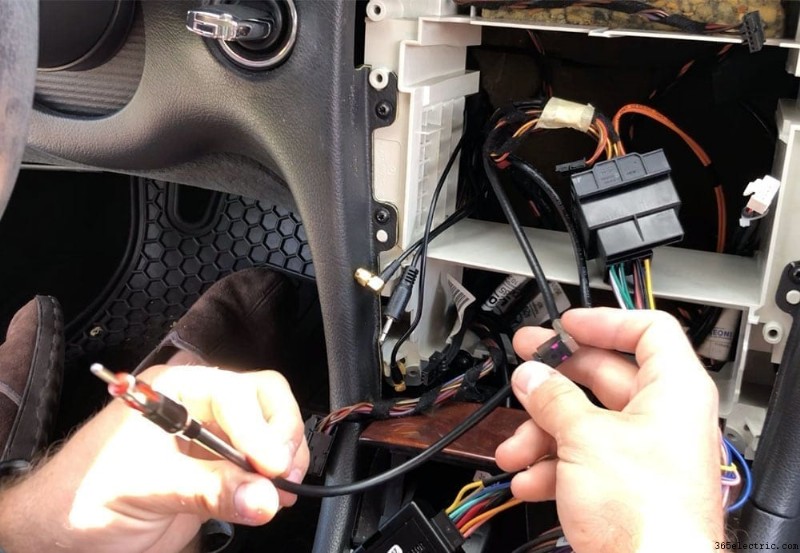
Finally, you're ready to re-install your head unit and connect all of the wires. One last step before you place start connecting your head unit and screwing it in – use the Metra 40-EU10 to connect to the black antenna wire that was connected to the back of your OEM head unit (there was a black and a yellow/tan one – use the black). Plug the antenna wire into the back of the unit.
Now, move on to the microphone, GPS and WiFi connections (if your head unit has them). Connect these to the back of the unit. Finally, connect your new adapting harness with the Axxess modules connected and tuck the modules behind where the climate control would go. You'll need to make as much room behind the head unit so that it will have enough depth to mount. If you don't tuck your wires and modules neatly out of the way of the back of the head unit it will not have enough room to mount flush.


At this point, you should have all of your wires connected and the head unit should not be fully mounted yet. Re-connect your vehicle's battery and test out your unit. You'll want to check:
- Power – obviously this is the most important first-check
- Radio – check sound and that the radio has reception
- GPS – If your unit has GPS ensure that it has signal
- Bluetooth call – make sure that your new microphone works
- USB – check that your USB connection works
- WiFi – in our case we had a WiFi antenna, check that you have signal and that you can connect to a WiFi network
- Test general features – Roam around the features of your new head unit. Make sure that nothing is defective before you permanently re-install it!
Once you've checked your unit and everything is confirmed working, you can begin mounting it back. Mount the unit by screwing the four torx screws.*Note – the climate control has clips that you'll need to remove from the old head unit. Take these clips and place them on the back side of the screw holes on your new unit BEFORE you screw it in.
Move on to the trim pieces, reversing the process that you took to remove them. And your finished product:
